Inbox
In this section you can find all the conversations that have taken place between every user and all your (and shared) chatbots.
SnatchBot automatically extracts usernames and, in some channels, profile pictures. A username is displayed in the header of the section and a profile picture is displayed in the chat, next to the user’s message bubble.
Conversations of deleted bots are not displayed in the Inbox.
The section consists of 2 main parts: the list of conversations and the actual chat:
List of conversations
In this section you can manage all the conversations in your account. You can search, filter, export, delete, archive and unarchive them.
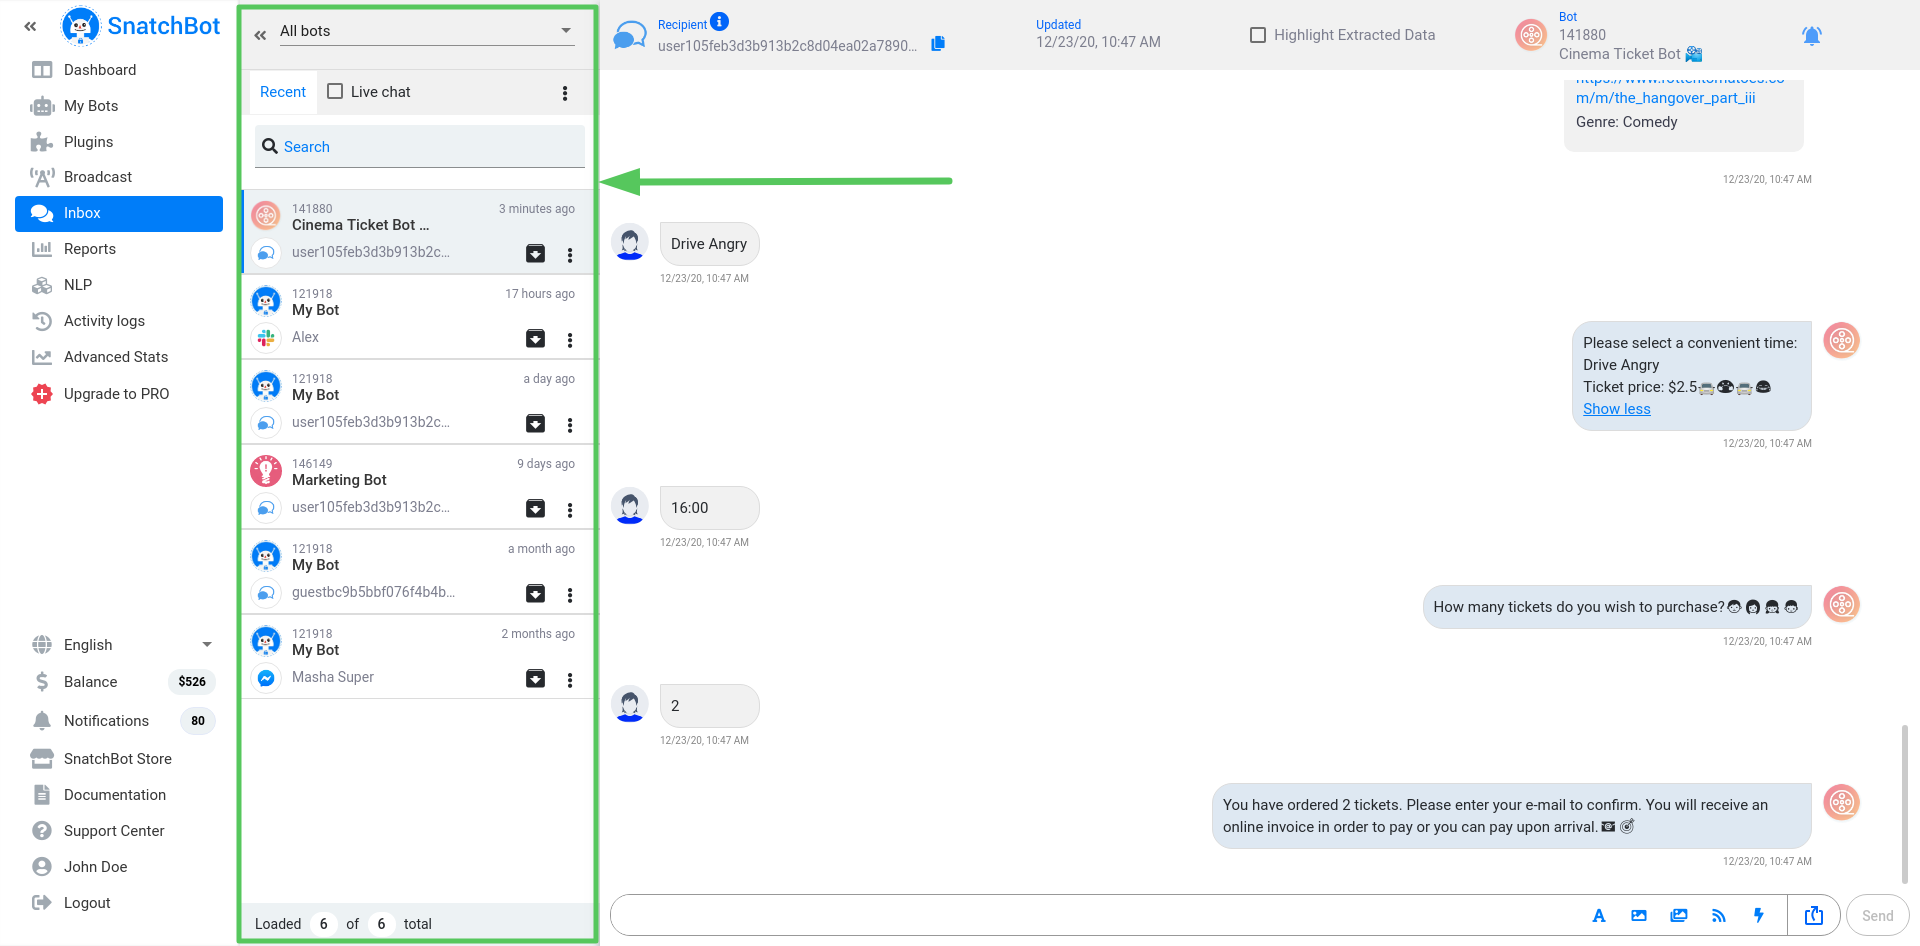
There is a drop-down menu at the top of the section, where you can select a particular bot and filter the list of conversations by that bot.
You can search for conversations by messages, using the Search field.
At the bottom of the section you can see the current number of the loaded conversations.
Live chat and Live Agent interaction
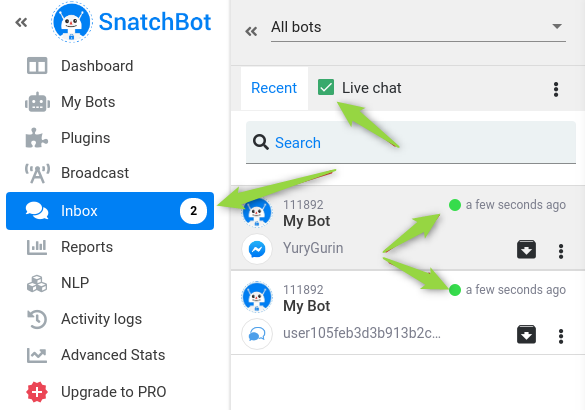
Tick the “Live chat” checkbox to filter conversations that are currently in the Live Agent mode. You will see only those conversations that belong to the bot, selected in the drop-down menu. The number of awaiting conversations is displayed next to the Inbox button, on the left side menu.
As soon as the customer goes to a "Live Agent" interaction, you will get several notifications:
- next to the inbox tab, you can see the number of conversations awaiting your response.
- unanswered conversations will be marked with green dots.
- you will hear a sound notification.
- you will receive an email notification, where you can see the recipient ID, the user’s message, and the channel from which the message was sent.
Notification about awaiting users disappears in the following cases:
When you send a message to the chat.
When a user leaves the AR interaction via Global Connections.
When a user’s session has expired.
When a user restarts the bot via “Restart” command.
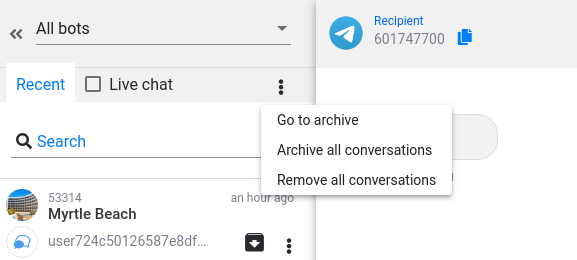
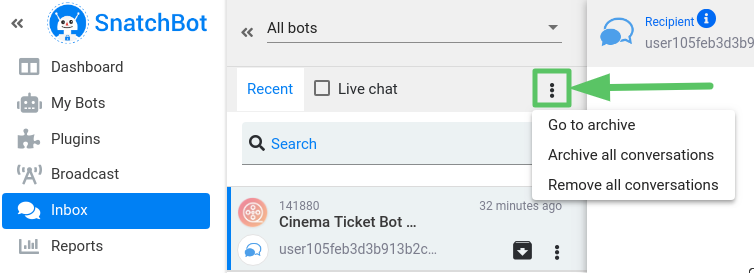
There is an “Additional Options” button (three dots), that opens three more buttons:
Go to archive - opens the list of archived conversations (either all conversations or those of a selected bot)
Archive all conversations - moves all conversations to the list of archived conversations (either all conversations or those of a selected bot)
Remove all conversations - delete all conversations (either all conversations or those of a selected bot).
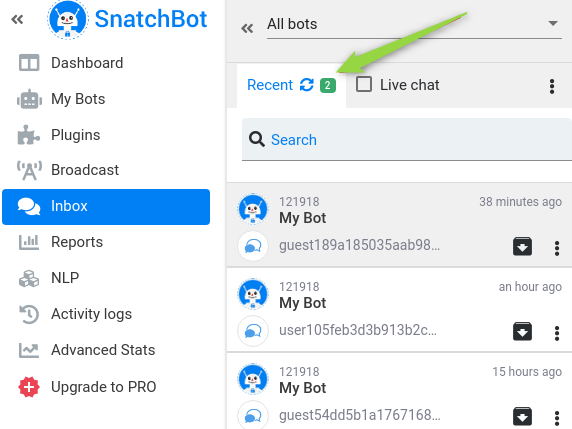
Refresh button
This option disables the real-time updating of the Inbox section. All new messages can be accumulated, and you are able to load them manually.
The Refresh button is displayed in the Recent tab if you have marked the checkbox in the Profile section (Profile -> Options -> Disable real time inbox Messages).
Refresh - updates the list of conversations.
Export conversations
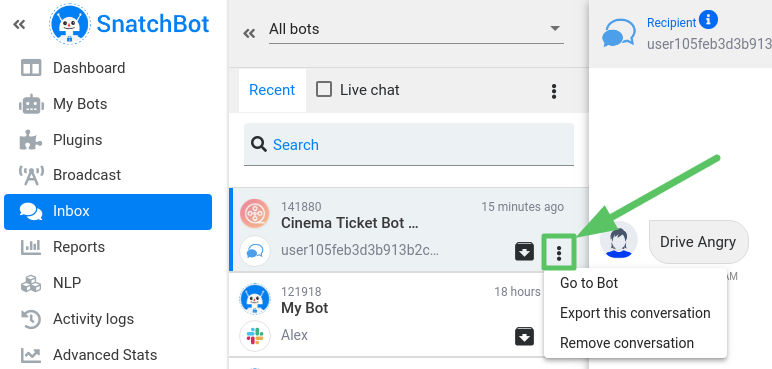
You can export whole conversation with a user as a txt file. To do so, click the More options button and select Export this conversation:
Archived conversations
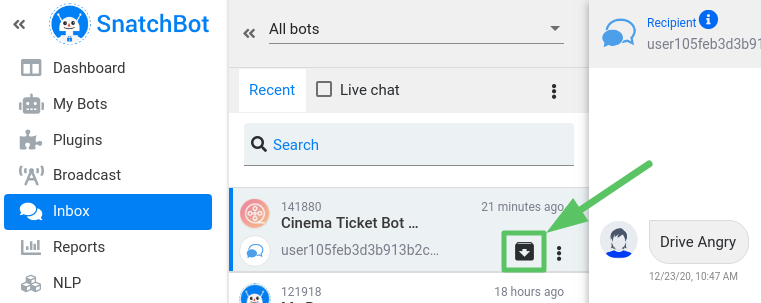
In order to archive/unarchive a conversation click the button in the conversation cell:
To open the Archived conversations list click More options and select Go to archive:
Chat
The system allows you to view attachments and media files sent by users in the chat. You can download users’ documents, pictures, audio and video files via download links.
Note
Currently, you can see only the last 20 messages of the conversations. If you wish to see the whole conversation you need to export it to your device.
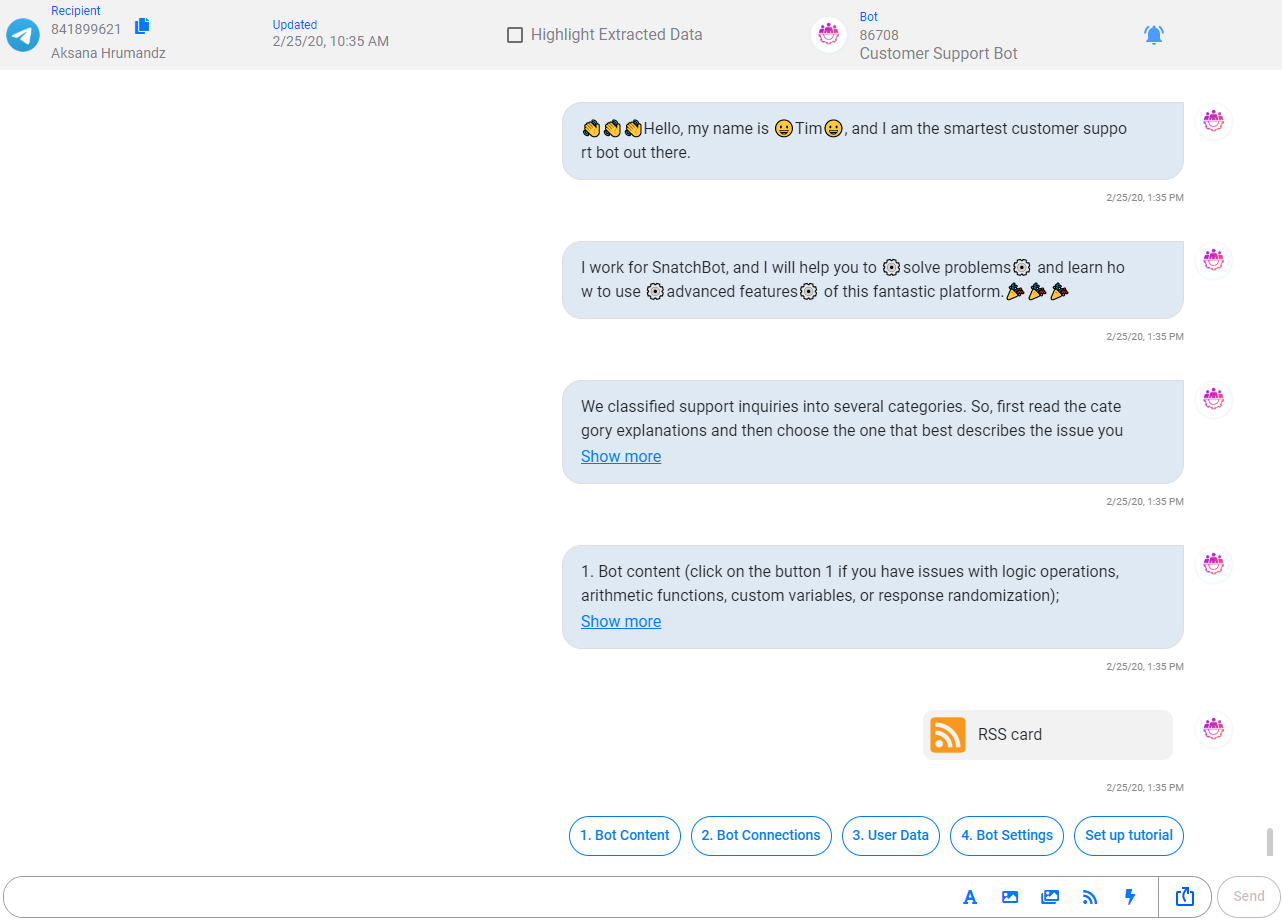
Above the chat you can find the following information:
- Channel icon
- Recipient id number
- Recipient name (for Facebook, Telegram, Skype)
- Recipient email for the Email channel.
- Recipient phone number (for the “Africa’s Talking” channel)
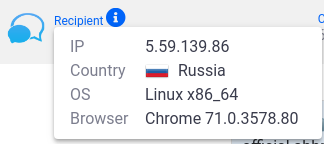
- Recipient info tooltip (Webchat only):
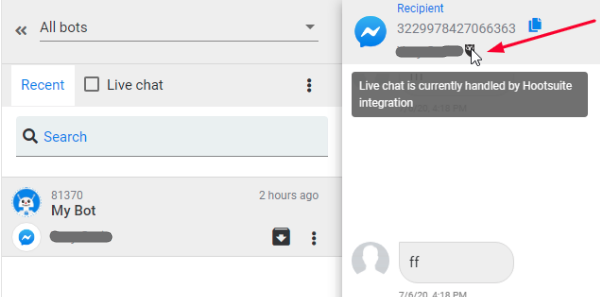
- The Hootsuite icon. This icon is displayed only for conversations from Facebook pages, which are connected to Hootsuite.
- The “Copy to clipboard” button
- The time and date of creation of the conversation / The time since the last update
- Highlight extracted data - upon ticking the checkbox, attributes, custom variables, response text and extracted data will be highlighted.
- Bot icon, bot name, bot id number
- Notification icon - enables/disables sound notifications about incoming messages
Chat-bar: Using Cards and Pre-prepared Responses Within Live Chat
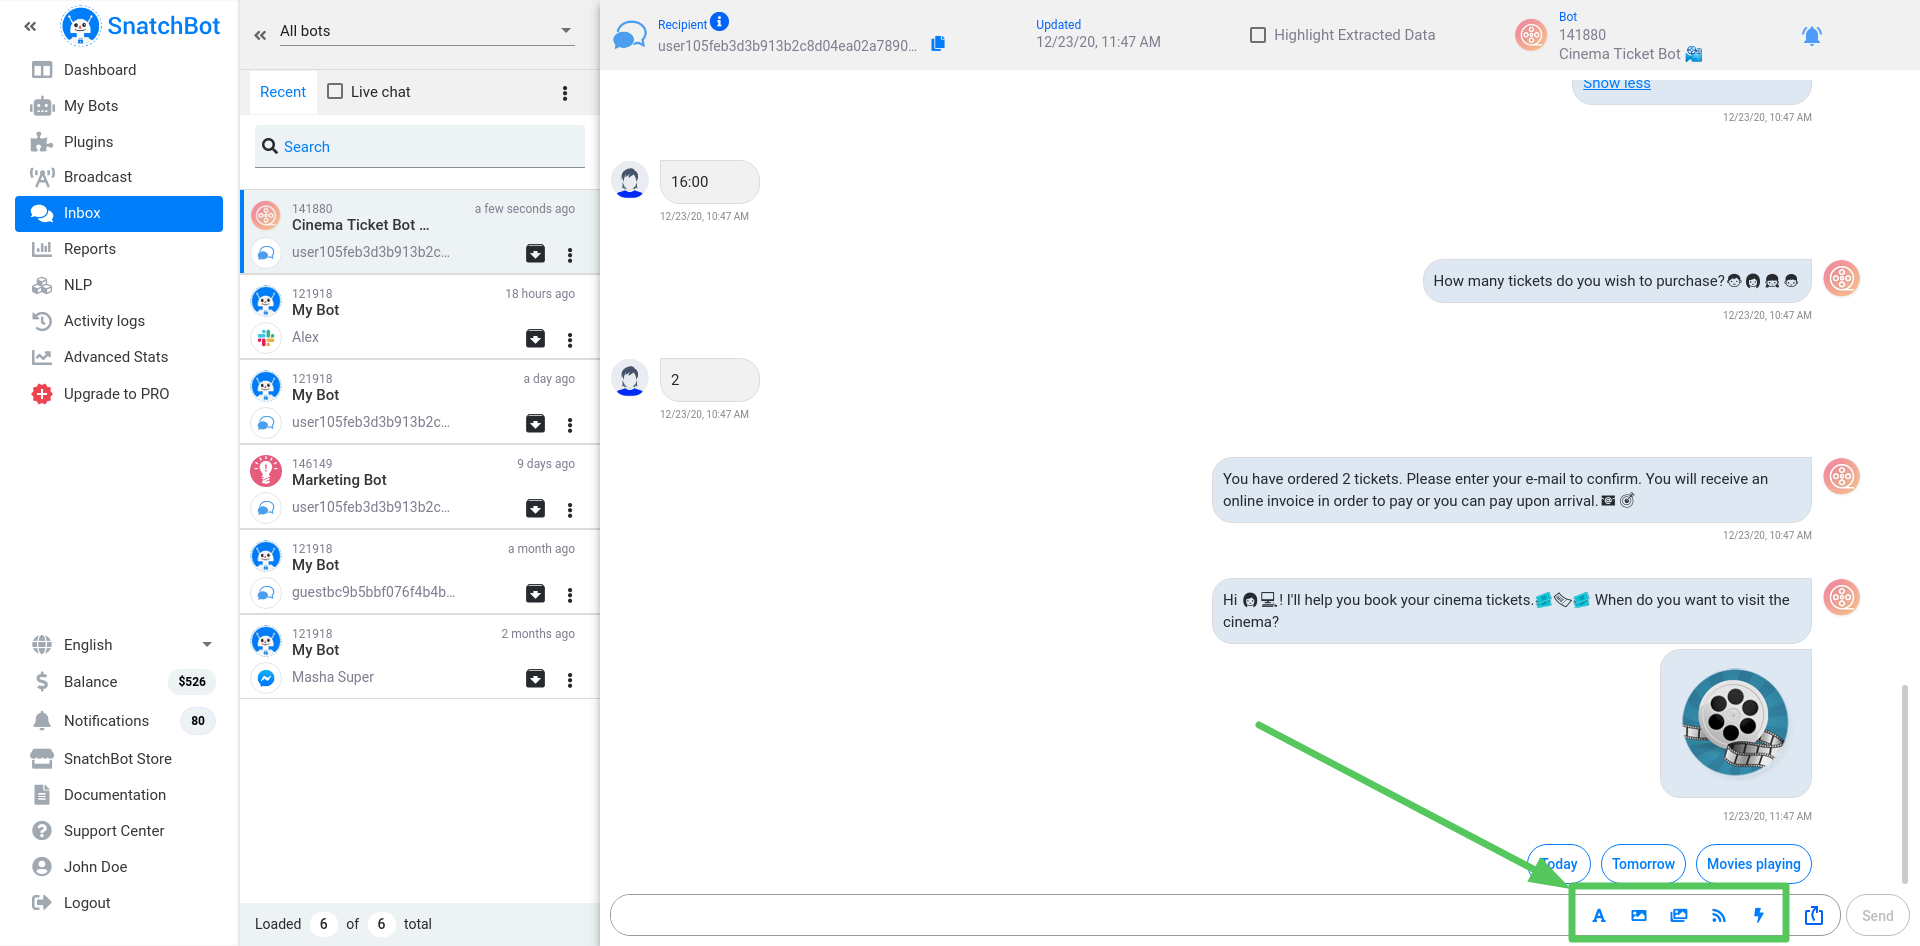
It is possible for your operator to compose a custom message (max 4000 characters) or/and add the full range of Card features to the conversation i.e. Quick Replies (max. 20 QRs), URLs, images, video, RSS feeds, etc and send it to a user. Cards work in exactly the same way as when you are placing them in an interaction. Also, you can have key phrases already written for your operator to choose from and ensure accuracy in their responses.
In order to add a card, the operator needs to click the relevant button next to the input field:
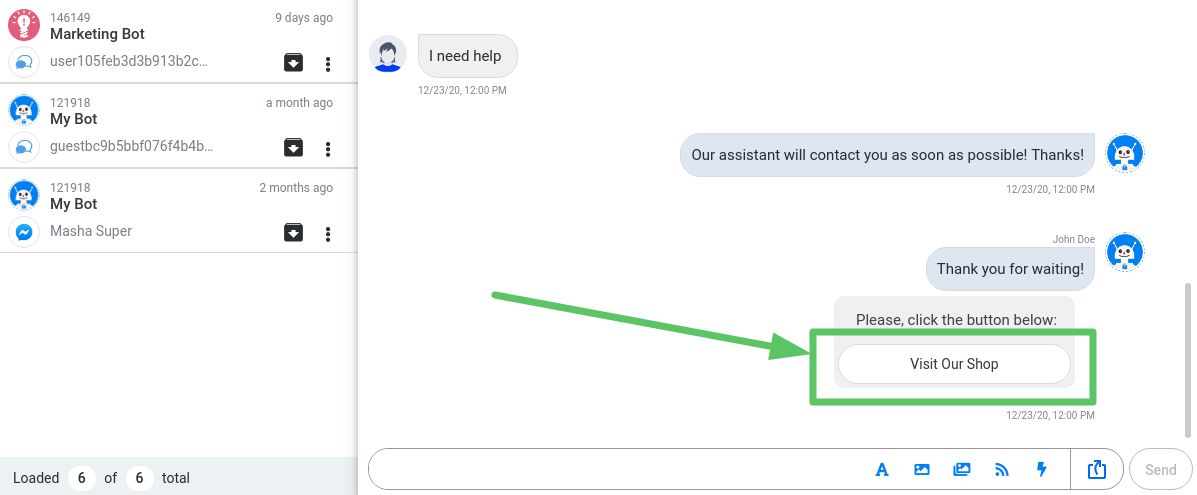
So, for instance, if the operator added a card with a link to ‘Visit Our Shop’, it would appear in the conversation UI in a much neater button form than a URL.
Important
You cannot attach cards and QRs to the message when using the mobile version of the page.
Operator can view a conversation and intervene in a conversation at any time.
You can send only images and gallery cards to the “Twilio” channel and only images to the “Africa’s Talking” channel. Note that the Twilio and Africa’s Talking channels do not support any media files and recipients can get only the text. Thus, all images will appear as URL links.
Font customization
You can apply a custom style of text in the input field (bold, italic, strikethrough, underline). To do so, highlight the relevant text in the field and select the desired style from the pop-up menu. This feature works only on Webchat:

Saved Replies
A bot owner can save the content of the bot’s messages as a template, in order to use it later and provide quick answers to users’ questions. A template can contain text and cards.
When you select a template, its data automatically loads into the input field and into cards (if there are any).
To create a template enter a sentence in the input field and add cards (optional). Then press the Saved Replies button, the following pop-up will open:
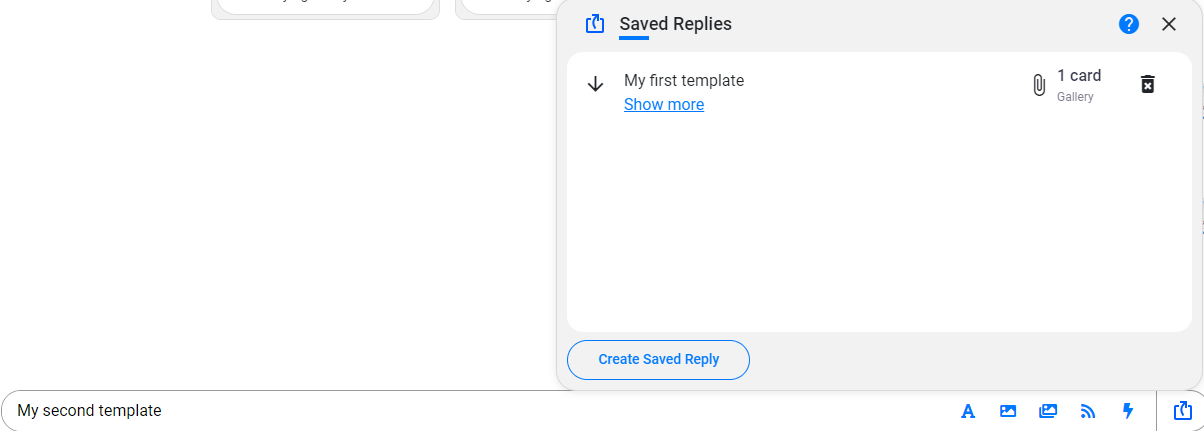
Create Saved Reply: save the message as a template. The button becomes active once you have entered a text in the input field.
To use the template press the Saved Replies button again, find the template and press the upload button (down arrow). The template data will be entered into the chat bar. If necessary, you can make some changes before sending the message.
You can delete or edit a template.
Important
You cannot create and edit templates using the mobile version of the SnatchBot, but you can use them.
Inbox and collaboration feature
SnatchBot admins can use Inbox if the bot owner has granted Inbox access in the Teammates tab.
Watch this video tutorial "The Inbox section"
Updated over 3 years ago
Check the Reports section to find records about every single message sent and received in your account.
