Automations
This feature is designed for users who want to connect their bots to different services, such as Google Sheets, Mailchimp, Email, Salesforce.
Currently, only Google Sheets automation is available, but other services will be integrated soon.
Note
Automations are available only for PRO-Bots. Click the 'Upgrade to PRO' link to open PRO-Plan settings. Learn more about PRO-Plan.
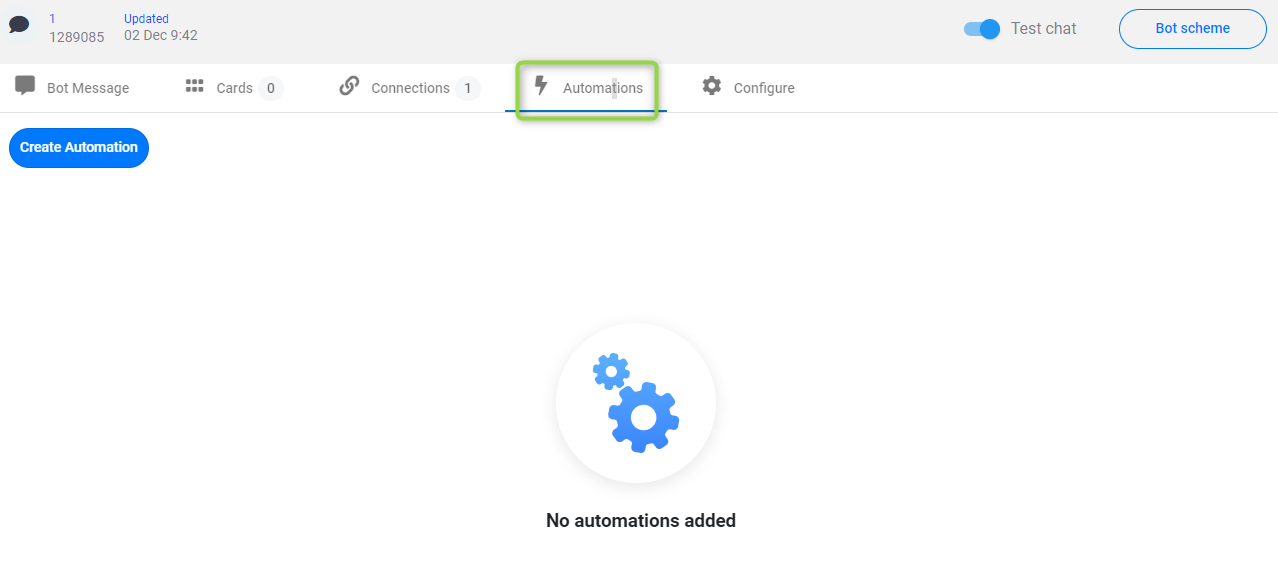
To set up a new automation go to the Automations tab on the Build page. Click the 'Create automation' button to add an automation:
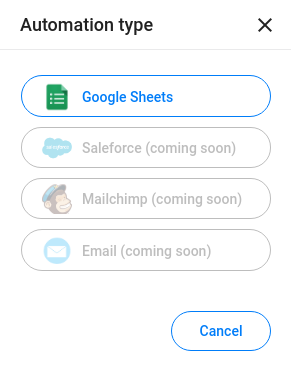
Next, you need to select a type of automation:
The Automations tab is not available in the Plugins section when you create a plugin, however, you can add automations to the plugins that are added to the bot.
Google Sheets Automation
Google Sheets automation allows users to export bot attributes to Google spreadsheets and vice versa. A user has to select the type of export (from/to spreadsheet), authorize a Google account and choose a spreadsheet and attributes.
When end-users engage with these interactions, all the data will be exported/imported to/from Google Sheets, according to the settings.
To continue, select sub-type of the automation in this window:
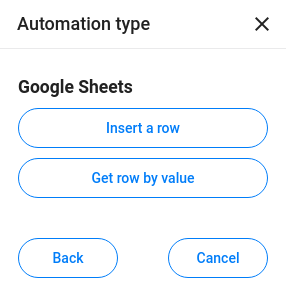
Insert a row - import from bot attributes to a spreadsheet.
Get row by value - import from spreadsheet to bot attributes.
Insert a row
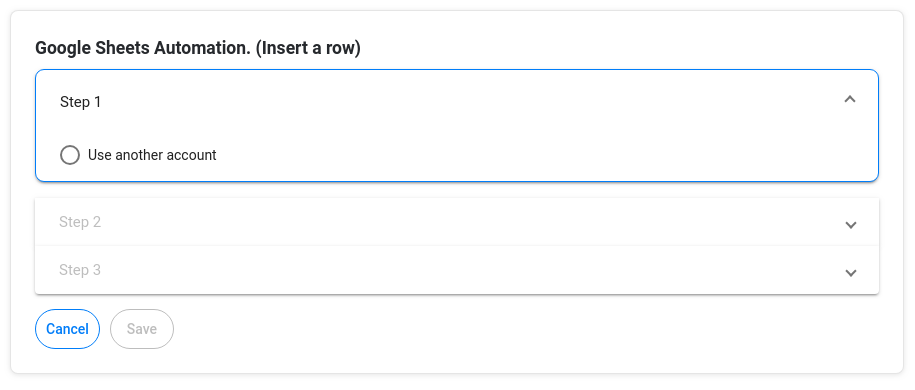
Step 1.
Here you need to authorize a Google account. If you don’t have any saved authorizations, click 'Use another account':
The standard Google authorization window will pop up:
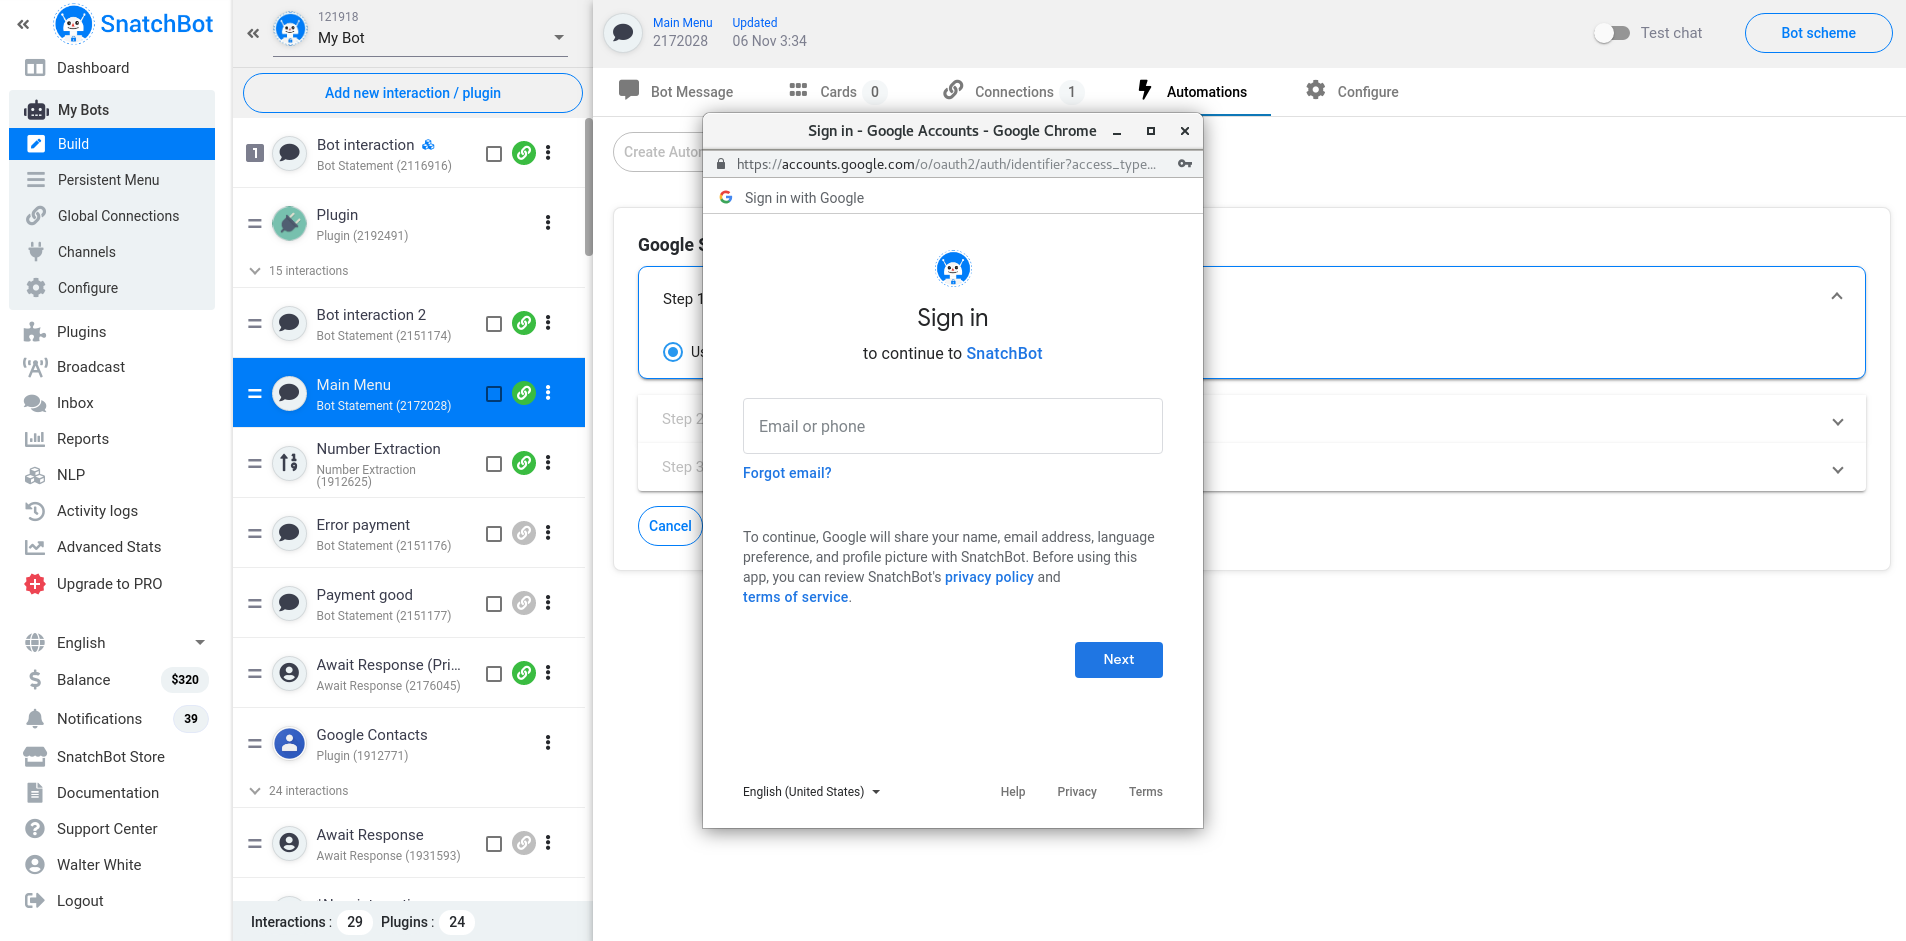
It is also possible to get authorized on the Automation tab in the Profile section.
Once you are authorized, your authorization will be saved. You can use it later when you create new Google Sheet Automation in any of your bots.
Step 2.
Select whether you want to create a new spreadsheet that data will be saved to, or have the data uploaded to an “Existing spreadsheet”:
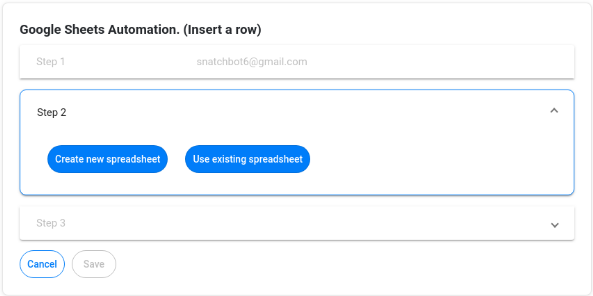
Create a new spreadsheet
In this case, SnatchBot will automatically create a new file on your Google Drive with a standard name like 'Interaction name_date_time.xls'. Also, the system will automatically create 4 default columns:
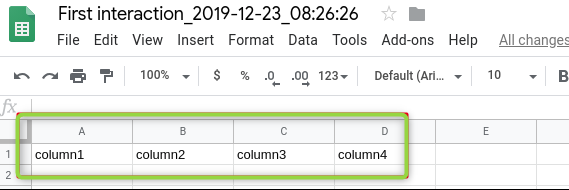
This file will be automatically populated to the 'Spreadsheet' and 'Worksheet' fields on Step 3:
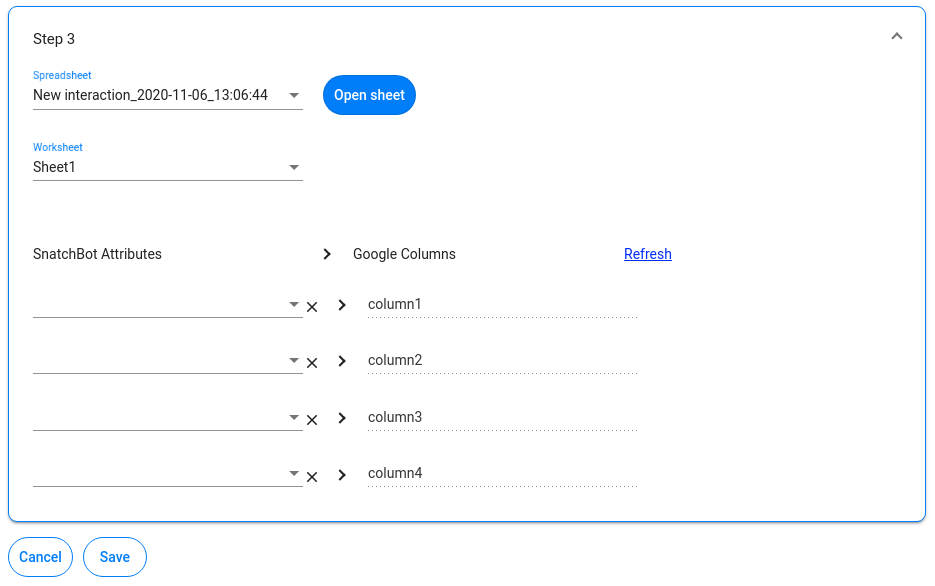
Google columns
Google columns' values are populated from the first row of the sheet.
Refresh button - updates data in the column. Use this button if you made changes in the first row of the Google worksheet.
SnatchBot Attributes
Here you need to select and associate attributes you want to export to the Google sheet.
The SnatchBot Attributes column values can be set to:
- Facebook default attributes: first_name, last_name, profile_pic, locale, timezone, gender;
- Default attributes: User ID, Timestamp, Channel;
- Any attribute declared on the 'Configure' tab of any interaction of this bot.
Attributes that users create dynamically in the conversation using the 'Set Attribute' command won’t show up in the dropdown fields of the SnatchBot Attributes column:
You don’t have to select attributes for all columns. You’re allowed to associate only the desired attributes.
Here is how configured settings look like:
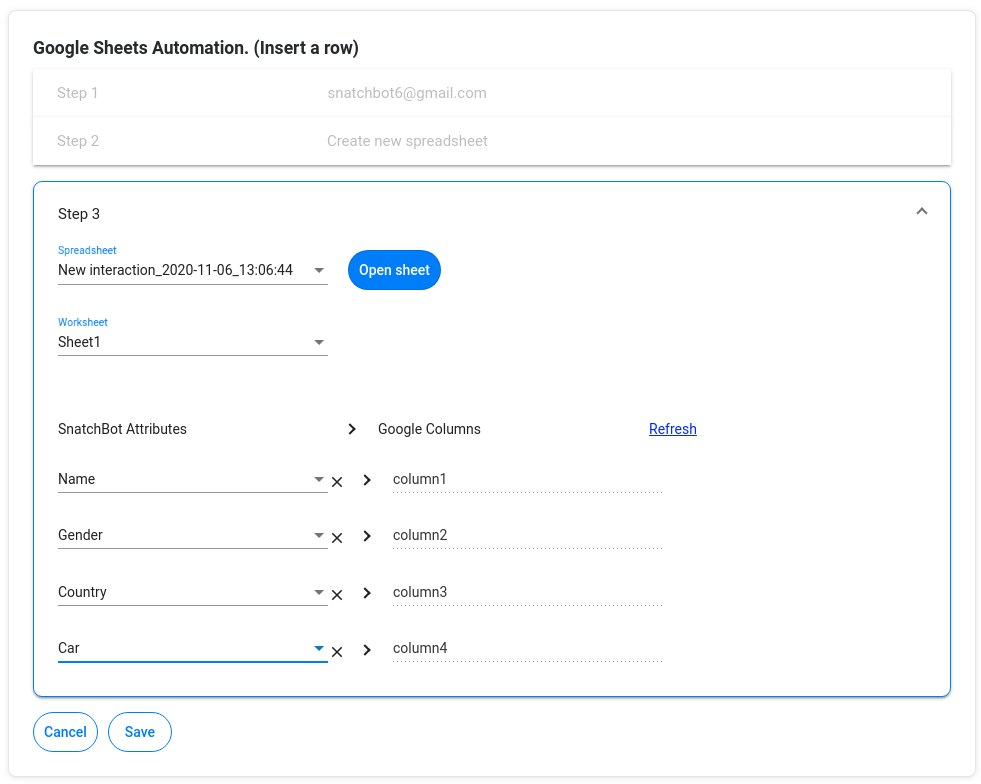
After the Automation is set up, you have to configure the bot in such a way that the associated attributes are populated by values before the interaction with the automation is reached.
The automation is saved after you click the Save button.
Once a user has gone through these interactions and reached the interaction with Automation the attributes will be sent to the Google sheet:

Use an existing spreadsheet
If you select this option you will be redirected to the step 3. Here you need to select one of your spreadsheets and pick a worksheet. As if you create a new spreadsheet, you need to select and associate attributes you want to export to the Google sheet and press Save.
Make sure the chosen spreadsheet has the required values in the first row.
Get row by value
This method is used to export data from Google Sheets back to the SnatchBot as attributes. Generally, 'Get row by value' searches the particular value in a particular column in a Google Sheet, takes associated values from a row and import them back to the bot as attributes.
Do not use the received attributes within the same interaction.
You can use them only in the subsequent interactions.
On step 2 you have to select a Spreadsheet, Worksheet, Lookup Column and Lookup Value.
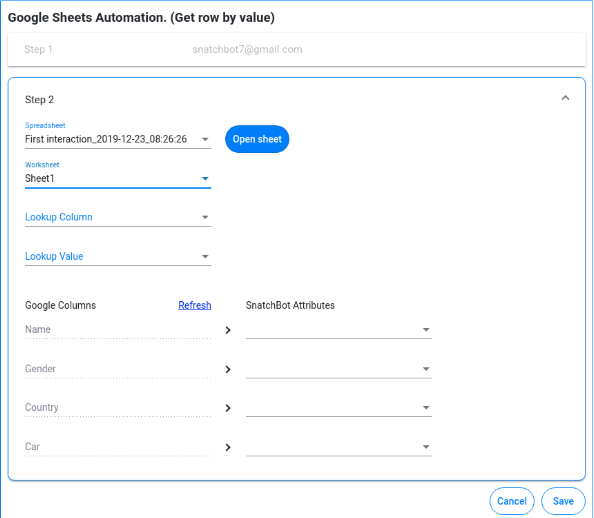
-
Lookup Column - this is the list of columns titles, which are taken from the first row of the worksheet.
-
Lookup Value - this is a value of an attribute that already exists in a bot. This value will be searched for in the Lookup Column.
Values from the Lookup Column will be compared to a Lookup Value. If they match, then automation will be triggered and selected values from the row where the Lookup Value is, will be imported to the SnatchBot attributes.Once you have chosen a worksheet, two more columns will appear:
-
Google Columns - the titles of the columns, which are taken from the first row of the sheet. The number of fields matches the number of filled columns in the first row of the sheet.
-
SnatchBot Attributes - a dropdown with the names (keys) of attributes, which already exist in a bot. You will see only those attributes which are declared on the Configure tab. Once an automation is triggered, the selected attributes will be populated with values from the row to which the Lookup Value belongs.
If you do not want to import certain values, just leave those fields empty.
If there are two or more same values in a Lookup Column, then the system parses the first (upper) value in the column and takes the related data.
Attributes that the user creates dynamically in Bot Message using the “Set Attribute” command won’t show up in the dropdown fields of the SnatchBot Attributes column.
The automation is saved after you click the Save button.
New automations appear in the Automations tab:
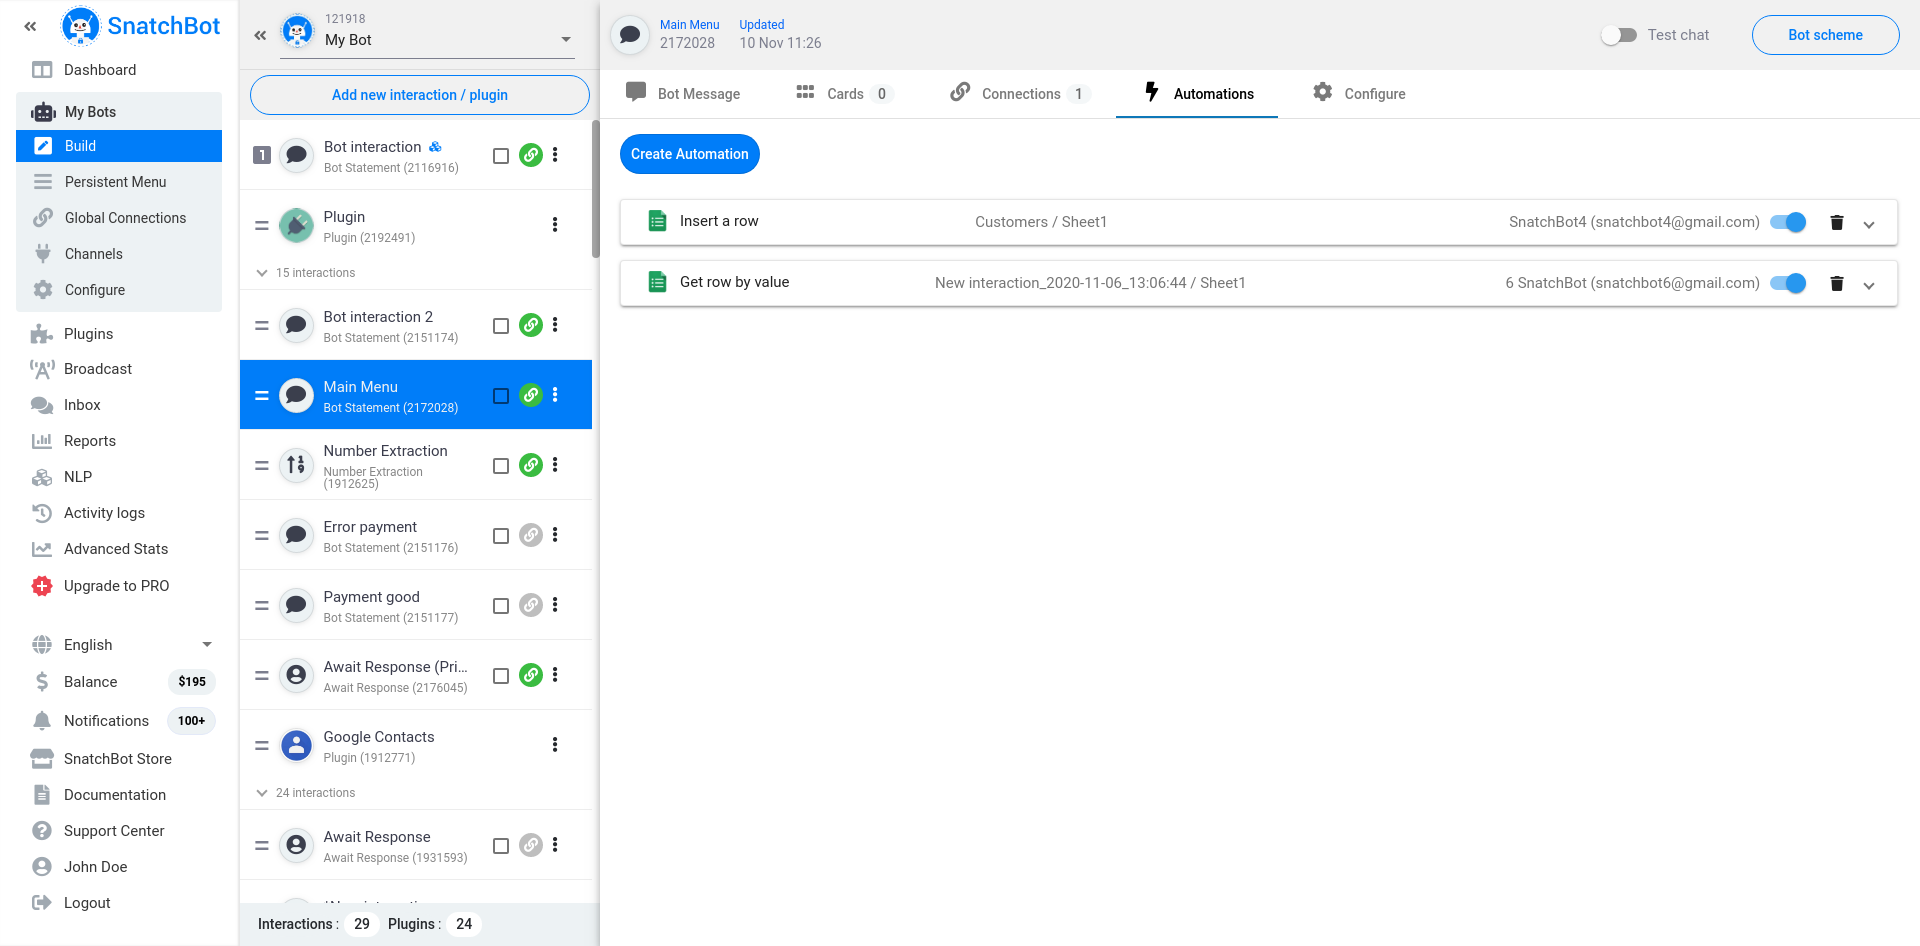
Each Automation line contains the following functionality:
- Type and subtype of the automation
- Email, first and last name of the Google account owner
- Toggle - turn on/off an Automation
- Delete - remove an Automation
- A click on an automation line will expand automation details allowing you to edit the automation configuration.
Automations and Collaboration feature
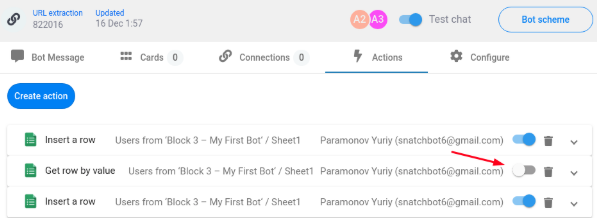
Every bot admin can see all the automations created by other users. But editing/deleting is available only for the person who created the automation.
It is also possible to turn on/off any automation, regardless of your role:
Automations and Import/Export
When you export a bot, then all Automations will be exported, as well. To use these after export, you have to be authorized on the same Google account.
Automations can be used within one SnatchBot account only. If you import a bot that contains automations into another SnatchBot account, then you won't be able to use them because they belong to another user's account.
- When you import a PRO-bot, which contains automations, to the Free bot, these automations will be ignored.
Watch these video tutorials "Google Sheets automation"
You are also very welcome to watch the following videos considering some Advanced Google sheet techniques
In this video we are going to take a quick look at a problem that you might encounter with the Google Sheets Automation and how you can quickly and easily solve it.
In this video we'll be covering a simple way to specify and draw down a custom message in the interaction where you want to show the results from Google Sheets in order to notify the end-users that the relevant information was not found.
This video will be very useful If you want to look up something random in a Google Sheets Automation. Let's have a look at how it is possible and super easy
Updated over 2 years ago
