How to send a Broadcast
Using Your Chatbot to Stay in Touch with Your Audience: How to Broadcast
One of the most useful features of our chatbots is a very versatile broadcast system. Many people will want to use a chatbot to grow their audience and sustain a lively engagement with users. There are plenty of examples that show chatbots to be really effective at growing your audience. Chatbots have two immense advantages compared to sending out a mass email: they give a more positive, interactive experience for the recipient than does a group email and the message won't be blocked by spam filters.
It’s up to you to provide great content, but it’s up to us to get that content to the right people and here’s how.
Assuming you’ve built your chatbot and have a new message to broadcast, you open the broadcast page.
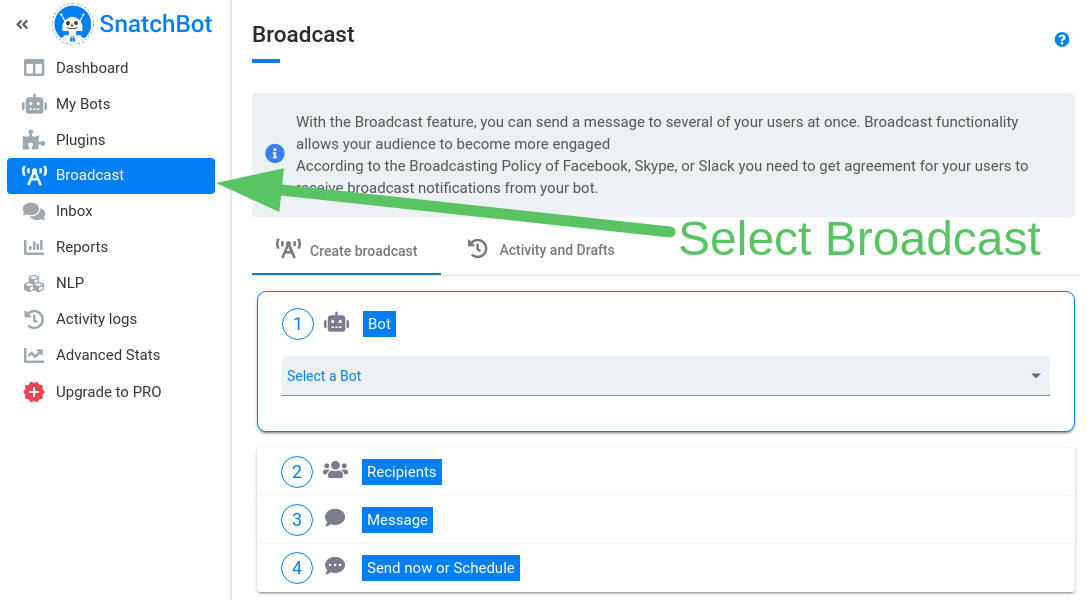
First, you’ll see our note to remind you to make sure you are aware of the broadcasting policy of your channel. Facebook, Skype and Slack, for example, require you to have agreement from your audience that they are willing to receive broadcast notifications.
Tip
For a template bot that shows you how to allow users to opt-in for broadcast messages click here.
Create broadcast
Step 1
Under the "Create broadcast" tab choose the bot you want to engage users with from the first drop-down menu.

Step 2
Open the Recipients section. There is a wide range of filters:
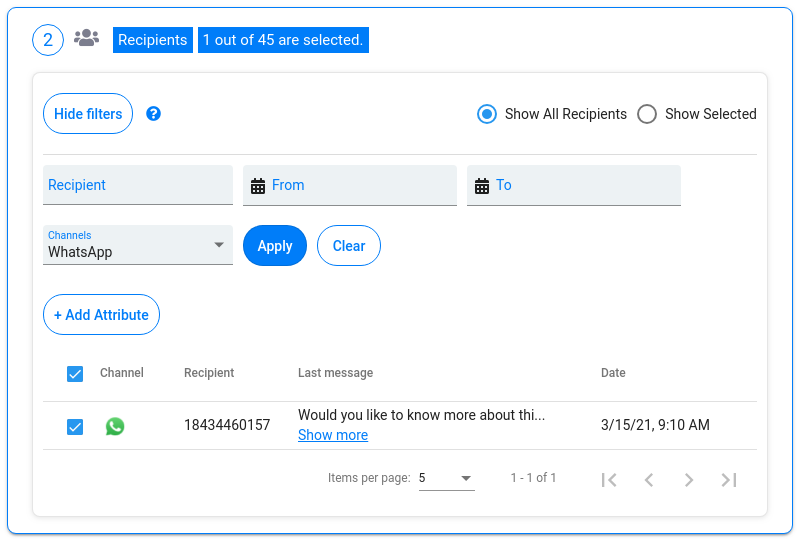
You can filter broadcast recipients by:
- Name;
- Date of the last conversation. Filter by date allows you to input the particular date and time range during which users spoke to the bot;
- Channel: filter users by particular channels (Facebook Messenger, Slack, etc.);
- Attribute values.
Perhaps, the best tool is filtering by Attribute values. It’s easy to make sure you are compliant with the requirements of companies and governments as well as to make sure you are sending the invitation to chat to someone who really is interested:

Click Apply to activate filters.
Step 3
Now compose your message. The message field must be filled to a maximum of 4000 chars. Here, you have the option to insert media, such as images and videos, as well as an RSS feed, which might be, for example, updating the user with financial information. The Text-to-Speech feature is available in the broadcast (Auto mode only).
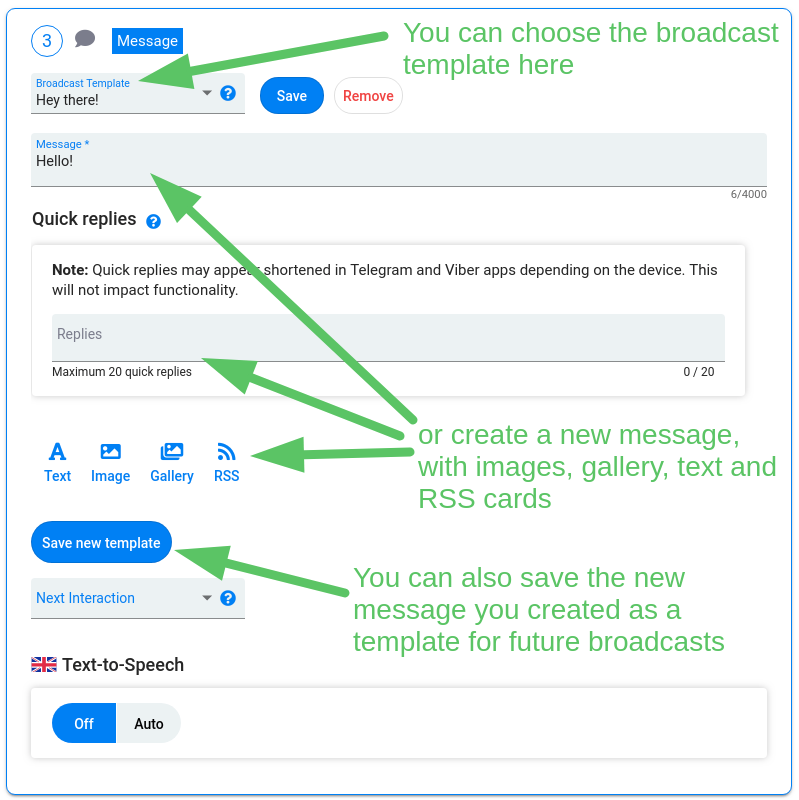
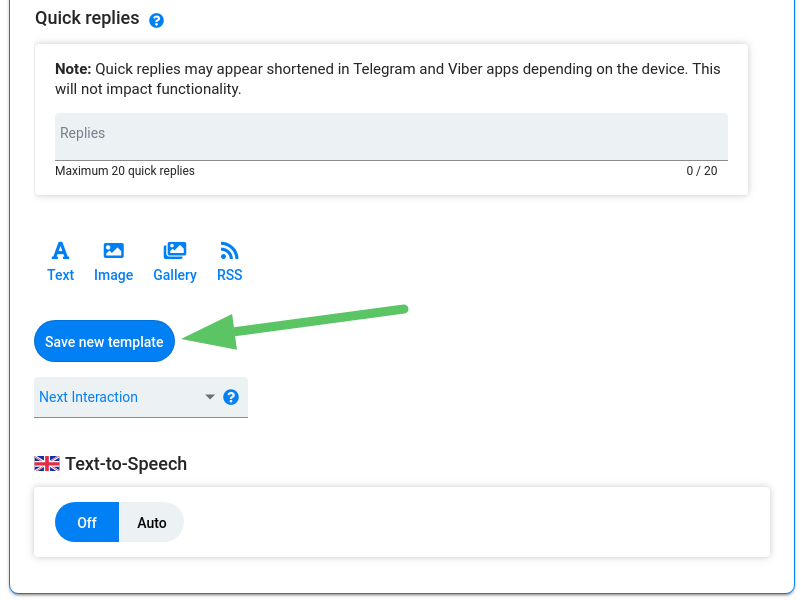
Here too, you can choose where the bot’s conversation will begin. If you want to make users land on a particular interaction within the bot, after receiving the initial broadcast message, check the Next Interaction option, and choose from the list of bot interactions:
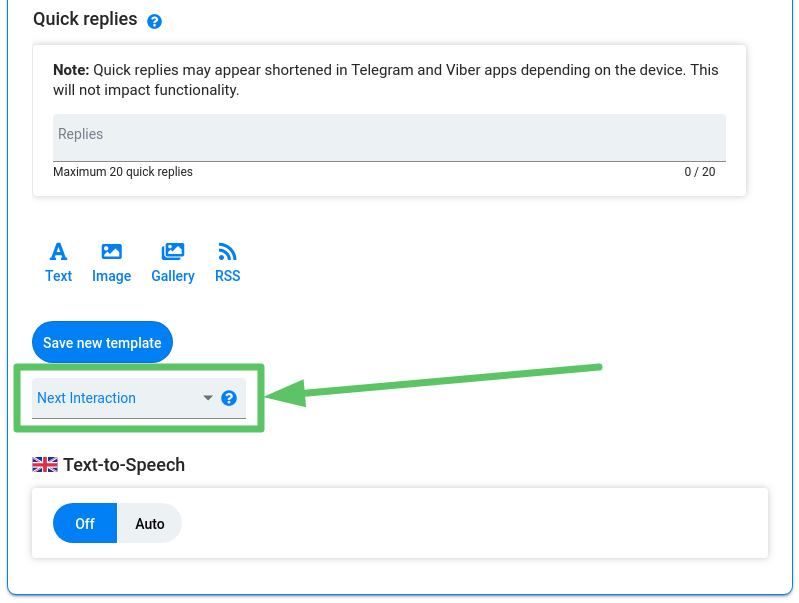
This feature means the recipient jumps right in on the topic that interests them.
For example. Your message might be about an exciting, new offer aimed at customers from the previous six months. It would, therefore, end with the question: ''would you like to learn more about this offer''. You select as your start interaction the answer ''yes'', which will avoid the need for the user to work through the conversation from the start.
If you want to save your message in order to use it again, you can make it a template. Just click Save New Template and enter a name for it. You will be able to use this message in an unlimited number of broadcasts.
Step 4
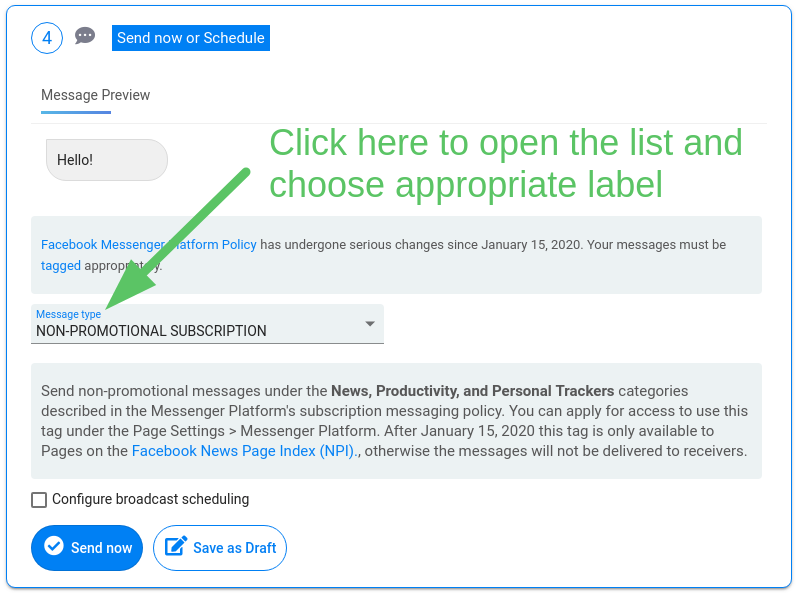
You are nearly done. If you are sending a broadcast on Facebook Messenger, you should label your message with an appropriate tag that you can choose from the list. Each label contains a short explanation. Please make sure that every Messenger broadcast has the right label:
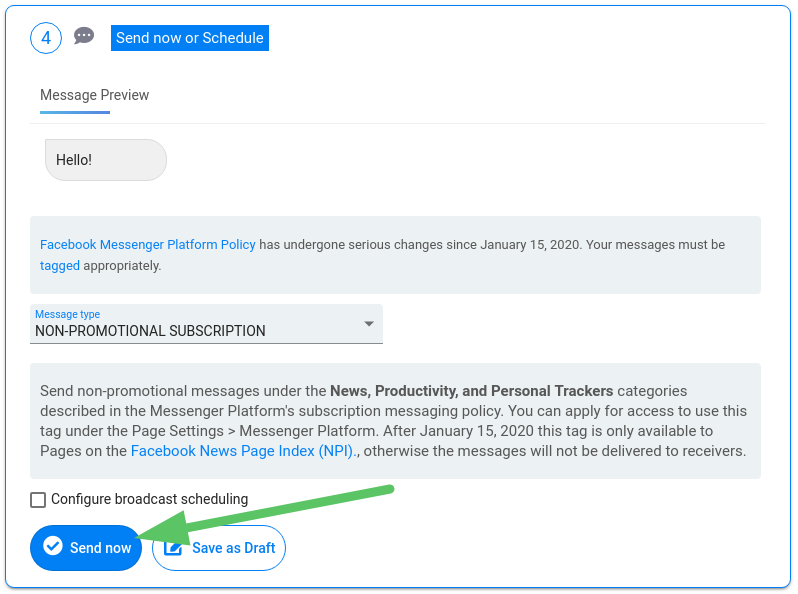
Now, the last thing to do, is to choose whether to send the message now or schedule it for release on a later date or save it as a draft. If you would like to send the message now, just click on the Send Now button:
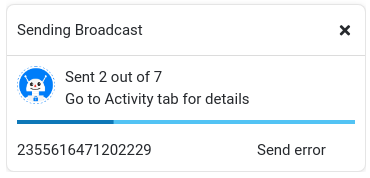
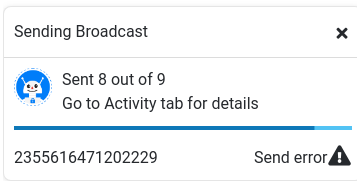
During sending a broadcast you will see a mini-report in the lower right corner:
To schedule the broadcast to go out automatically at a later date, tick the Configure Broadcast Scheduling box. It will provide you with a short form to define the date, time, timezone and broadcast frequency. You can automate the schedule so that your chatbot will broadcast the message every day, week, month or at any interval you define and at any hour.
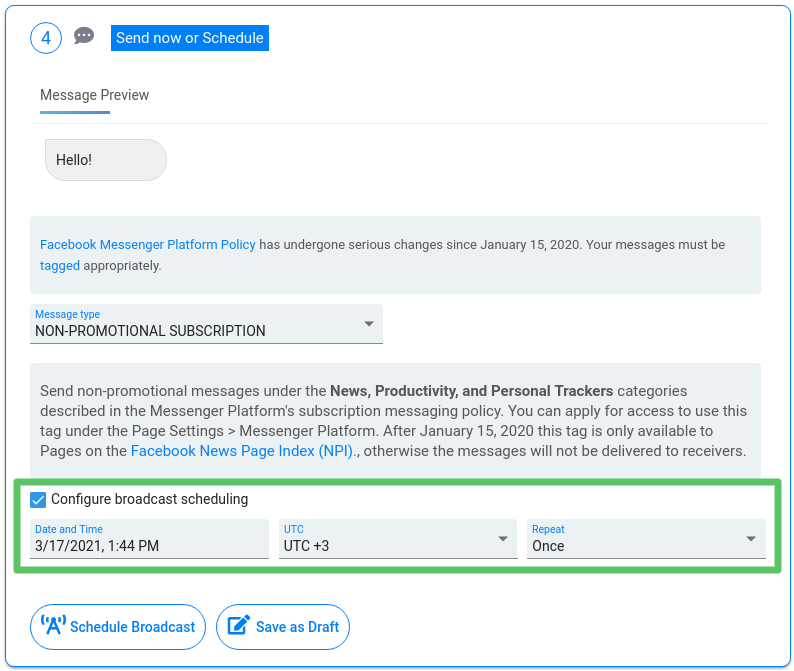
After that, just press the Schedule Broadcast button and if you for any reason can’t finish the broadcast you can always save it as a draft and continue working on it later.
Activity and Drafts
Under the Activity and Drafts tab you can find all of your broadcasts, including draft messages (Drafts), scheduled ones (Scheduled) and those that are already sent (Sent):
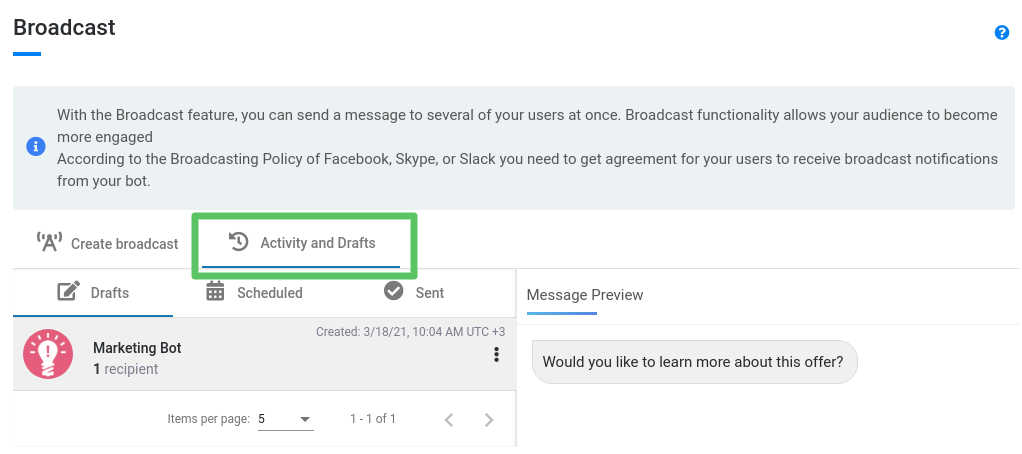
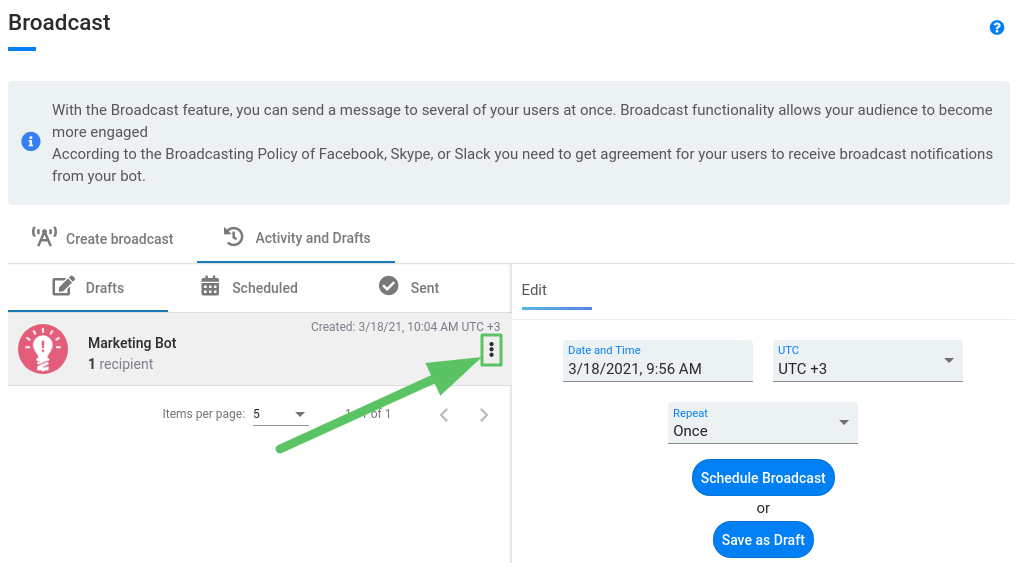
From the Drafts and Scheduled tabs, you can delete or reschedule broadcasts. Previous broadcasts are available in the Sent tab. You can only view these:
Right after sending a broadcast you will see a mini-report in the lower right corner:
Also, you will get an email message with a broadcast report, which contains the broadcast message, the total number of recipients and two lists of users - those who received the broadcast and those who did not:
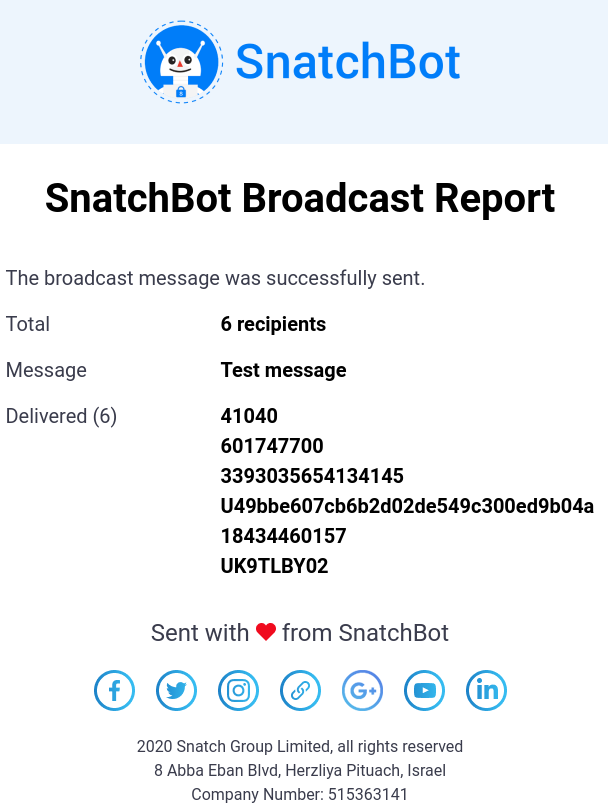
Also, you will get a notification in the side-menu:
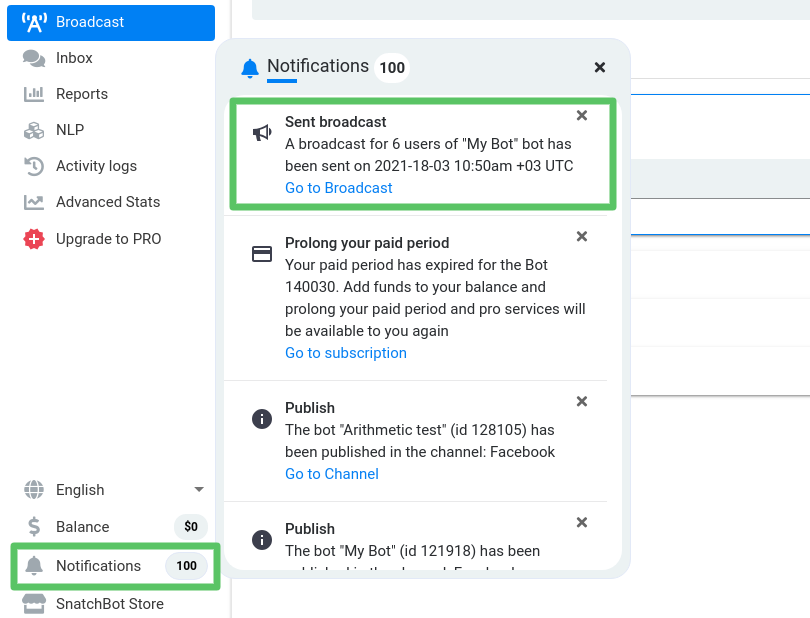
Go to broadcast - opens the “Sent” tab and highlights the sent broadcast.
Below is an example of how notifications of messages are received via FB messenger:
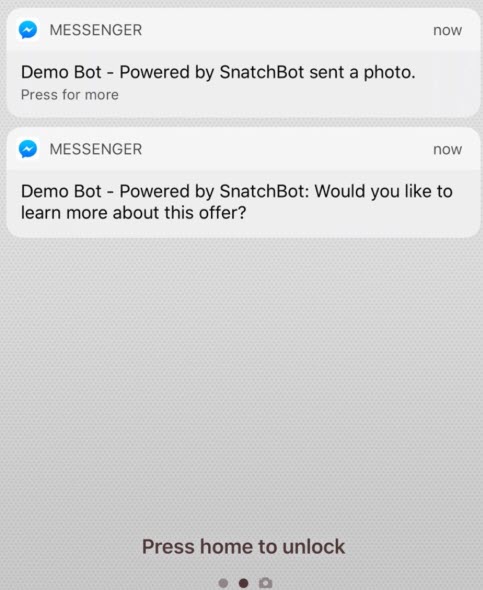
Below is an example of how messages are received in FB messenger:

It's a whole new dimension for one-to-many communications, immensely valuable in certain circumstances, yet free for you here at SnatchBot Enjoy!
Tip!
To check you have set everything up correctly, we recommend sending the message to yourself before broadcasting it widely. It is very easy to do so. Just go back to ‘Choose your Recipients’ and make sure everyone is deselected apart from yourself. Hit send, then go to the platform you are broadcasting to and open the message you will have just received. If the chatbot functions as planned, you are ready to broadcast to others.
Watch the Video tutorial "How to send a broadcast with a SnatchBot chatbot"
Updated almost 4 years ago
