WordPress Website
How to Deploy Your Chatbot on the WordPress Website
WordPress is the world’s most popular CMS. It allows you to quickly build websites, with themes, widgets, shortcodes and easy-to-use plugins. Chatbot deployment on WordPress websites is equally simple. This tutorial will show you how to integrate the bot you have built with the SnatchBot platform on your WordPress web page.
There are two ways to install the widget onto your website: by using our plugin or alternatively by pasting the widget as described in the guide below.
Wordpress Plugin
The easiest way to install the plugin is by using the SnatchBot WebChat Plugin. Visit the plugin marketplace and follow the guide to install.
Getting the embed code
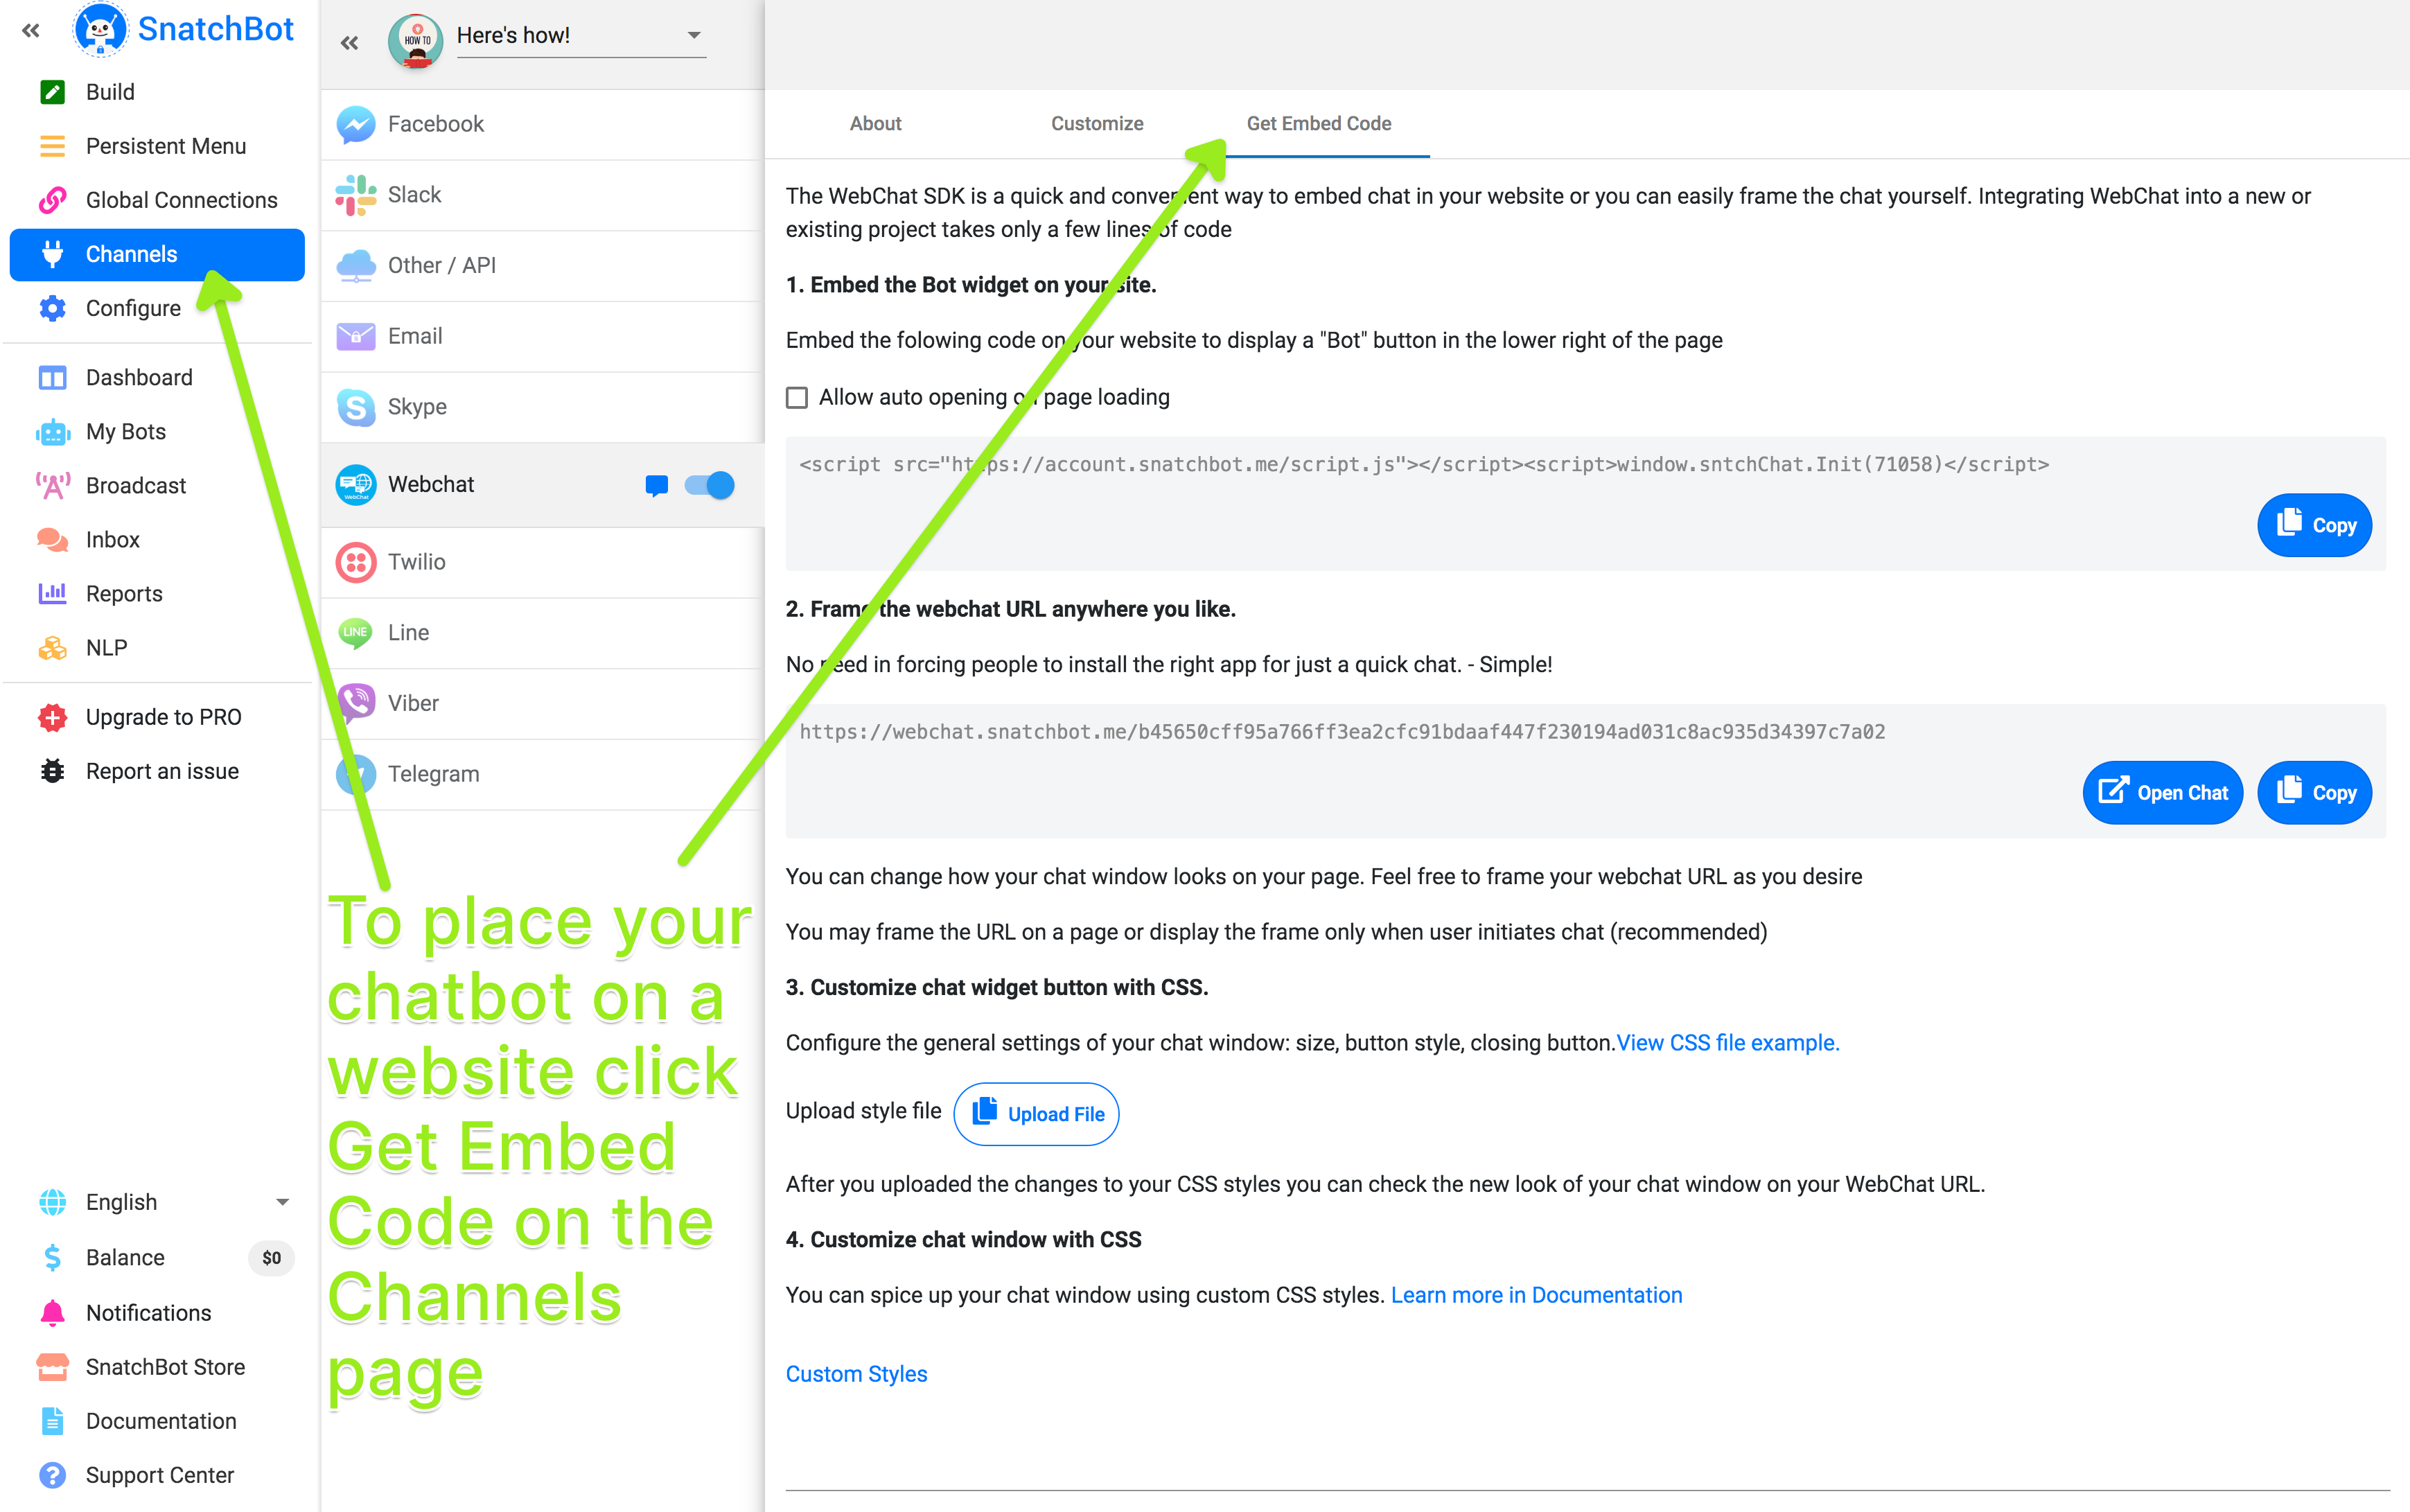
Start by choosing the desired chatbot in the My Bots page, on the SnatchBot platform. After you have chosen the bot you would like to display, click on Channels and Get Embed Code.
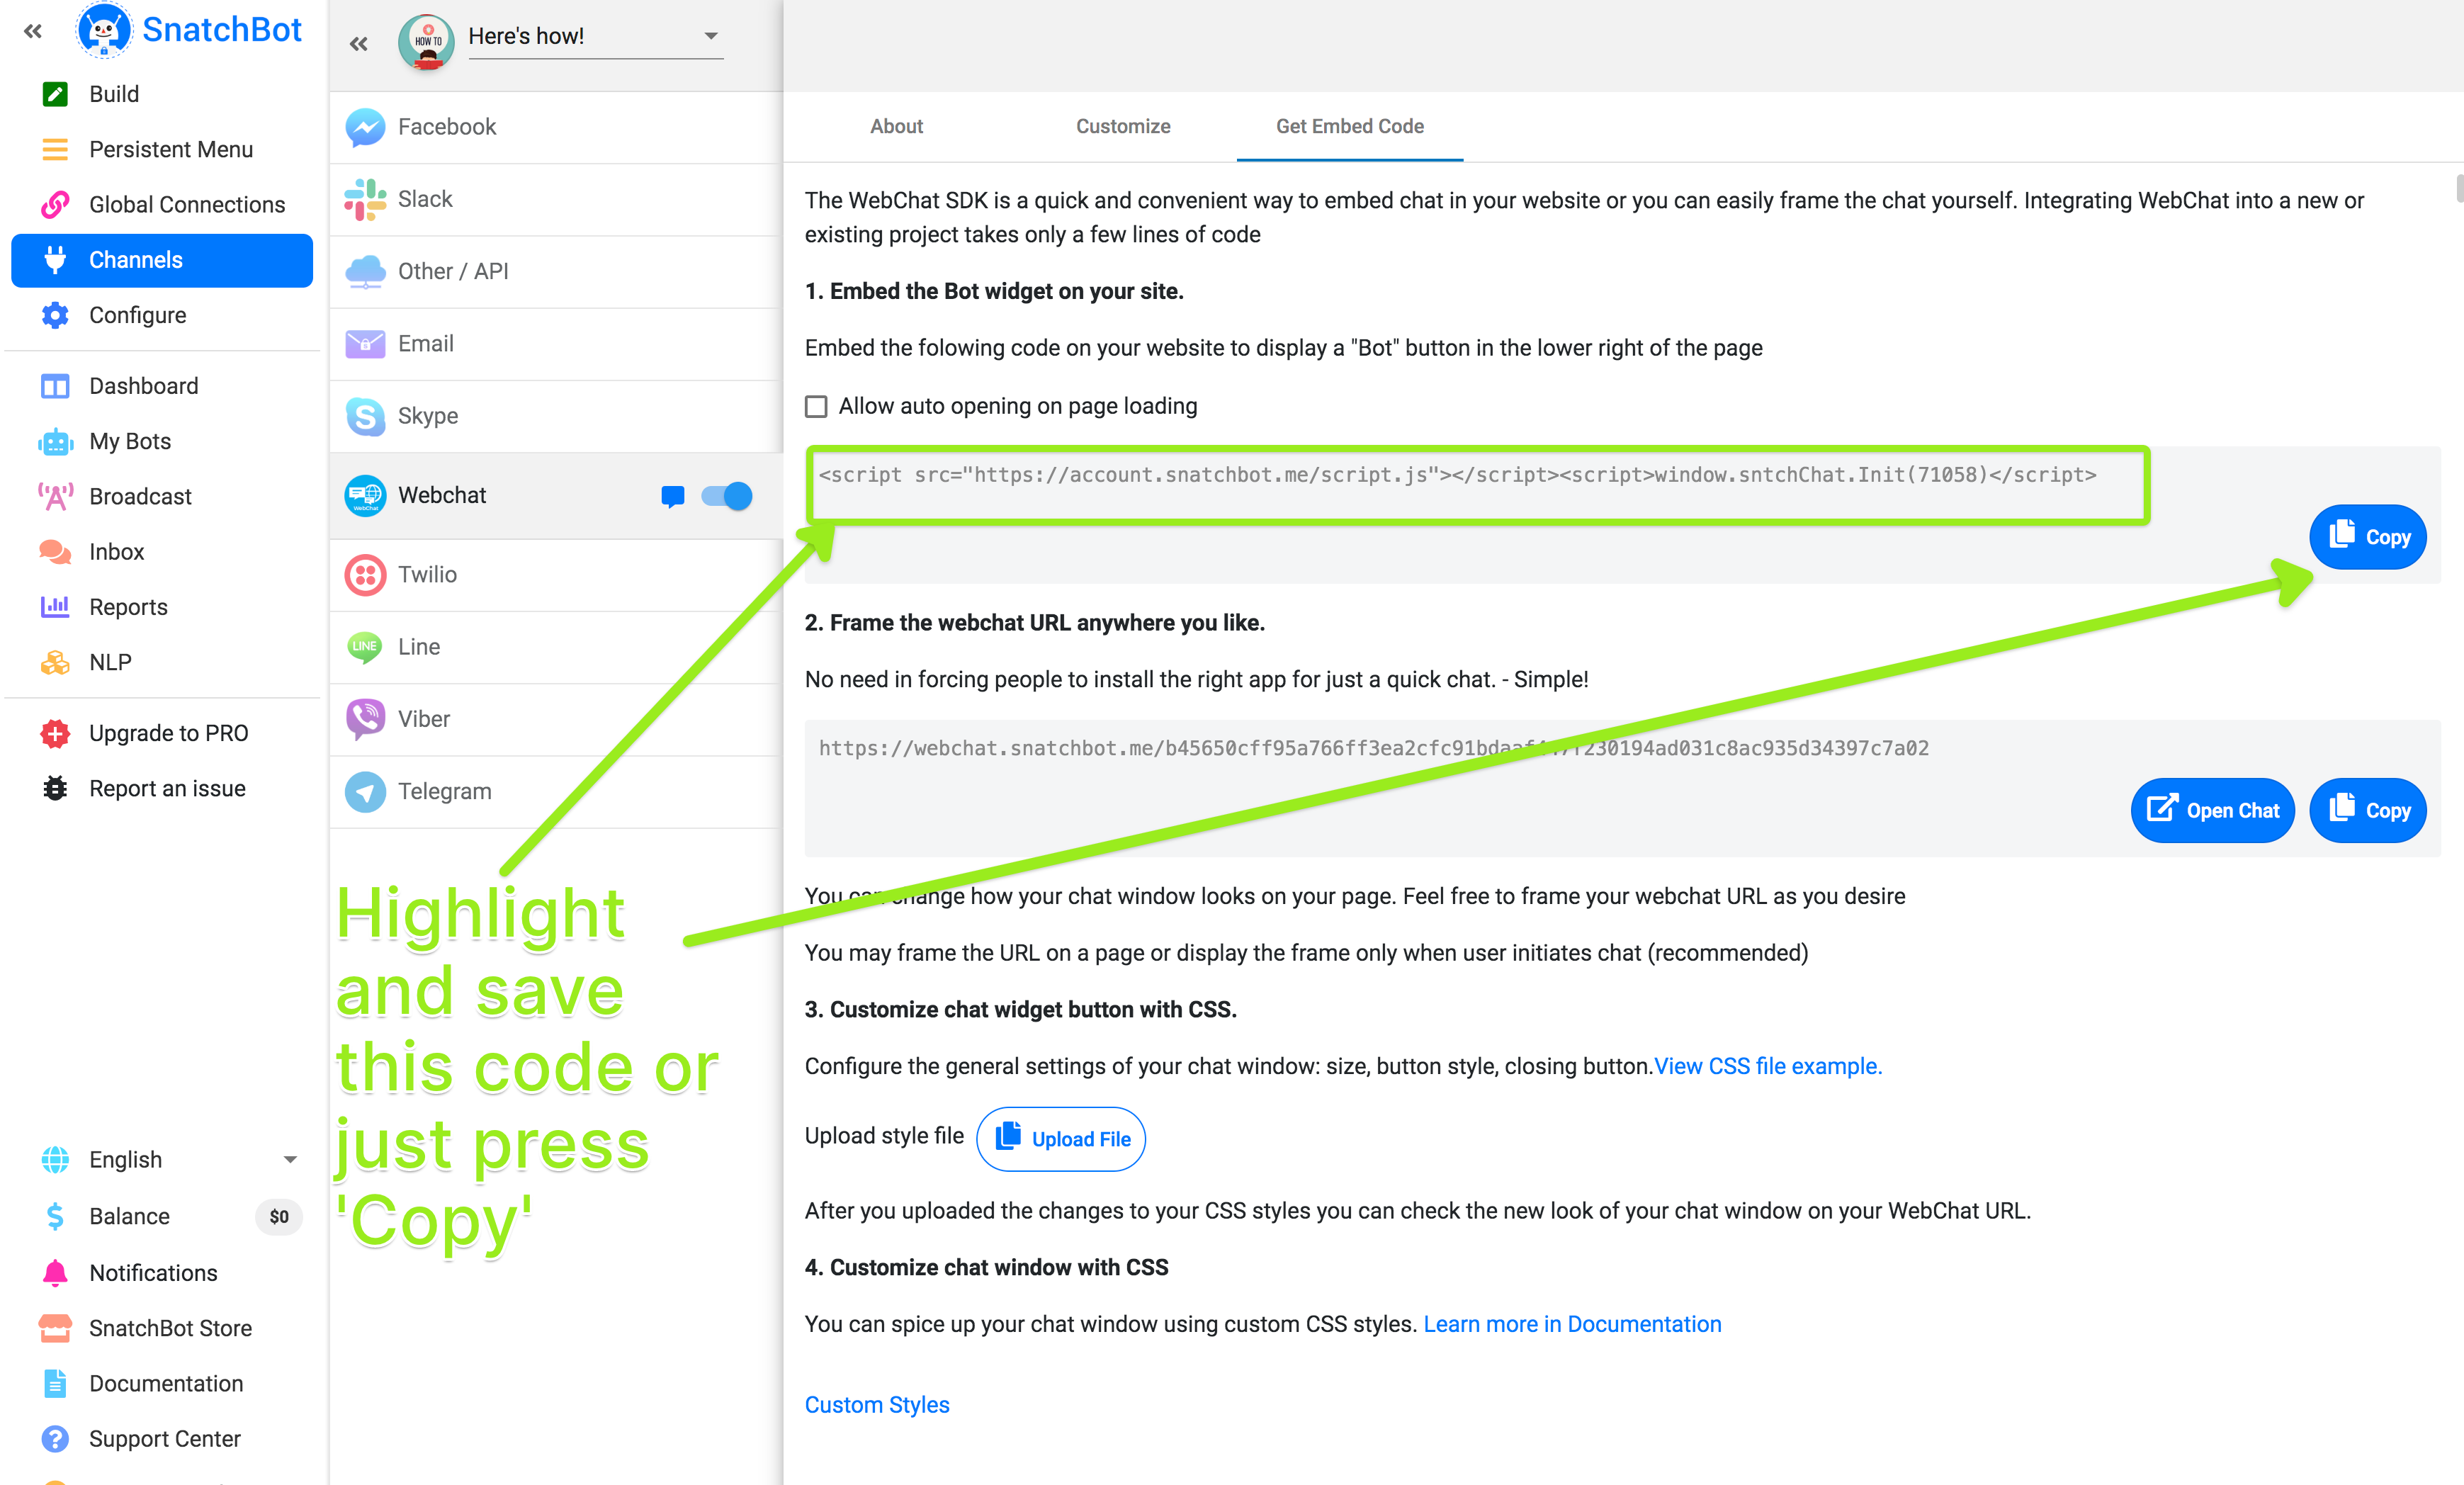
Here, you can customize how your chatbot is displayed as well as providing information that will be available to the user during the conversation. But for now we are looking for the custom JS code that you need to copy, either by highlighting or clicking the Copy button.
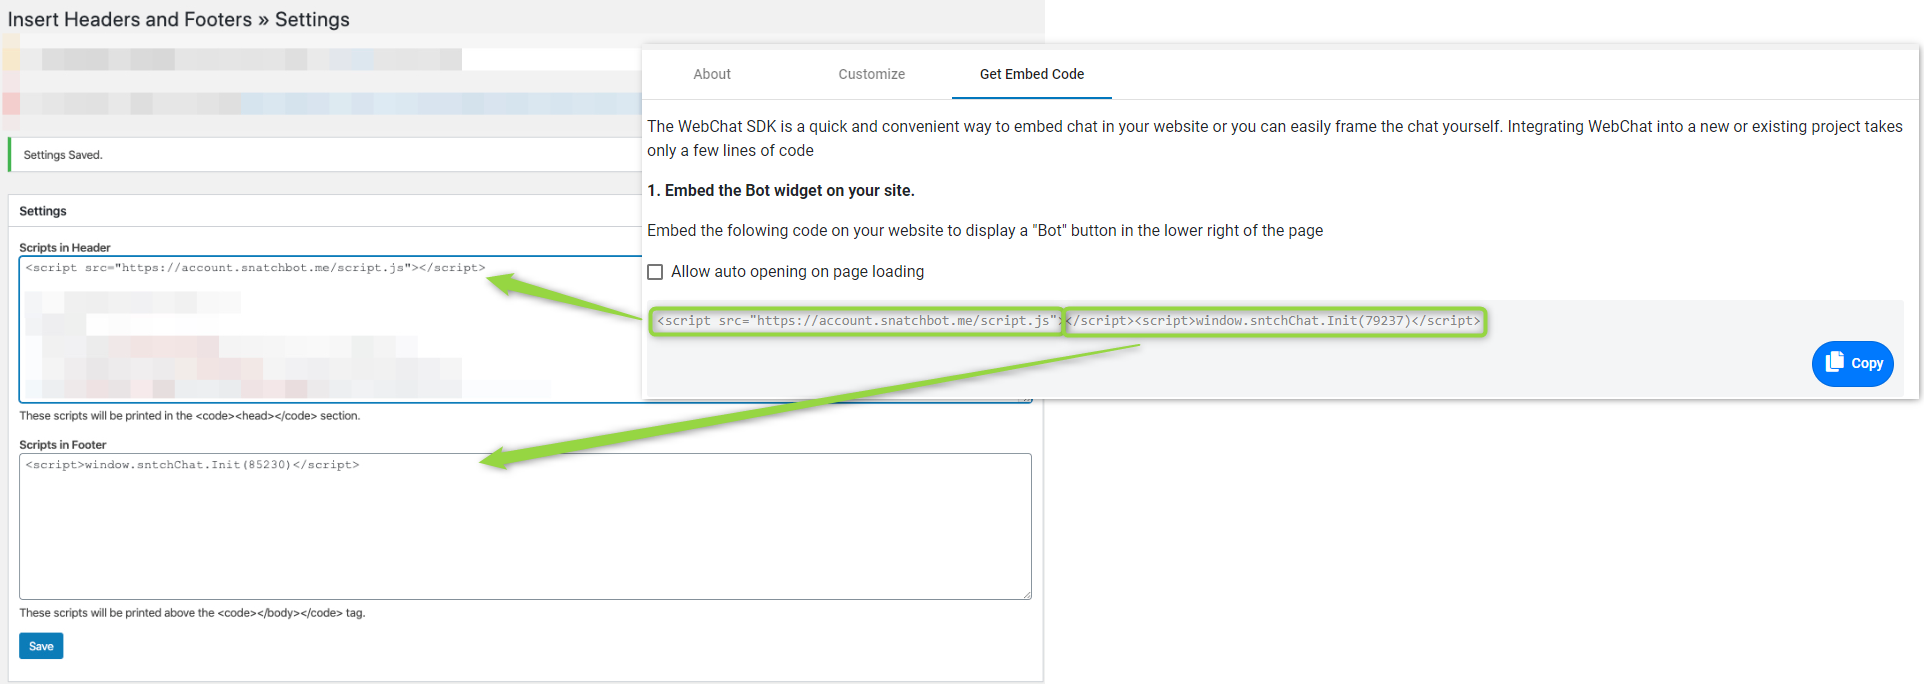
You have to insert the .js script in the Header while the "init" script should be left in the Footer if you are using 5.3.2 + Wordpress version** (via the "Insert Header & Footer" plugin).
Placing the code on your WordPress website
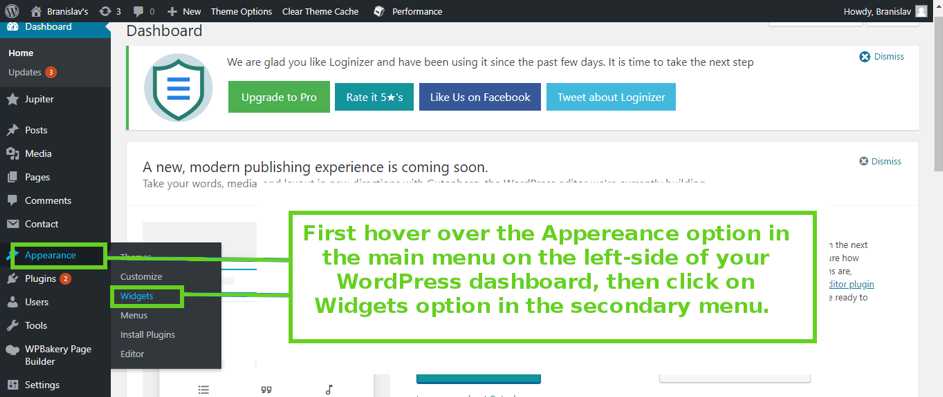
After you have copied the code, you should open your WordPress website's dashboard and locate the Appearance option in the main menu on the left side of the screen. Hover over it and you will see a secondary menu, with several options. Click on Widgets.
In the Widgets settings page, search for the Custom HTML widget in the grid that contains all available widgets, on the left side of the screen.
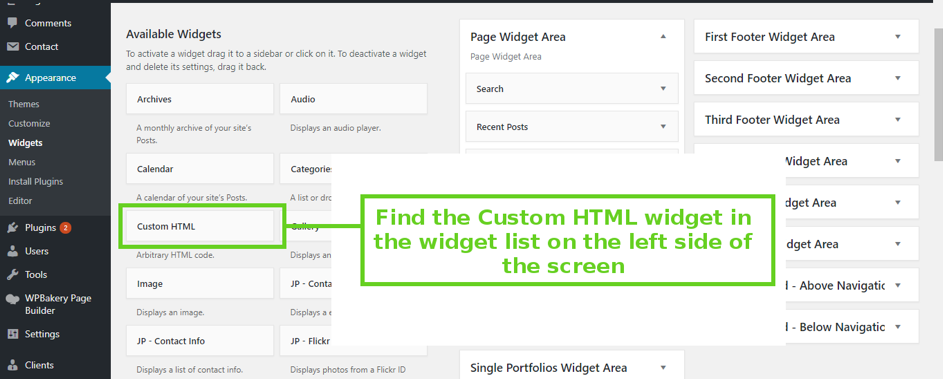
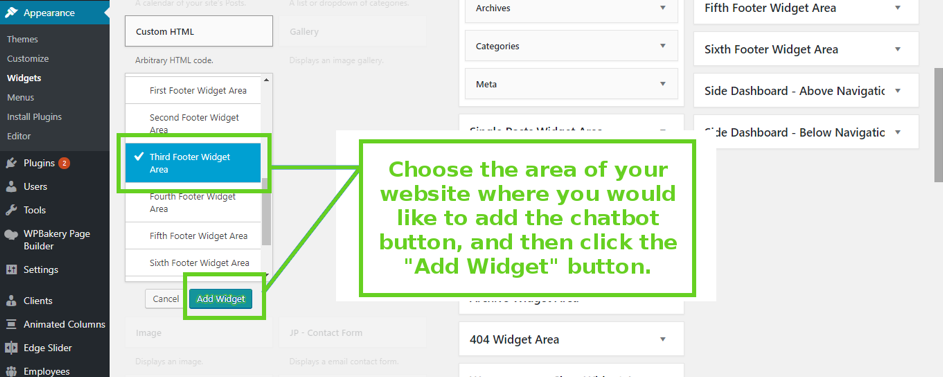
Click on the widget and then choose where you would like to place it. We advise you to put the chatbot button in the website footer.
Check how many footer areas your website has, and then choose one. The chatbot button location will be determined by the area you choose. The best bet for most left-to-right sites would be to place the widget in the last widget area, which will deploy the button to the bottom right corner of the bot. After choosing the desired widget area, click on the Add Widget button.
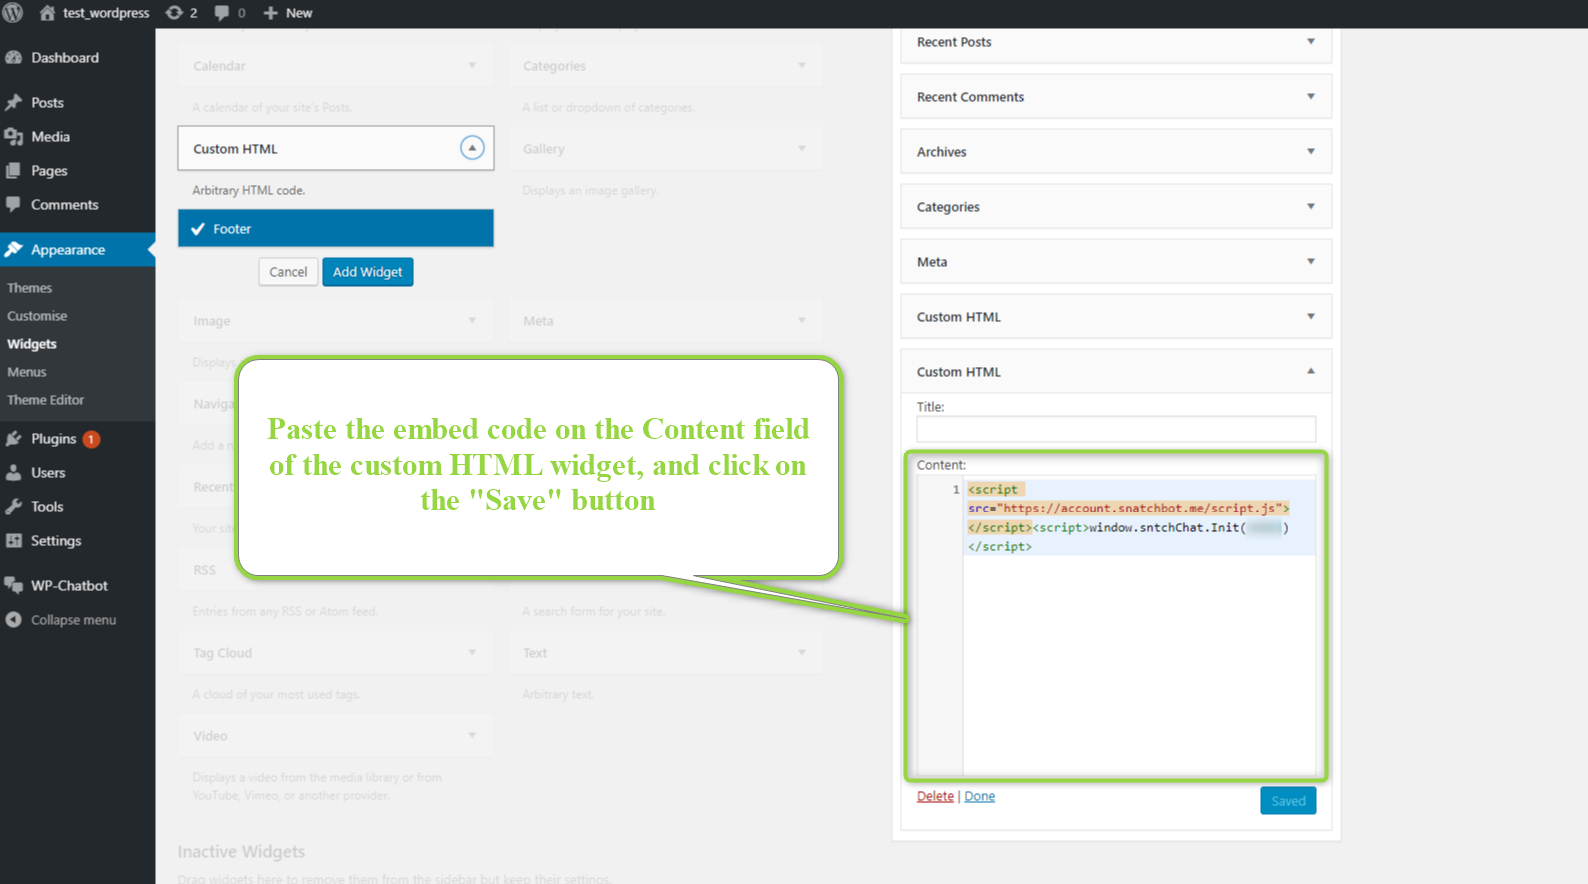
On the next screen, you will see a Content input field. That is where you should paste your code. You can also add a widget title and it will appear above the chatbot button. After you paste the code, click on the Save button, and then the Done option.
Then load your website and check whether the button is visible.
Adding chatbot button to different pages and posts
While basic WordPress installation and most free themes allow you to create only one footer, with most premium themes you can build several footer solutions that you will place on the desired pages.
The code widgets don't need to be added to the footer. You can also place them in the sidebar. If you are using a content builder, widgets can be placed on any post or page you wish.
Updated almost 5 years ago
