Custom Attributes: Exporting User Responses in Webhooks
Putting custom user responses in a webhook
Being able to take data from your chatbot’s conversation and put it in a webhook is a crucial feature for bot builders who want to provide real time information from the conversation for an app, website or database.
We have made that process beautifully simple for you, so that no coding is needed.
First, have the chatbot ask for the data you want. If it’s a phone number, address or email, you might want to use the relevant extraction type of Interactions. Let’s take email, for example. And let’s say that in the interaction numbered 1204741, you asked for the user’s email.
You can find the interaction numbers here:
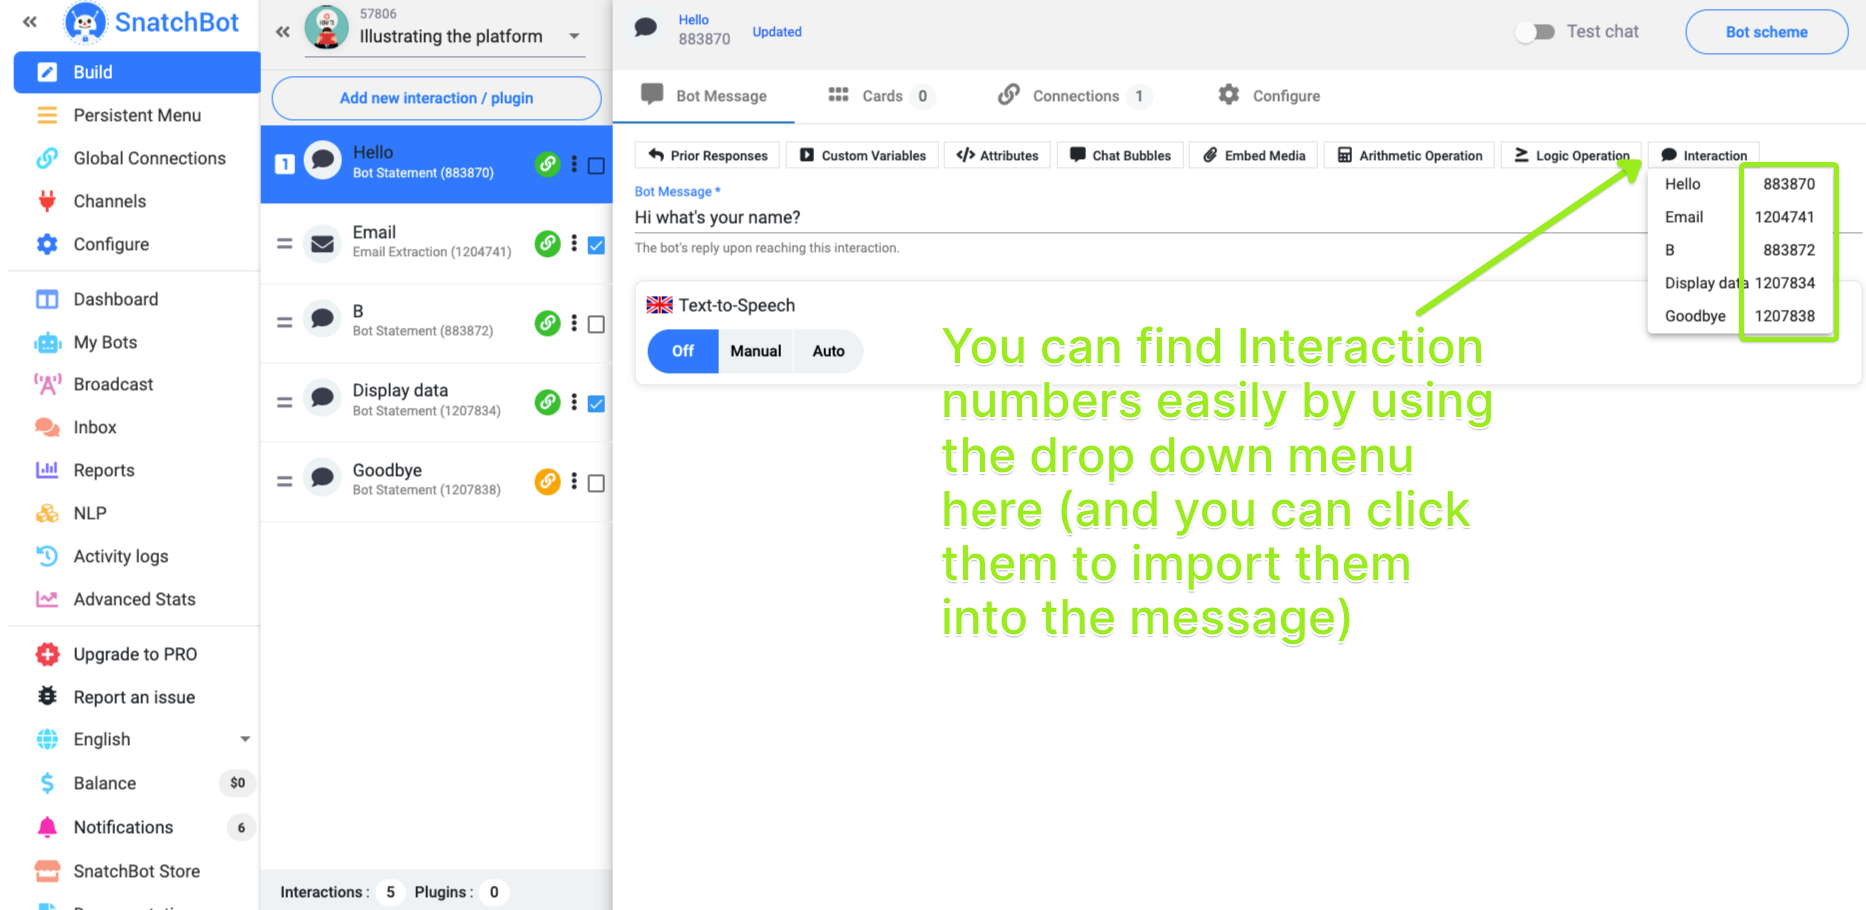
There is a dropdown menu for quickly obtaining Interaction numbers
Now you define a custom variable as this answer by pasting the following in your bot’s chat.
[customVar Email=[responseTo interaction=1204741 fallback=Error]]
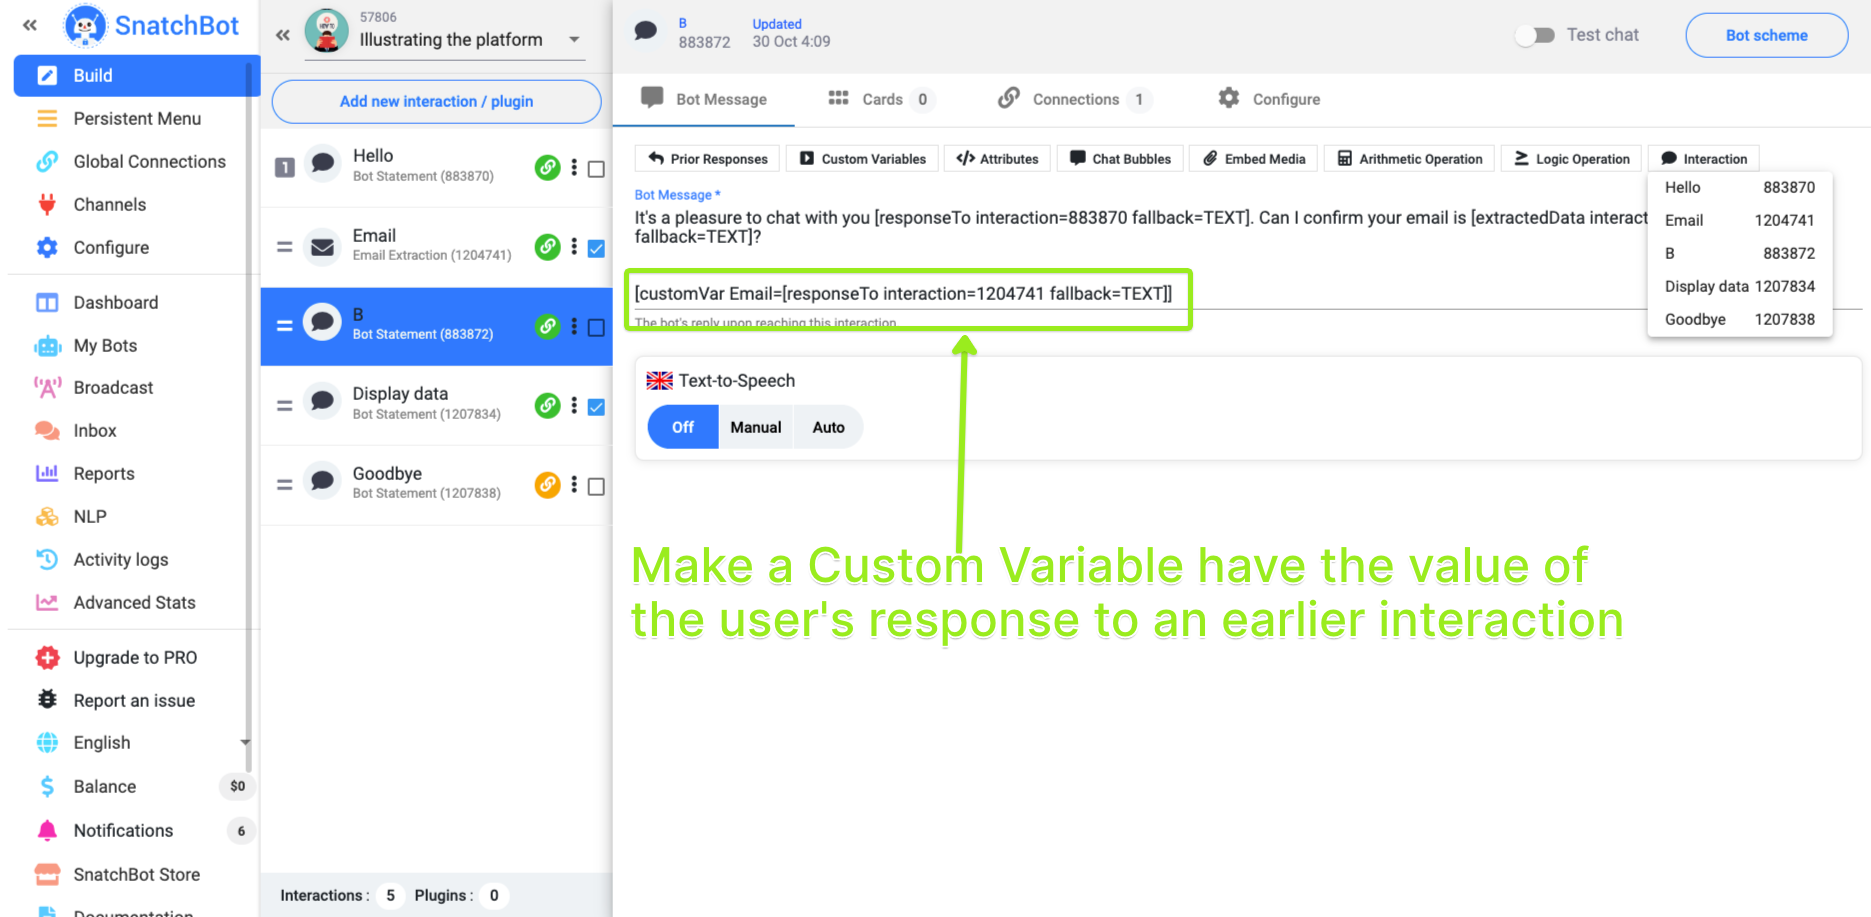
This means a custom variable called ‘Email’ will take the content of the user’s answer in interaction 1204741 as its value. The fallback = Error is just there to send you a message if something hasn’t worked. Note how versatile the custom variable feature is. It is not confined to numbers, emails, addresses, etc. It could be any answer at all the that user has given the bot.
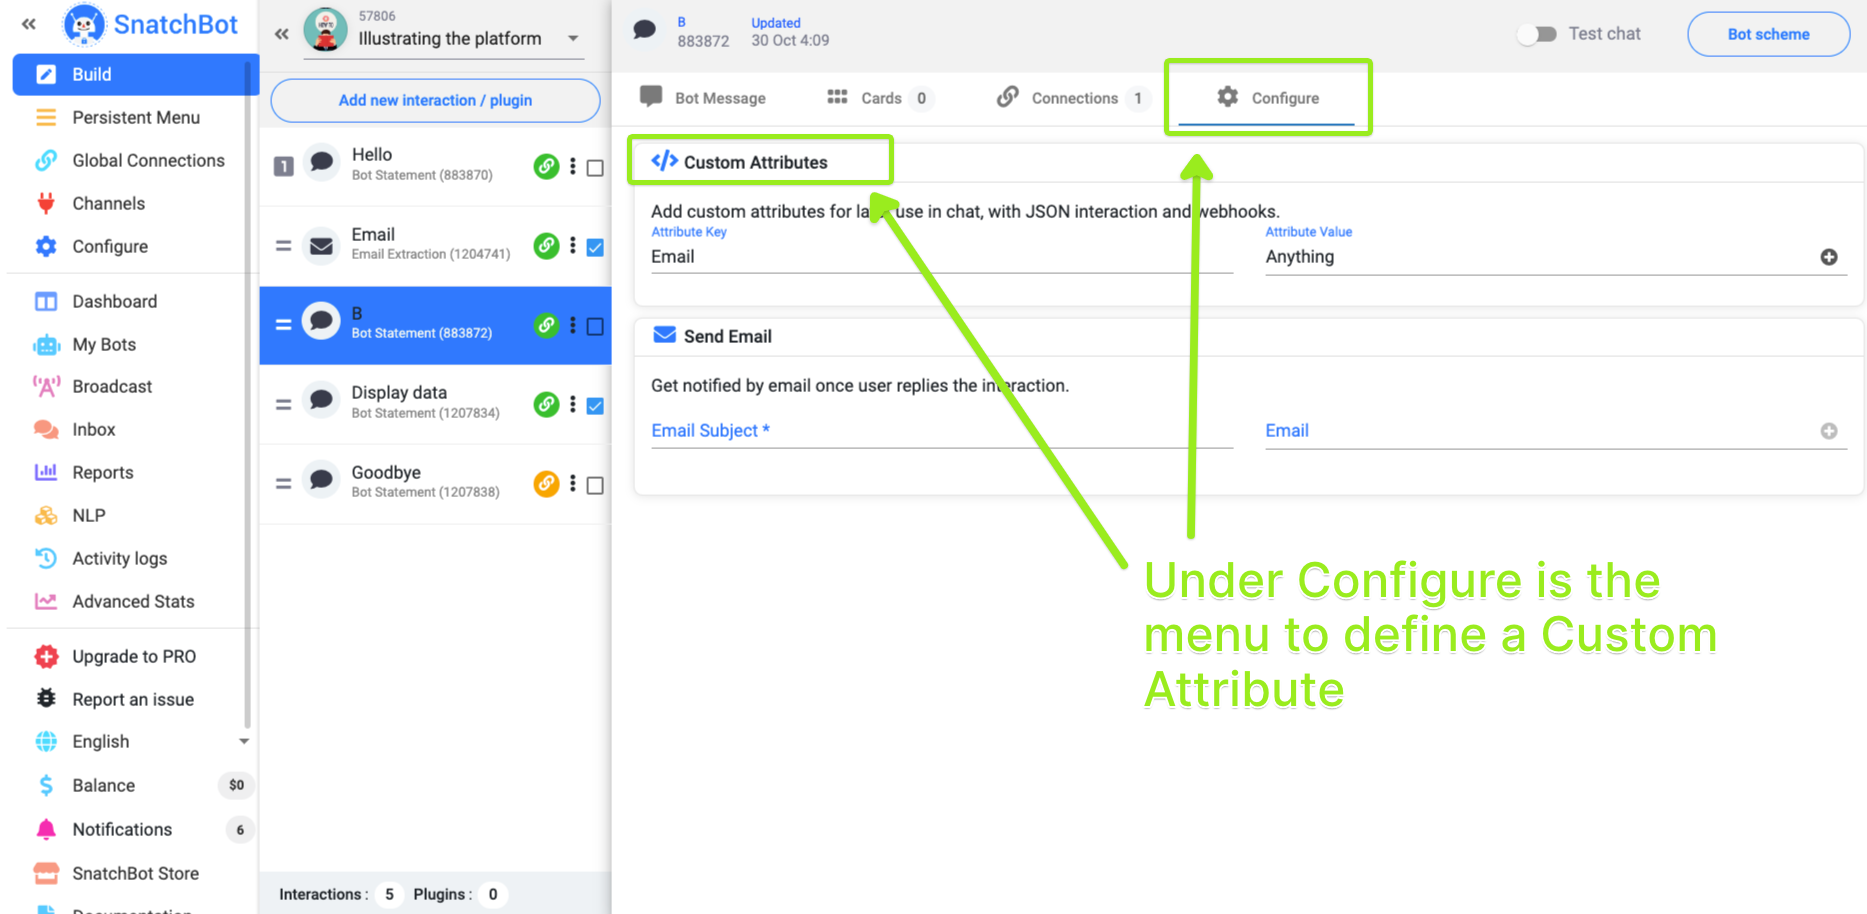
Next, you need to turn the variable into an attribute, so that a webhook will recognise and use it. Prepare a custom attribute by defining it. It is important that the attribute is defined after the user has given their response and this is best done in the interaction following the user’s response.
There is a dedicated menu under Configure for creating custom attributes, click it, give the attribute a label (in this case Email) and for its value, you can put whatever you like, because you are shortly going to overwrite the value with your user’s input.
Now, crucially, you can put your variable data into the attribute by placing this line into the Change Attribute Value phrase: [showVar=Email]
The result looks like this (with 'Email' here standing for any term you wish to use): [setAttribute Email=[showVar=Email]]
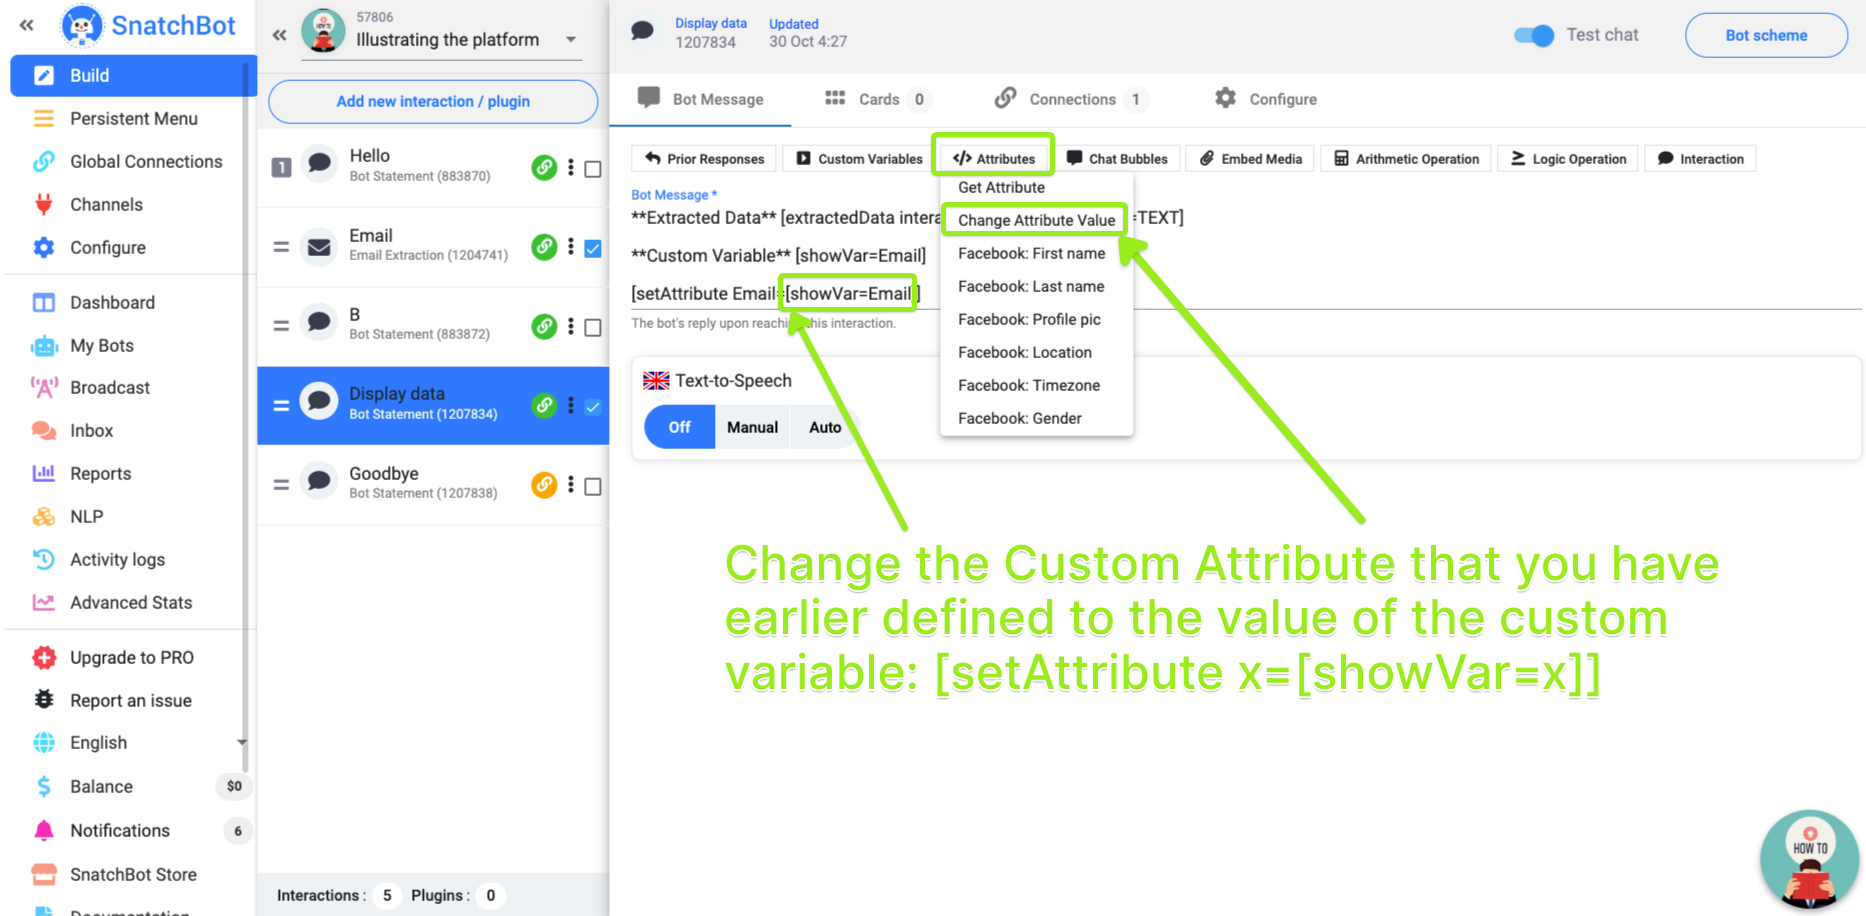
Naturally, if you are collecting data other than email, you’ll have labelled these differently but the principle is the same whatever labels you’ve used. You are giving your attribute the variable’s content.
Now you add attributes to the webhook, to tell it what to send. If you click ‘Web Hook Attributes’, the list of drop-down attributes for the webhook, you’ll see that we’ve predefined first_name; last_name; profile_pic; locale; time_zone and gender. If the user is communicating to the bot using Messenger, these details are likely to be present automatically. Thanks to the fact that you defined your own attribute (Email in this case), you’ll see that it is also on the list.
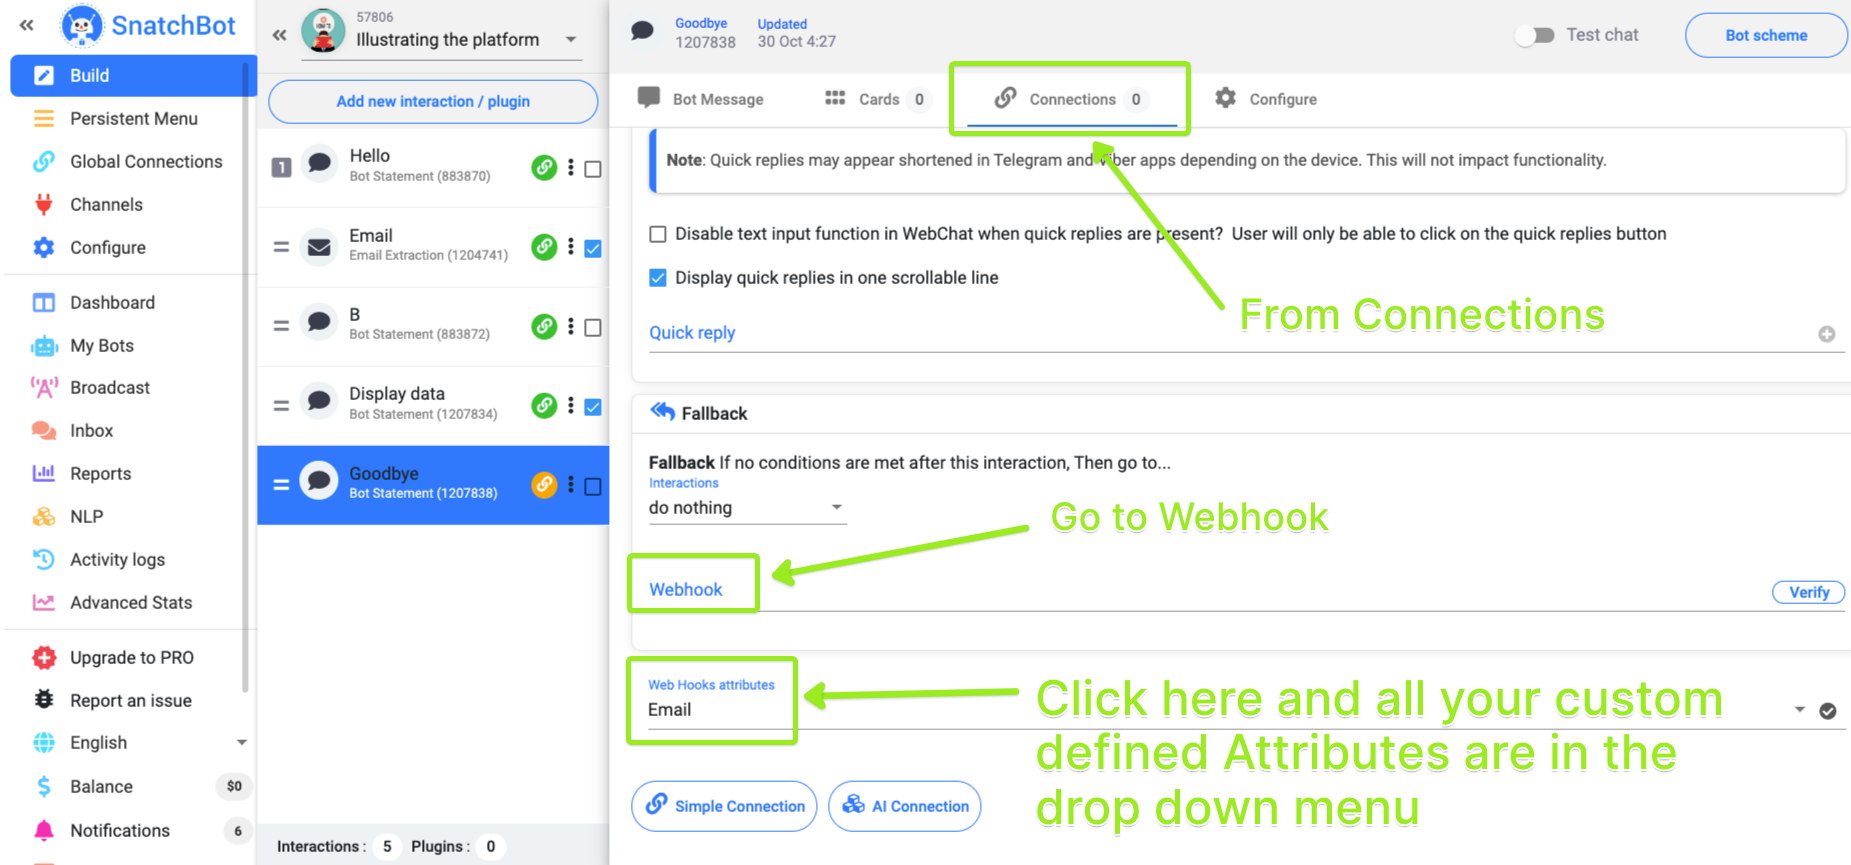
You can populate the webhook with as many attributes as you like from this list, just add them one at a time.
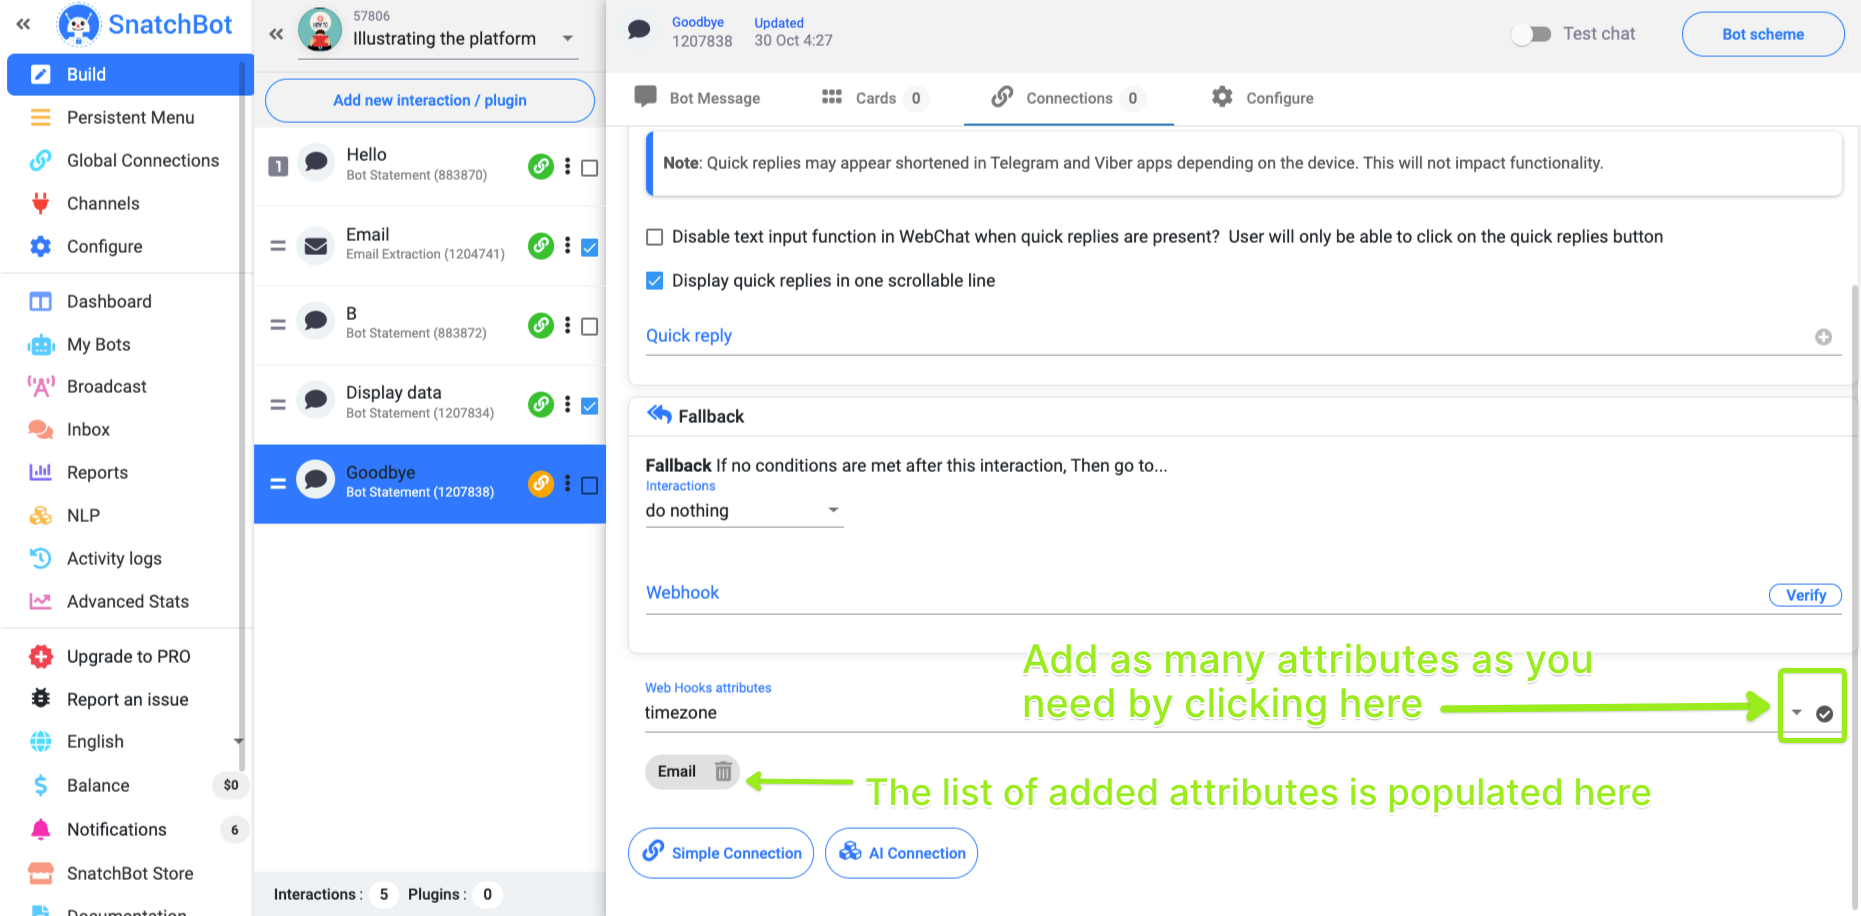
Your webhook is ready to send this data. To do so, simply add a webhook to an interaction (and / or the Fallback) and put in the URL for the webhook’s destination.
That’s it! Your data is on its way from the user’s response to wherever you need it.

TIP
For a template bot that shows you how to exports a user response (here an email, but it can be any response) in a webhook, click Here.
Watch this video tutorial to learn more about "Custom variables and attributes"
Updated over 4 years ago
Instant response or Delayed response: A simple way to let users know the communication status of the conversation’s participants.
