Configure (Bot)
In the Configure section, you can see and manage the settings of your bot.
At the top of the page, you can view the time and date of the last bot update, the logo of the current bot and a drop-down menu to let you switch between your bots.
There are 8 tabs on the page:
Bot Profile
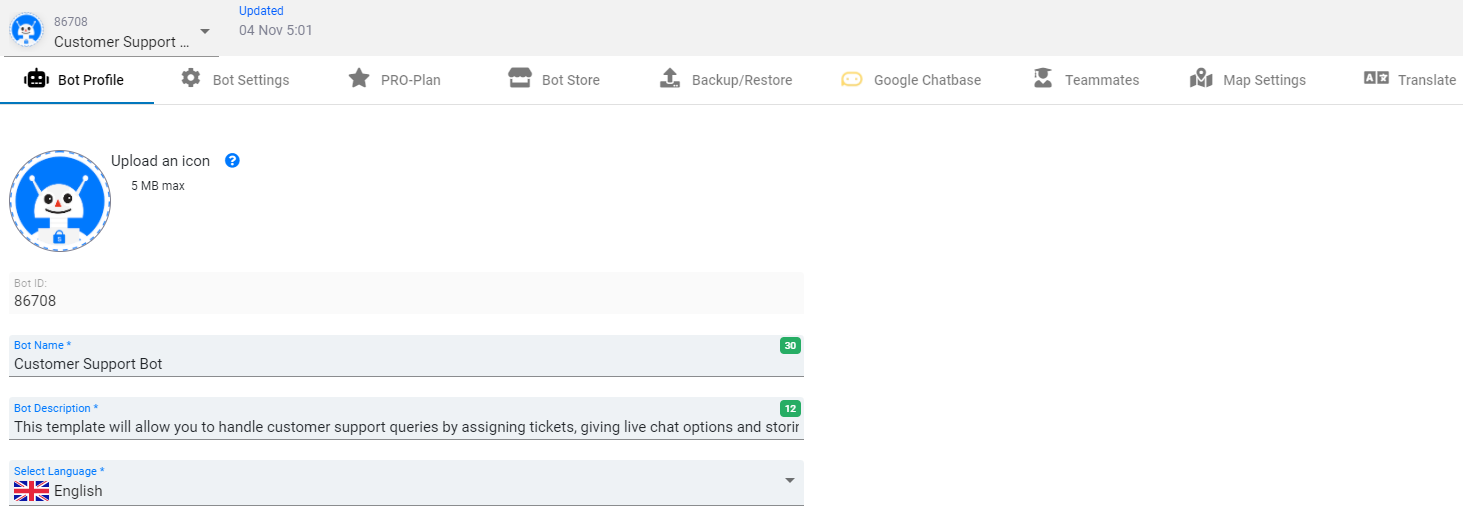
The icon uploaded here will be displayed in the WebChat channel only. Some messaging channels will also require you to upload the icon for it to be displayed in their chat.
Upload an icon of your bot (jpg, jpeg, png, 5 MB max),
Bot ID - view only
Bot Name - (6-50 characters length)
Bot Description - (6-150 characters length)
Bot Language. The chatbot language affects the followings:
- TTS language (only for new interactions)
- some customization settings (Channels->Webchat->Customise)
- the language of the Restart command and the language of the default Error message (Configure->Bot Settings tab).
Bot Settings
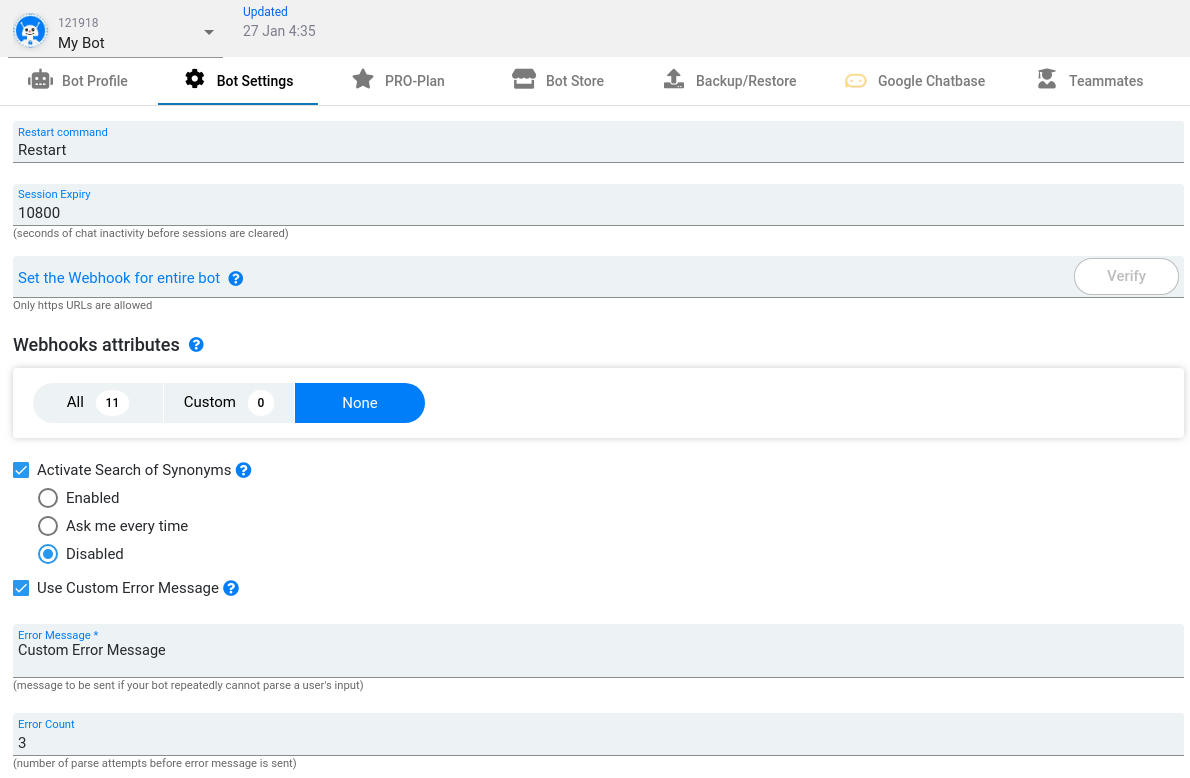
Restart: the restart command for your bot (1-50 chars), by default the restart command is “Restart”.
Session expiry: the number of seconds of chat inactivity before sessions are cleared (30-10800 seconds). By default, the session expiry time is 180 seconds. The session expiry time updates every time when a user or bot owner sends a message to the chat. This is to prevent a session expiring when the user gets to the “Live Agent” interaction.
Set the Webhook for the entire bot: turns on the sending of webhook notifications each time your bot sends or receives a message.
Webhooks attributes: here you can select attributes for the entire bot that you want to send to your webhook URL.
Activate Search for Synonyms: show/hide the pop-up window that offers you the option of adding synonyms when you create a connection.
- Enabled - automatically launch the synonyms finder every time you create a simple connection
- Ask me every time - if you select this option, then the following window will be appearing every time you create a connection:
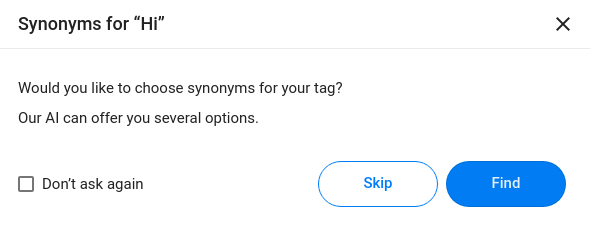
- Disabled - do not launch the synonyms finder
Use Custom Error Message: sends an error message if your bot is repeatedly unable to parse a user's input.
Error Message: the message to be sent (1-255 chars).
Error Count: the number of parse attempts before an error message is sent (from 1 to 100).
PRO-Plan
The SnatchBot platform can be used absolutely free of charge. A PRO-subscription, however, allows the removal of our branding, provides access to premium (ticketed) support, to an extended version of analytics and to a growing number of PRO features.
The tab of a Free Bot:
In the tab below you can see the status of your bot, view pricing, top up your balance and subscribe a bot to the PRO-Plan. To perform the last two actions you have to fill in your payment details and check “I accept the terms and conditions”.
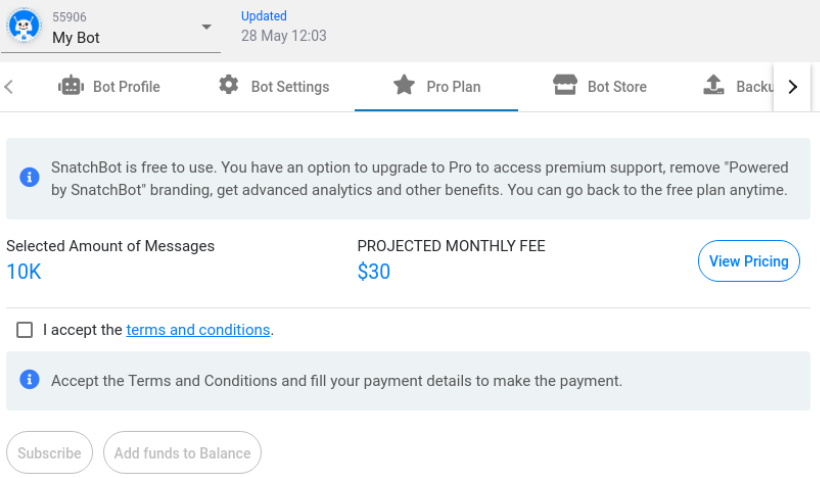
Add funds to balance - to add funds enter an amount in the pop up window (30-5000$) and press the Make a payment button:
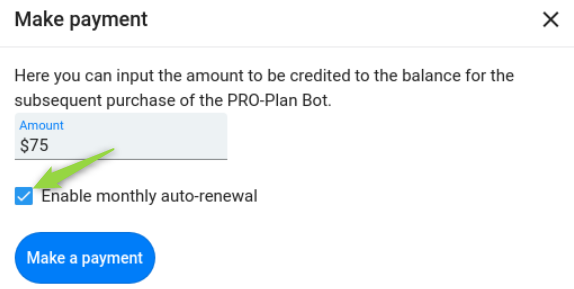
Enable monthly auto-renewal:
On - the payment is saved in the Paddle system as a recurrent (Subscription).
Off - the payment is saved in the Paddle system as a one-time payment (Product).
Then you need to select a payment method (by Card or via PayPal) and make a transaction. You will be taken to the payment system, where your payment will be processed:
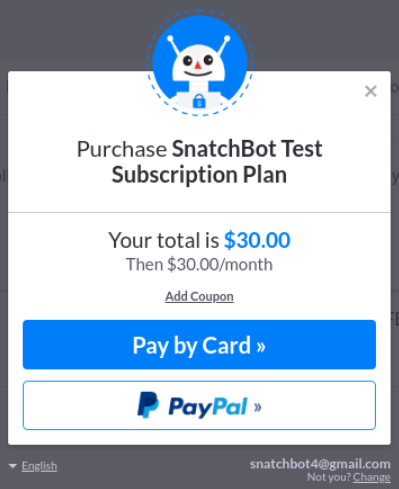
Then, once the transaction is processed, your funds will go to your SnatchBot account to be assigned to PRO-Plans for your chatbots. Also, a new record will appear in the Profile->Balance History->Payment History tab.
Your current balance is displayed in the left-side menu.
Subscribe - opens the PRO-Plan Upgrade window. You can apply a promo code in the window:
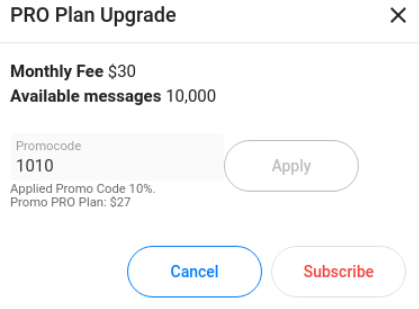
Promo code limitations
You can apply a promo code to a bot only once. The same promo code can, however, be applied to several bots in a single account (if the code is valid more than once).
Click on the "Subscribe" button to confirm your subscription. Upon pressing:
- a new record appears in the Profile->Balance History->Subscription and Renewals tab,
- a new record appears / updates in the Profile->Balance History->Subscriptions tab,
- you get an email notification,
- you get a notification in the left side menu,
- the following notification appears: “Subscription to PRO-Plan activated successfully. Payment will take place on the same day of every month. Your card / PayPal account will be charged in accordance with the terms of the PRO-plan.”
Period of subscription
The period of subscription begins from the moment you’ve pressed the Subscribe button. You will be charged every month at the end of the paid period according to the plan. Unused messages are not carried over to the next month.
For example: if you subscribed your bot on 10 July. It means that the subscription period begins on 10 July and ends on 9 August. On 10 August you will be charged for the next period.
If the bot reaches its messages limit, the plan will be automatically upgraded to the higher one. The fee difference will be deducted from the bot owner’s balance.
Any changes you make to your plan will take effect starting from the period following the change.
The tab of a PRO-Bot:
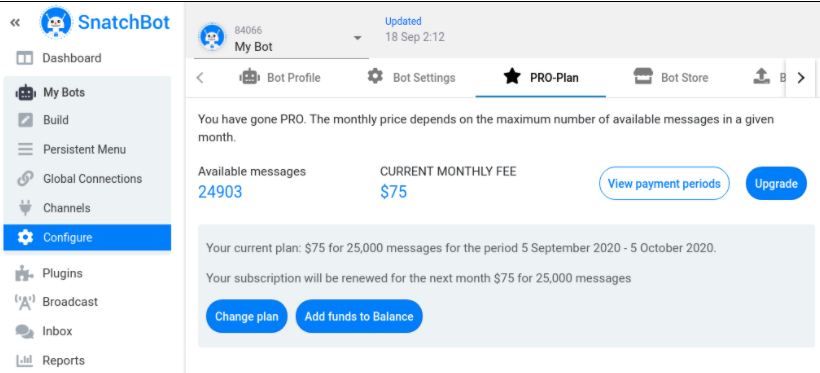
Available messages - the number of available PRO-messages.
Embedded videos and audio tracks are not considered as separate messages and do not affect the number of PRO-messages.
View Payment periods: view the subscription data about the current and next periods.
Upgrade - change the plan for the current paid period. Use it, in case you decide to upgrade it during the current paid period (before the next payment date). You will only pay the difference between your existing tariff and a new one. You can apply a promo code if you have not done so yet.
Using this button you can only improve the plan (set a larger amount of messages). Changes will take effect immediately. You will be charged right away, as well.
If you ran out of the PRO-messages before the end of the paid period, then the plan will be upgraded automatically.
Add funds to balance: to add funds enter an amount in the pop-up window ($1-1000000) and select a payment method. You will be redirected to the payment system, where you have to make a transaction. Then, your funds will get to your SnatchBot account and you can assign it to PRO-Plans.
Change plan: change the plan for the next paid period.
Change plan
You can select any plan (smaller or bigger) except the current one. Also, you can cancel your subscription here. All the changes will take effect starting from the next period. You get an email notification when you cancel the subscription.
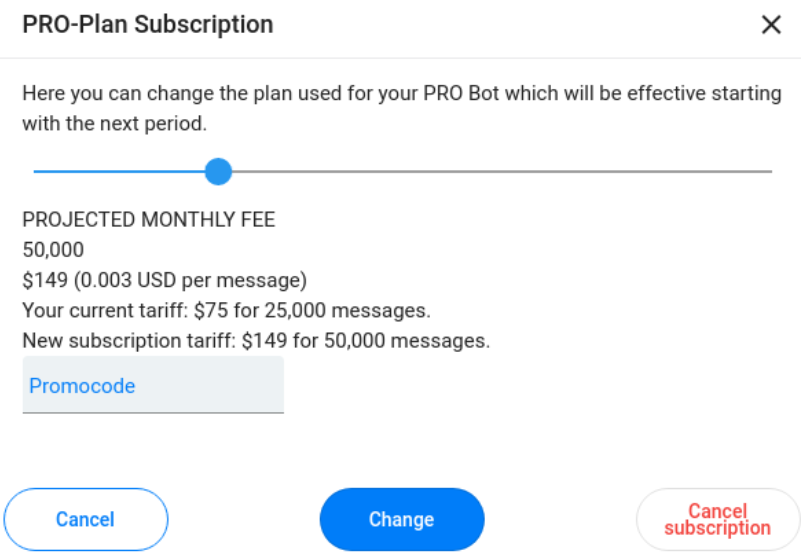
If you cancel the subscription and if you spend all the PRO-messages left in the bot before the end of the paid period, then the subscription won’t be prolonged for the current period. In this case, if you restore the subscription, then the plan will be upgraded automatically.
Bot Store
With this tab, you can publish your bots to the SnatchBot store (https://snatchbot.me/botstore/template). Check “make public” and select the categories in which your bot will be published. Your bot will be automatically placed in the “Bot Directory” category.
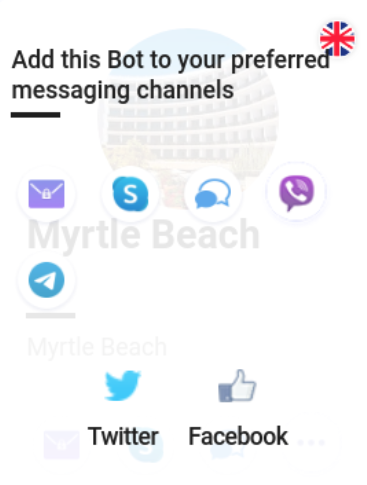
Facebook, Twitter fields - here you can enter the links to your Facebook and Twitter accounts. These links will add buttons in the Bot Store, in the bot directory, next to your bot.
Messenger Extensions
This feature allows you to integrate a bot into your website and establish a connection between your bot and Facebook.
Once you have deployed your bot on a Facebook page, you will see a Domain Whitelisting settings in the Bot Store tab.
Some features like Messenger Extensions and Checkbox Plugin require a bot to specify a domain whitelist. You can enter domain names and add them to this tab.

Below is an image of the tab with a connected Facebook page. You can enter a domain and add it:

You have an option to login a Facebook account from this tab. The Login button will appear in that event that you have published the selected bot on the Facebook channel and if you are logged out from Facebook:

Backup/Restore
With this tab you can import or export your bot:
Export: download a bot as a txt file (make a backup).
If a bot has NLP connections, NLP models must be trained before export. All NLP models will be exported too.
Before exporting, the system checks the bot for connections that lead to interactions that have been removed. They can be in the following places:
- Bot -> Build -> Interaction -> Connections (Simple / AI)
- Bot -> Build -> Interaction -> Cards -> Text / Gallery -> Button Blocks / Payment ( Successful payment / Error)
- Bot -> Global Connections (Simple / AI)
If there are such connections, you will see the next message: "You have one or more broken connections (or buttons in cards), leading to removed interactions. These connections will be ignored. Proceed?".

Go back - cancel the export option
Export - proceed with the export.
Import: upload a bot (restore). When you import a bot, all the interactions and settings of the current bot will be overwritten and cannot be restored. Because of that, you need to create a new bot or be ready to lose the current one.
If a bot has NLP connections, NLP models must be trained before export. All NLP models will be exported too. If there are connections that lead to the untrained NLP models, then you will see the error message: "Unable to export bot. You have connections that are related to untrained NLP models. Train the models and try again".
You can also import interactions from your existing bot. In general, your bot will be simply duplicated. Old interactions and settings will be overwritten and cannot be restored.
As with exporting a chatbot, the system checks the bot for broken connections.
If there are broken connections in the bot, you will see the following message:

Ok: import a bot, all broken connections will be removed.
The system also checks the bot when you copy it on the My Bots page.
Collaboration (Teammates)
In the tab, you can see the list of people who have access to the bot. You can find more information on the Collaboration feature here.
Map Settings
Here you can enter a Google Maps API key for the Collect Address interactions. To obtain the key follow the instructions on the tab.
The key applies only to the selected bot.
Go to the Profile -> Map Settings tab to apply the key to all your bots.
If you don't have a key you can upgrade your bot to PRO or activate a trial period.
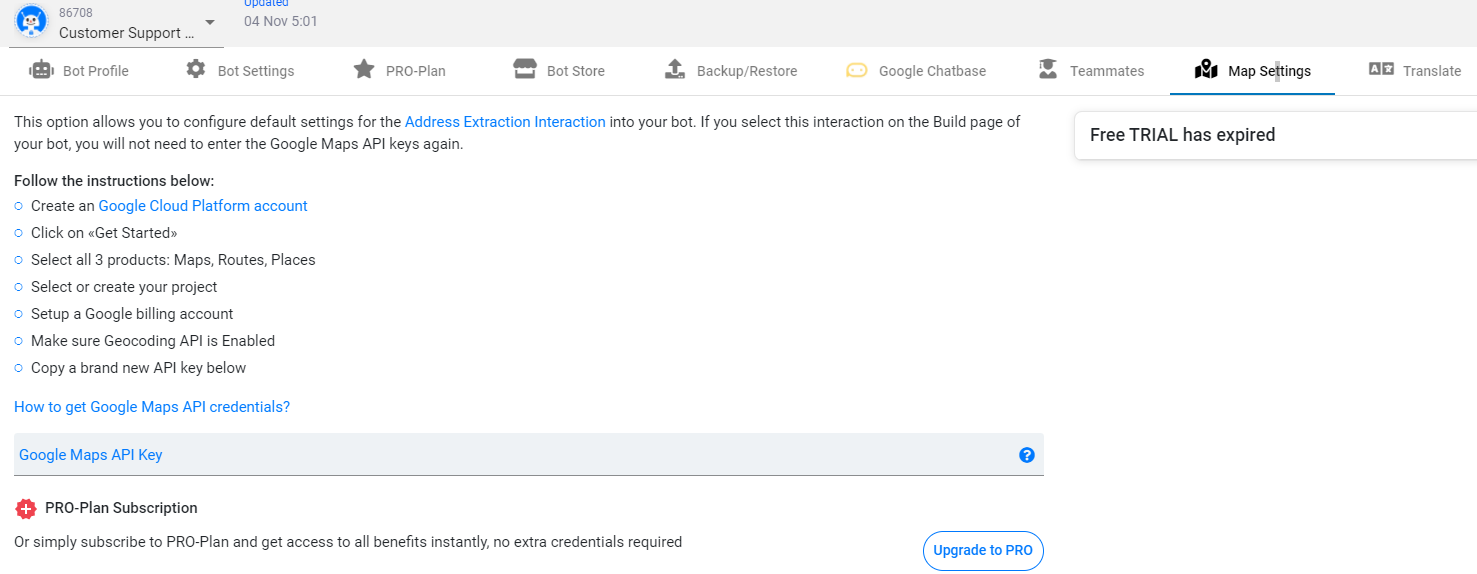
When using the Collaboration feature, the key is hidden for bot administrators. Only the chatbot owner can see the key.
Translate
Here you can enter a key for the Translation interactions. To obtain the key follow the instructions on the tab.
The key applies only to the selected bot.
Go to the Profile -> Translation Settings tab to apply the key to all your bots.
If you don't have a key you can upgrade your bot to PRO or activate a trial period.
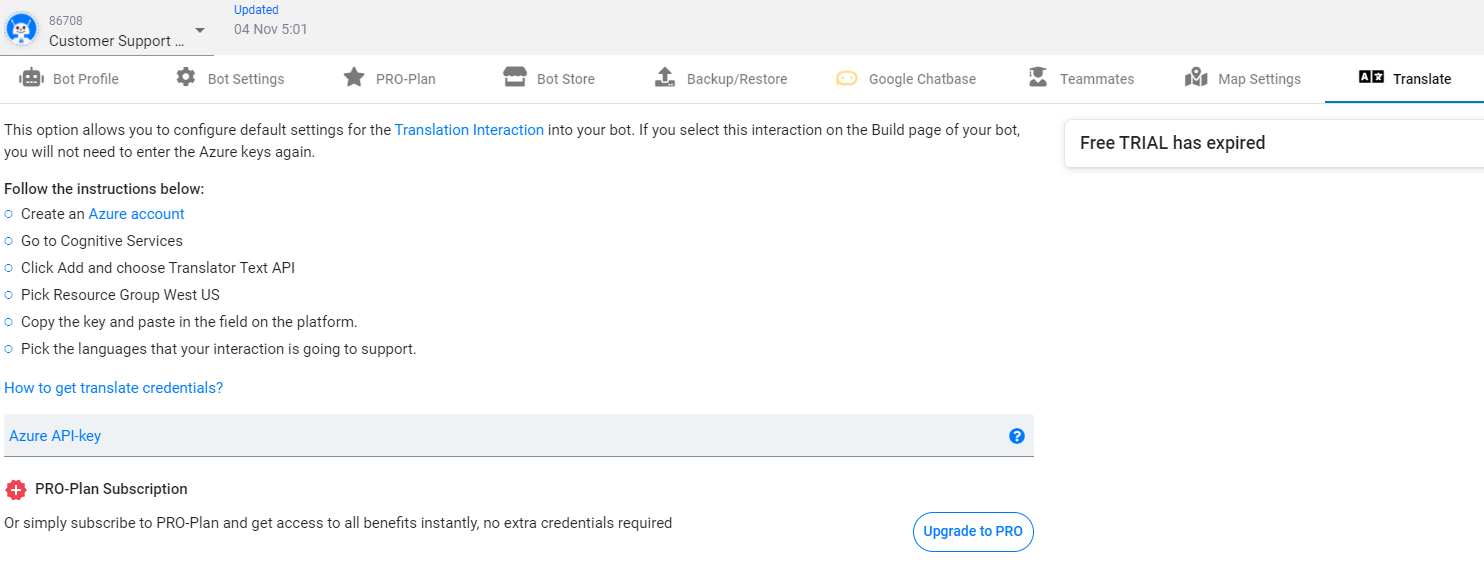
When using the Collaboration feature, the key is hidden for bot administrators. Only the chatbot owner can see and edit the key.
Watch this video tutorial ''Configure tab in the SnatchBot platform''
Updated over 3 years ago
