JSON API
Integrate your bot with API and post custom content in a chat.
This interaction provides you with the possibility to post content directly from your resources via API and/or sending data back to your server.
JSON posts can contain all elements of the interaction, such as cards, buttons, quick replies, etc.
How to add interaction
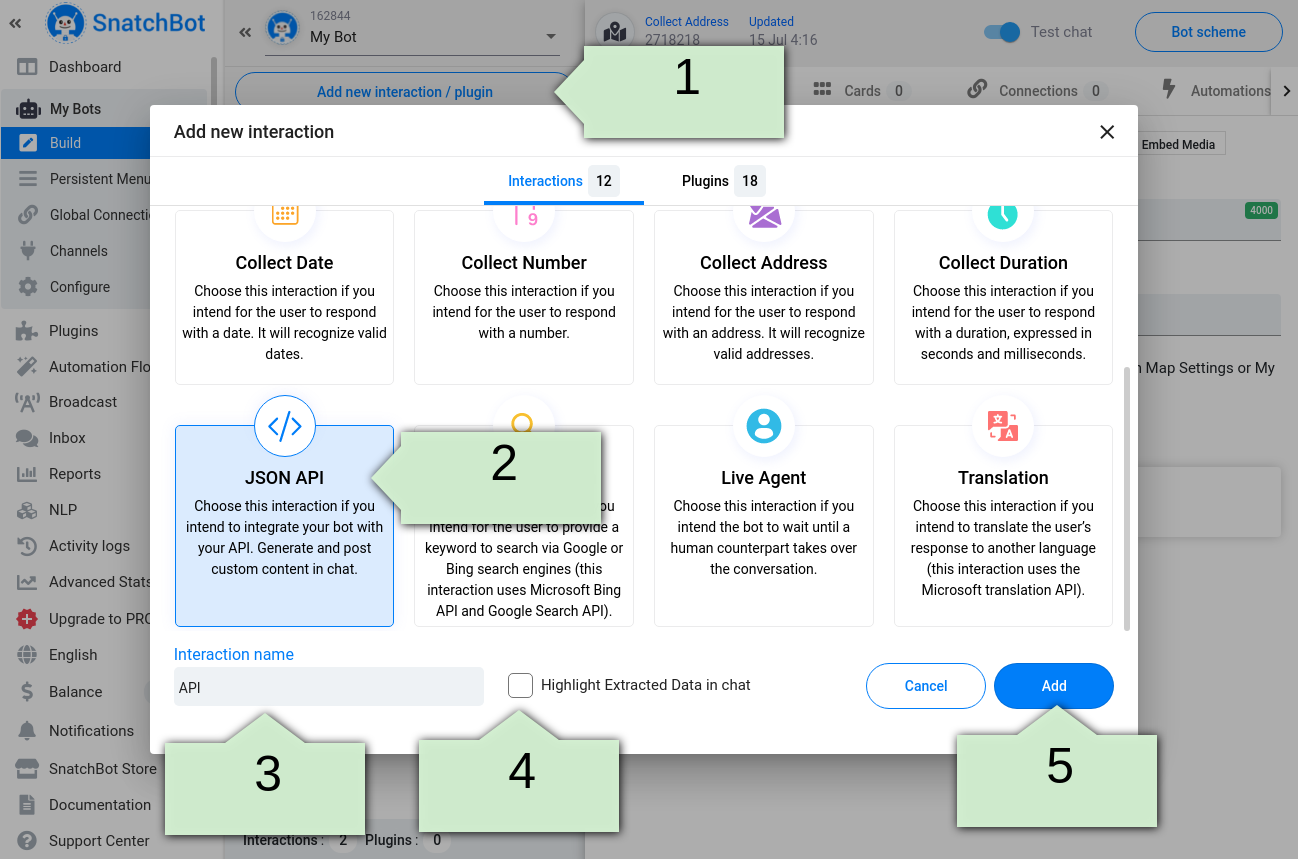
- Click Add new interaction/plugin
- Select JSON API
- Specify the interaction name, e.g. ‘API’
- (Optional) Tick Highlight Extracted data in chat for a better user experience
- Click the Add button to add the interaction to the bot’s structure:
How to set up the interaction
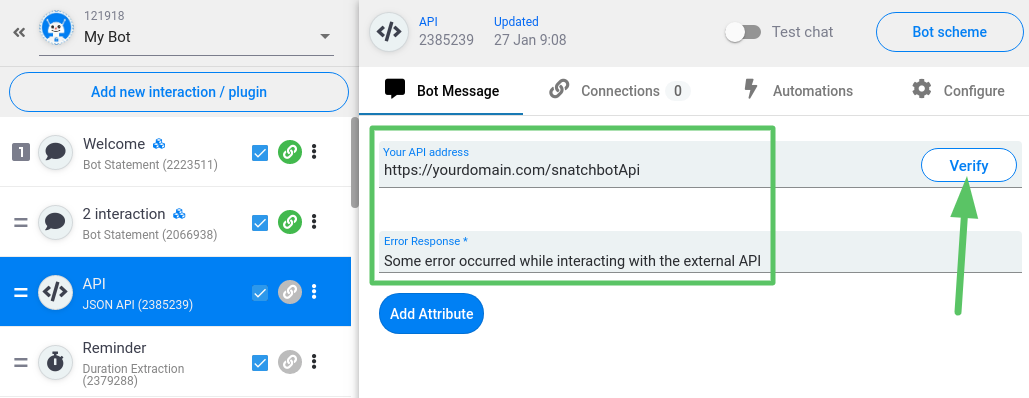
To start working with the interaction, you need to specify the URL of your API, the text of the error response and click Verify:
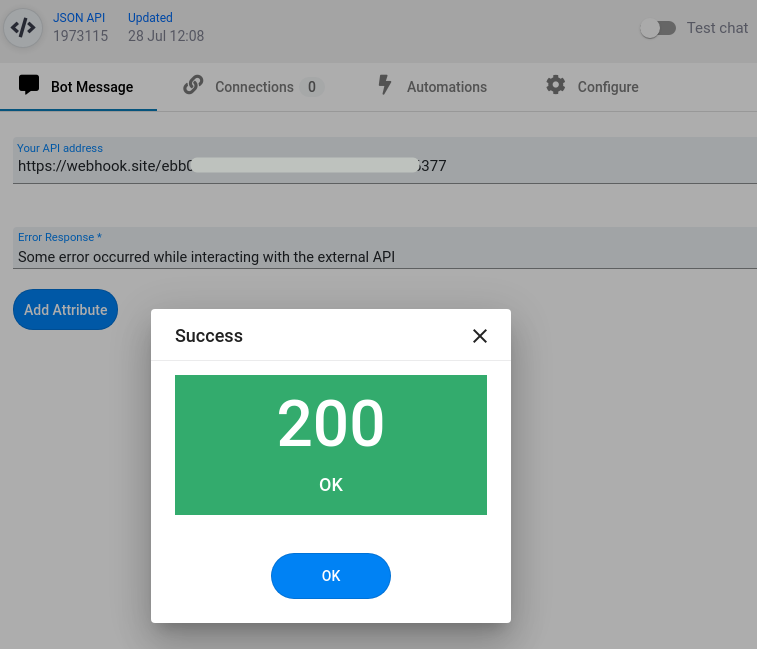
Valid API address should return status 200:
You can check your API address via a GUI platform – Postman.
Below is an example of the valid JSON structure:
{
    "user_id": "2",
    "bot_id": "1",
    "module_id": "3",
    "message": "Test Message",
    "cards": [
        {
            "type": "text",
            "value": "Test Text Card",
            "buttons": [
                {
                    "type": "url",
                    "value": "https://google.com",
                    "name": "google"
                },
                {
                    "type": "module",
                    "value": "4600",
                    "name": "Change Module"
                }
            ]
        },
        {
            "type": "image",
            "value": "http://link_on_image .png"
        },
        {
            "type": "gallery",
            "value": "gallery",
            "gallery": [
                {
                    "image": "http://link_on_image .png",
                    "heading": "Test Gallery Heading",
                    "subtitle": "Test Gallery Subtitle",
                    "url": "http://some_test_url.com",
                    "buttons": [
                        {
                            "type": "url",
                            "value": "https://google.com",
                            "name": "google"
                        },
                        {
                            "type": "module",
                            "value": "4600",
                            "name": "Change Module"
                        }
                    ]
		}
	    ]
	}
    ]
}
JSON API interaction sends a request to your API using the POST method following such a structure:
| Type | Description |
|---|---|
| bot_id | bot id (the one this interaction is connected to) |
| user_id | user id (account ID. It can be found in Activity Log) |
| module_id | interaction id (the one sending the request) |
| channel | channel type (test chat, web chat, facebook, slack, skype, API, email, SMS) |
| incoming_message | previous message sent by a user that triggered API interaction start |
Mandatory fields in requests
- bot_id
- user_id
- module_id
Are taken from the request
Once the interaction is triggered, JSON response will display your content. It must have the following structure:
| Type | Description |
|---|---|
| message | cannot be empty, contains message shown to the user. Value can be the same as supported by all other interaction types (initial response or error specified in the Error Response field) |
| suggested_replies | quick reply buttons like in other interactions |
| blocked_input | locks user’s input in the chat. The user can only use cards and quick reply buttons to interact with the bot. Can be true (user input locked) or false (not locked) |
| cards | each card has type and value attributes |
Cards in JSON API
The response can contain Cards. There are four types of cards supported by the SnatchBot platform: text card, image card and gallery card.
- Text Card – is a card that can contain any combination of text, buttons, and input fields;
- Image Card – is a card that can contain just an image, without buttons and input fields;
- Gallery Card – is a card that can contain any combination of text, speech, images, buttons, and input fields.
- RSS Card - is a card that displays the content from the RSS feeds.
Values should be as follows:
| Value type | Description |
|---|---|
| text card | the text displayed on the card (limited to 640 characters) |
| image card | the URL of the image |
| gallery card | value has to be gallery. Each gallery is a massive of sub cards, each of them containing its set of parameters: image (the URL of the image), heading (text in gallery header, limited to 80 characters), subtitle (text under the gallery, limited to 80 characters), URL (the URL the gallery forwards to) |
| RSS card | "type": "rss", "value": "rss", "rssCard": { "imageURL": "https://rssfeed.rss", "subscribtionTitle": "Test Rss", "countStories": 2, "isReadContentInBot": true, "OneLine": false, "url": "https://snatchbot.me/rss_feed" } |
Text and Gallery cards could have buttons (each card can contain up to three buttons). Each button is a massive of JSON data with the following attributes:
- Type – button type;
- Value – content;
- Name – button’s title (limited to 20 characters).
There are four button types:
| Button type | Description |
|---|---|
| module | triggers an interaction, its id should be specified in the button type |
| URL | switches to the specified link in the button type |
| phone | triggers a phone call to the specified phone number |
| opens an email client on the device |
There are restrictions for structure of the buttons in the JSON request:
- The maximum number of buttons in a card (Text/Gallery) is 3. Other buttons will be hidden.
- The buttons of the Interactions type will be hidden if they lead to the interaction of another bot.
- The maximum length of the name of the button is 20 characters. The rest will be hidden.
Here is an example of the API implementation:
public function snatchbotAPITest()
    {
        $bot_id = $this->input->post('bot_id');
        $user_id = $this->input->post('user_id');
        $module_id = $this->input->post('module_id');
        $channel = $this->input->post('channel');
        $message = $this->input->post('incoming_message');
        $cards = [
                    [
                        'type' => 'text',
                        'value' => 'Test Text Card',
                        'buttons' => [
                            [
                                'type' => 'url',
                                'value' => 'https://google.com',
                                'name' => 'google'
                            ],
                            [
                                'type' => 'module',
                                'value' => '4600',
                                'name' => 'Change Module'
                            ]
                        ]
                    ],
                    [
                        'type' => 'image',
                        'value' => 'http://link_on_image .png'
                    ],
                    [
                        'type' => 'gallery',
                        'value' => 'gallery',
                        'gallery' => [
                            [
                                'image' => 'http://link_on_image.png',
                                'heading' => 'Test Gallery Heading',
                                'subtitle' => 'Test Gallery Subtitle',
                                'url' => 'http://some_test_url.com',
                                'buttons' => [
                                    [
                                        'type' => 'url',
                                        'value' => 'https://google.com',
                                        'name' => 'google'
                                    ],
                                    [
                                        'type' => 'module',
                                        'value' => '4600',
                                        'name' => 'Change Module'
                                    ]
                                ]

                            ]
                        ]
                    ]
                ];

        $suggestedReplies = ['Option1', 'Option2'];

        header('Content-Type: application/json');

        $response = [
                    'user_id' => $user_id,
                    'bot_id' => $bot_id,
                    'module_id' => $module_id,
                    'message' => 'Test Message',
                    'cards' => $cards,
                    'suggested_replies' => $suggestedReplies,
                    'blocked_input' => true
                ];

        echo json_encode($response);
    }
The JSON API interaction supports the following options:
- Delayed card sending;
- Switching the view mode in Gallery Cards (Grouped/In a Line);
- Adjusting settings of the TTS feature (on/off, volume, voice, etc).
For auto mode only;- “Display quick replies in one scrollable line” for quick replies in the Webchat;
- “Disable input” feature;
- Text wrapping.
Some restrictions
- It is not possible to set the TTS feature in a JSON interaction, but TTS can be part of the JSON message as well as cards, modules etc.
- Users can not subscribe/unsubscribe to RSS feed via JSON.
Attribute extraction
JSON functionality allows to extract user’s attributes and store them on your own server. To do so you have to add required attributes and wait until a user reaches JSON interaction. Then the data will be immediately sent to your server.
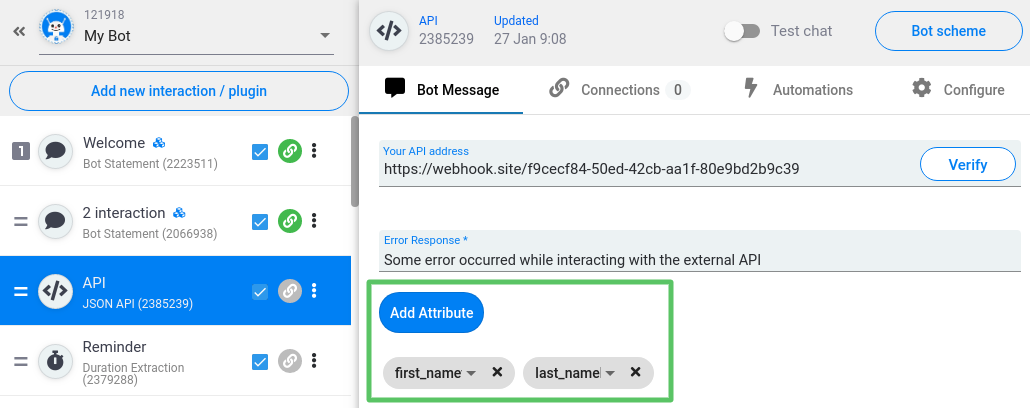
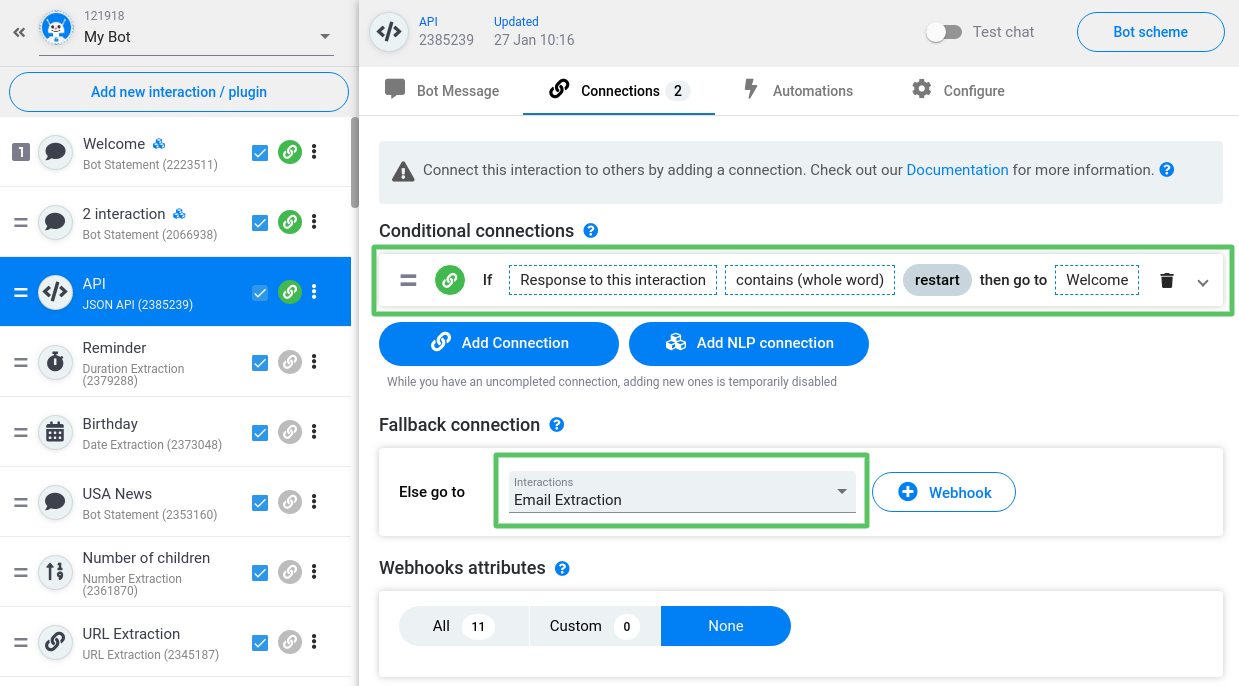
JSON API interaction can be connected to other types of interactions. For example to the Bot Statement:
Watch this video tutorial ''How to use JSON API''
Updated over 3 years ago
To illustrate how you can generate and post custom content via API, here is a demonstration of how you can create a Weather Forecast Chatbot that provides a weather forecast for a selected location and period using the API of the weather forecast web service provided by SnatchBot.
