Extended API interaction
Extended API interaction sends a request by one of the methods (GET, POST, DELETE) to a specified URL of a third-party service.
Let’s take a look at the Weather plugin.
Interactions of the “Bot Statement” type are used to get information from the user. And with the help of the interactions of the “Extended API” type, the inputted information is inserted into the necessary places in the weather service requests.
Extended API information tab
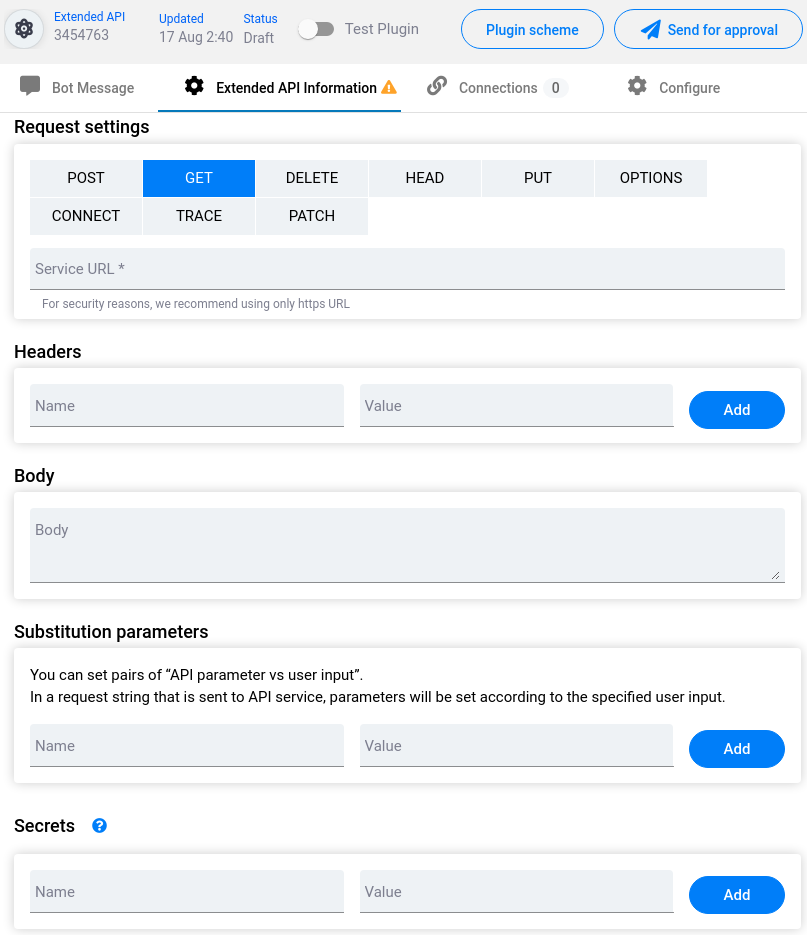
Request settings:
Method choice
Service URL - URL that is used to connect to API
Headers
Body
Note: in order to use the Response text feature in the Body field you have to use the following structure: [responseTo pluginInteraction=ID].
You can use the Extracted Data feature in the Body field, as follows: [extractedData pluginInteraction=ID].
Substitution parameters
Placeholders are necessary to replace certain words and phrases with others. E.g. in the “Weather” plugin when the user determines “Celsius”, “Fahrenheit” or “Kelvin” for measurement scales, in URL though “metric”, “imperial” or “kelvin” should be determined respectively.
- Name - the way the user introduces data.
- Value - substitute for making a request.
Secrets
Parameters that you specify in this section won't be visible to users who add this plugin into their bots. Here you can specify keys, tokens or any other data required for authorization on a 3rd-party service. You can use a specified [label] tag in URL, headers or body fields of the request that is configured within this interaction. A 'value' matching to the inputted label will replace the label in the request.
For example, you need to hide the “btc” word in the following URL:
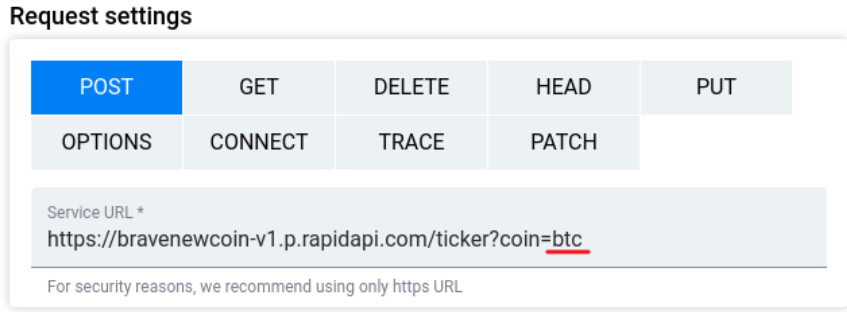
To do so, you have to enter random text instead of “btc” and enclose the text in square brackets. The URL will look like this:
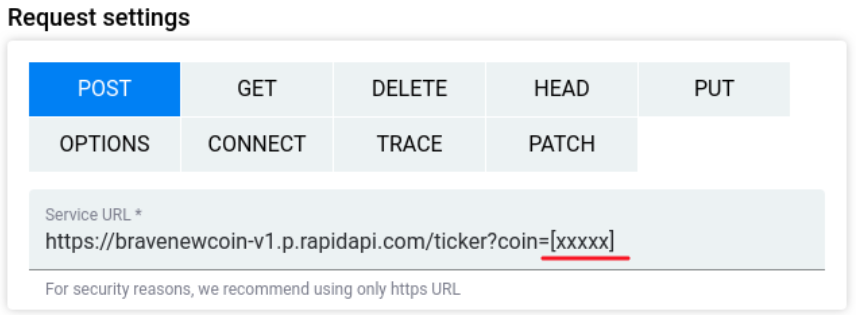
Next, you need to fill the Label and Value fields in the Secrets section:

Label - the random text from the brackets.
Value - the information, which is concealed from the Service URL field.
You can use secrets with headers and body, as well
The token will be substituted in the URL automatically, once the plugin is launched and a request is sent.
There are 2 types of tokens: default and custom.
Default Secrets are defined by the plugin creator in the Plugins→Plugin (Build). These tokens are concealed from the rest of the users. Only the plugin creator is able to edit the Service URL field and configure tokens.
Custom Secrets are defined by the users in the My Bots→Build, after adding a plugin to the bot. In this case, users are unable to edit the Service URL field, but it is possible to set up tokens. It assumes that the plugin creator has to input brackets into the URL before publishing a plugin, in order to let other users conceal the data.
An example of Extended API interaction
Let’s get an insight into the Extended API interaction in terms of API that provides information about cryptocurrency pricing:
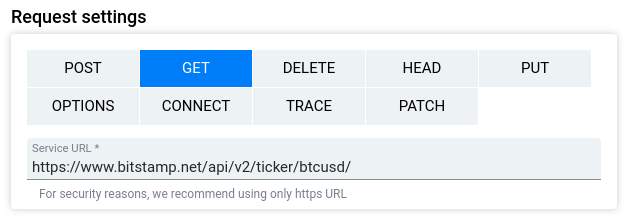
https://www.bitstamp.net/api/v2/ticker/btcusd/
- First, we need to choose the request type. Let’s choose GET query (get data).
In the “Service URL” field it is necessary to paste a link from the “Request URL” string. It can be found in API settings.
In this case Headers, Body, Placeholders, and Default Secrets can be left blank:
Some API requests require headers. In the Headers section you can set Header Parameters values, which can be seen in the documentation of the API service.
- In the Bot Message field you need to input the information that you need to receive from the API and display to the user. It can be found in the documentation of the API service. It is inputted in the following format: {{Value}}.
For example:
Extended API
1 BTC = {{last}} USD
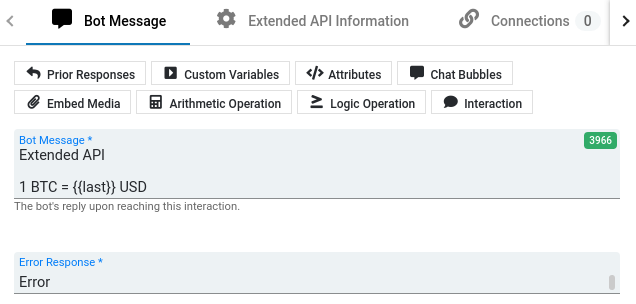
Use this structure to display all the received data: {{}}.
The structure applies both for the Bot Message and Error Response fields.
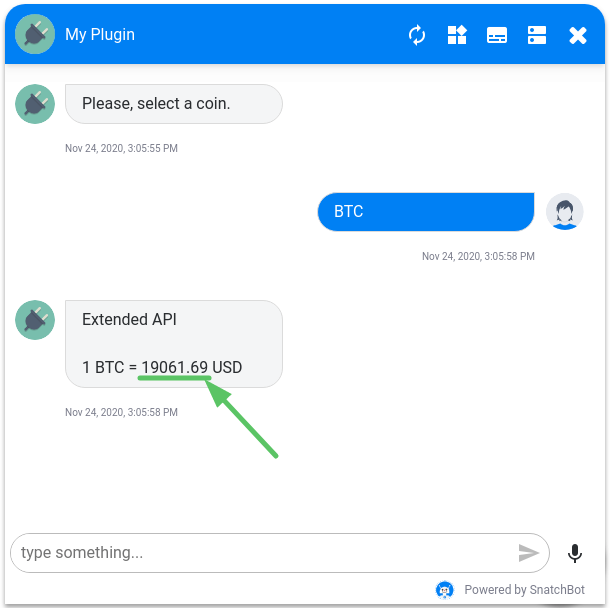
- Interaction output in Test Chat:
A more complicated example of working with data.
Parsing data from arrays.
When creating an Extended API interaction the system must process data from the array and from nested arrays as well.
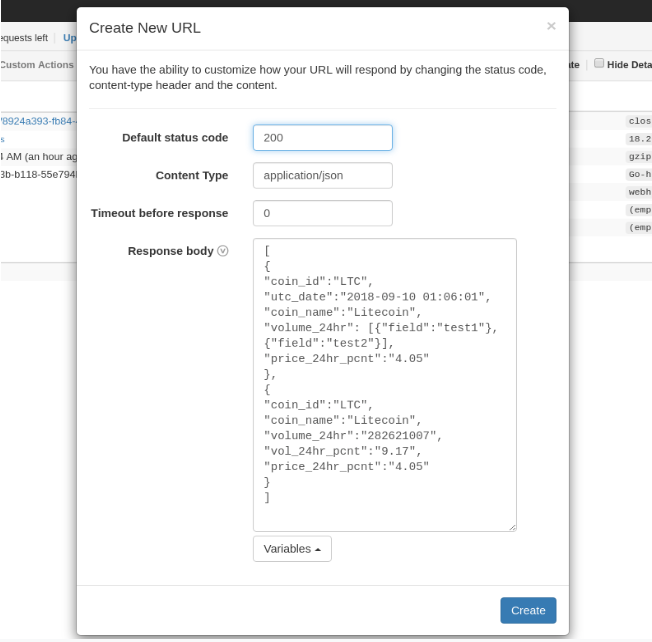
- To test this functionality one can use the resource https://webhook.site/.
To do so we create a new URL, filling the fields with the following values (you can use arbitrary names and values of the variables):
[{
"coin_id":"LTC",
"utc_date":"2018-09-10 01:06:01",
"coin_name":"Litecoin",
"volume_24hr": [
{"field":"test1"},
{"field":"test2"}
],
"price_24hr_pcnt":"4.05"
}]
Press “Create” and you have a ready-made link for testing.
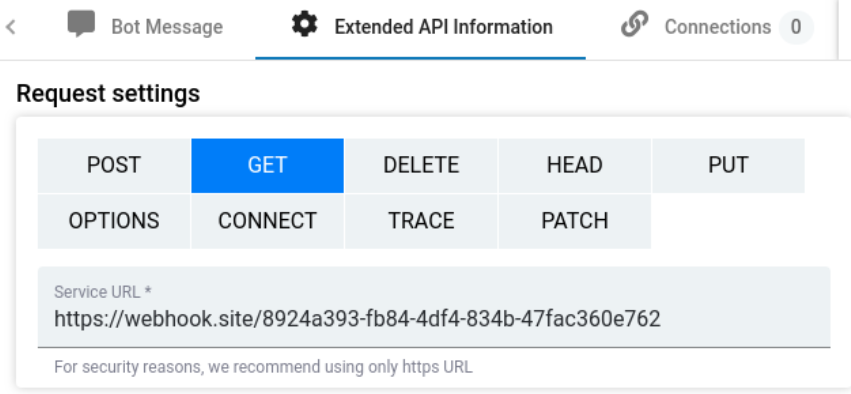
- Insert the link you’ve got in the Extended API interaction into the “Service URL” field:
- In the “Bot Message Extended API interaction” field you output the values, using the construction:
[FOR(i,val){{}}[coin_id:{val.coin_id}, coin_name:{val.coin_name},
volume_24hr: [FOR(i1,val1){val.volume_24hr}[{val1.field}]]]]
As a result, the array data (including those of the nested array) should be processed while testing and the following values reported:
coin_id:LTC, coin_name:Litecoin,
volume_24hr: test1test2
Updated over 3 years ago
