Getting Started: An Introduction
Creating your first Chatbot on the SnatchBot platform.
Registration and Authorization
To begin the process of creating your own chatbot, you'll need to register on SnatchBot's website, it only takes a moment. The platform is built with robust administrative features and uses high-grade security that complies with all regulatory mandates, so data is secure and safe.
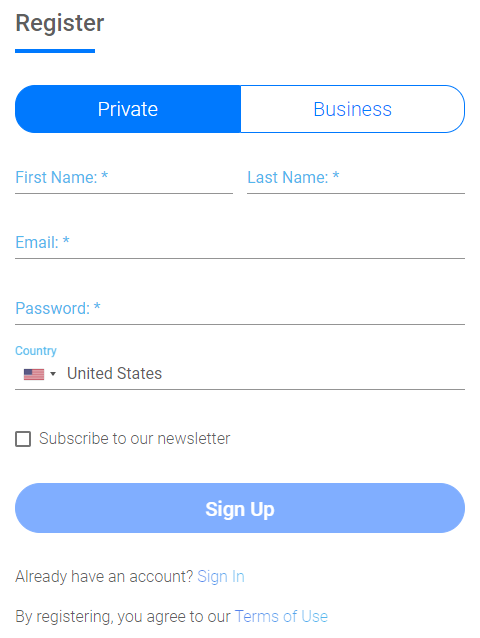
First, you need to select a type of account: Business or Private. There is no difference in functionality between these types of accounts.
Next, you have to enter your first and last name, an email address, and create a password.
The password must be at least 6 characters long and contain at least one uppercase letter, a lowercase letter, and a number. It cannot contain spaces. You can only use letters (A-Z), numbers (0-9) and special symbols.
Once the verification process and registration is complete, you'll be able to access your Dashboard. To proceed press Sign Up:
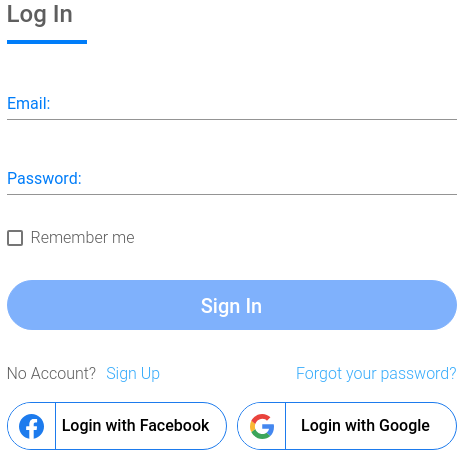
You can register and log in via a Facebook or Google account.
Next time when you need to sign in you must enter your email and password on the authorization page and press “Sign In”. If you want to remain logged in, tick “Remember me”.
Once you’re authorized you will get to the dashboard.
How to reset the password?
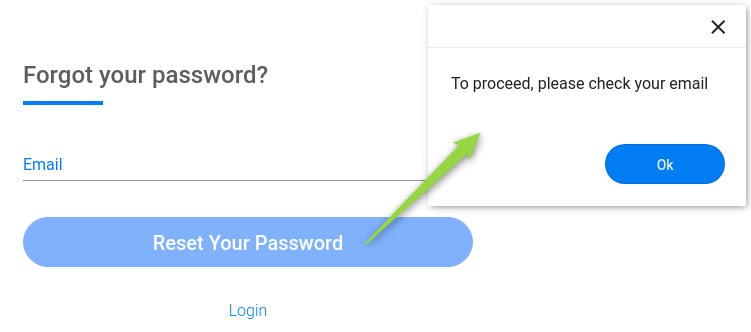
To restore your password click “Forgot your password?” on the “Login” page, enter your email address, and press “Reset your password". A message with a restore link will be sent to the email address that you gave.
Click the link and you will get to the reset password window. Enter a new password in the "Password" and "Confirm password" fields and press Reset.
Dashboard
When you log in, you will be taken to the Dashboard page. Here you will see the basic chatbot analytics such as the number of messages exchanged by your chatbots, the number of messages on each channel, and the total amount of messages:
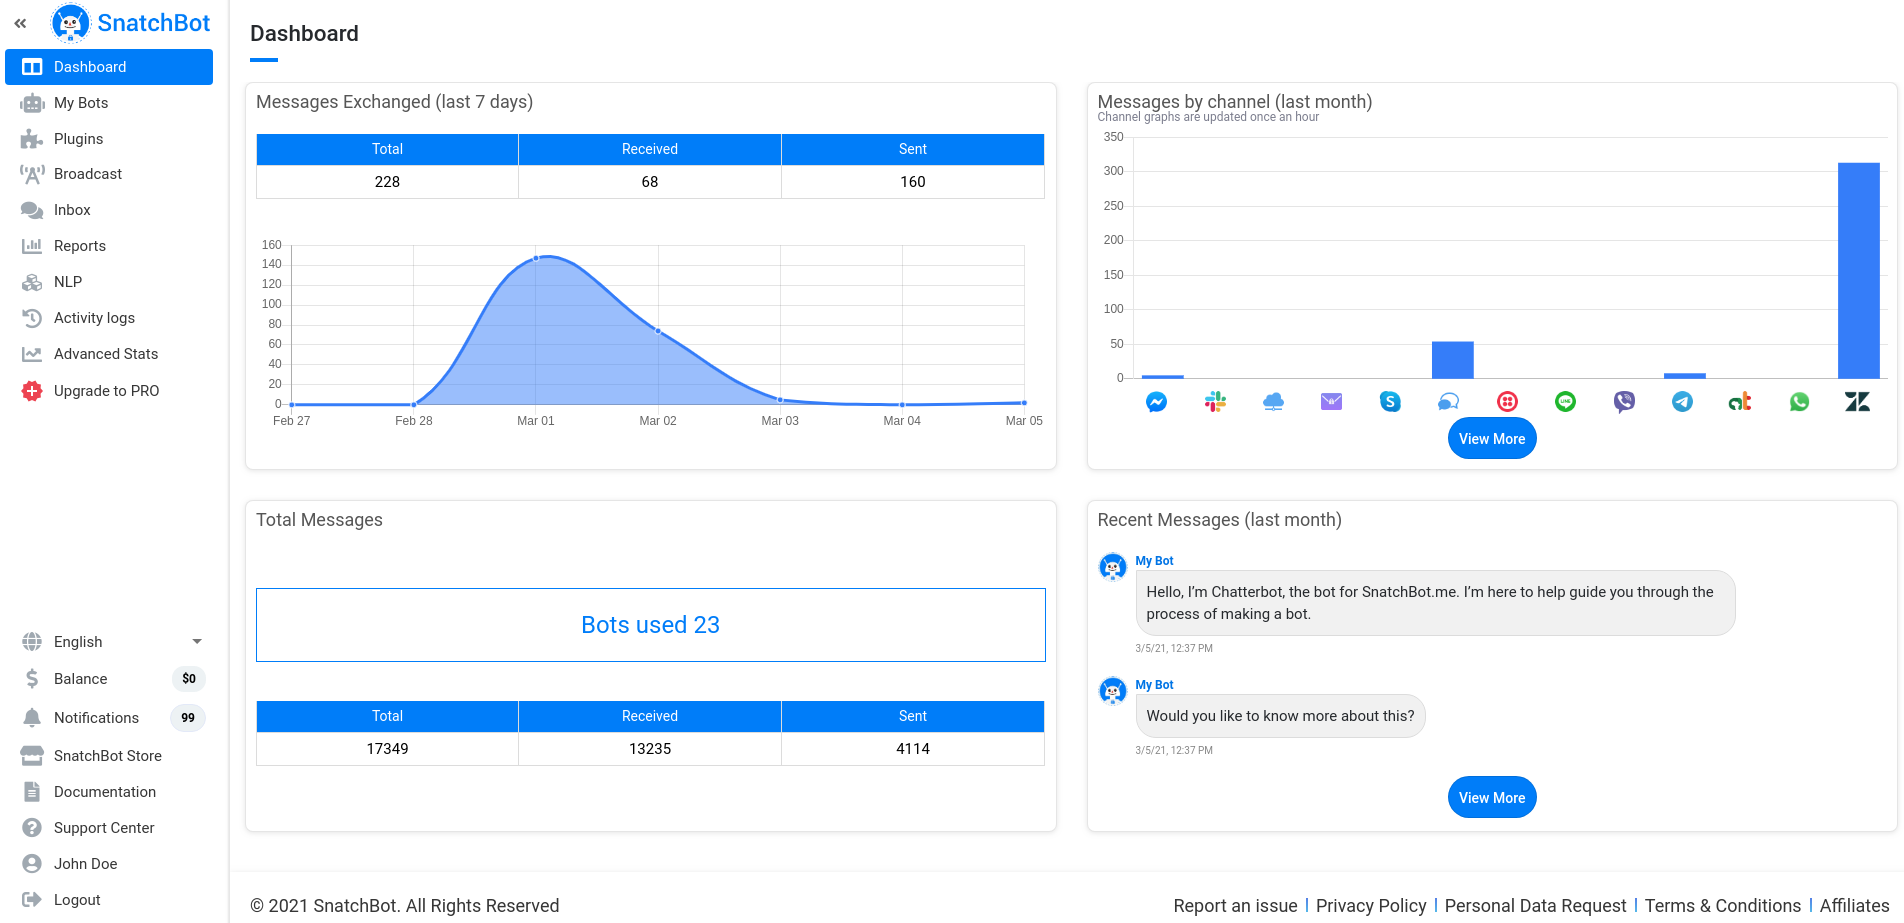
Test Chat does not affect your analytics.
Dashboard and collaboration feature
The statistics on the Dashboard page considers all the bots in your account - those that you have created and shared bots.
My Bots
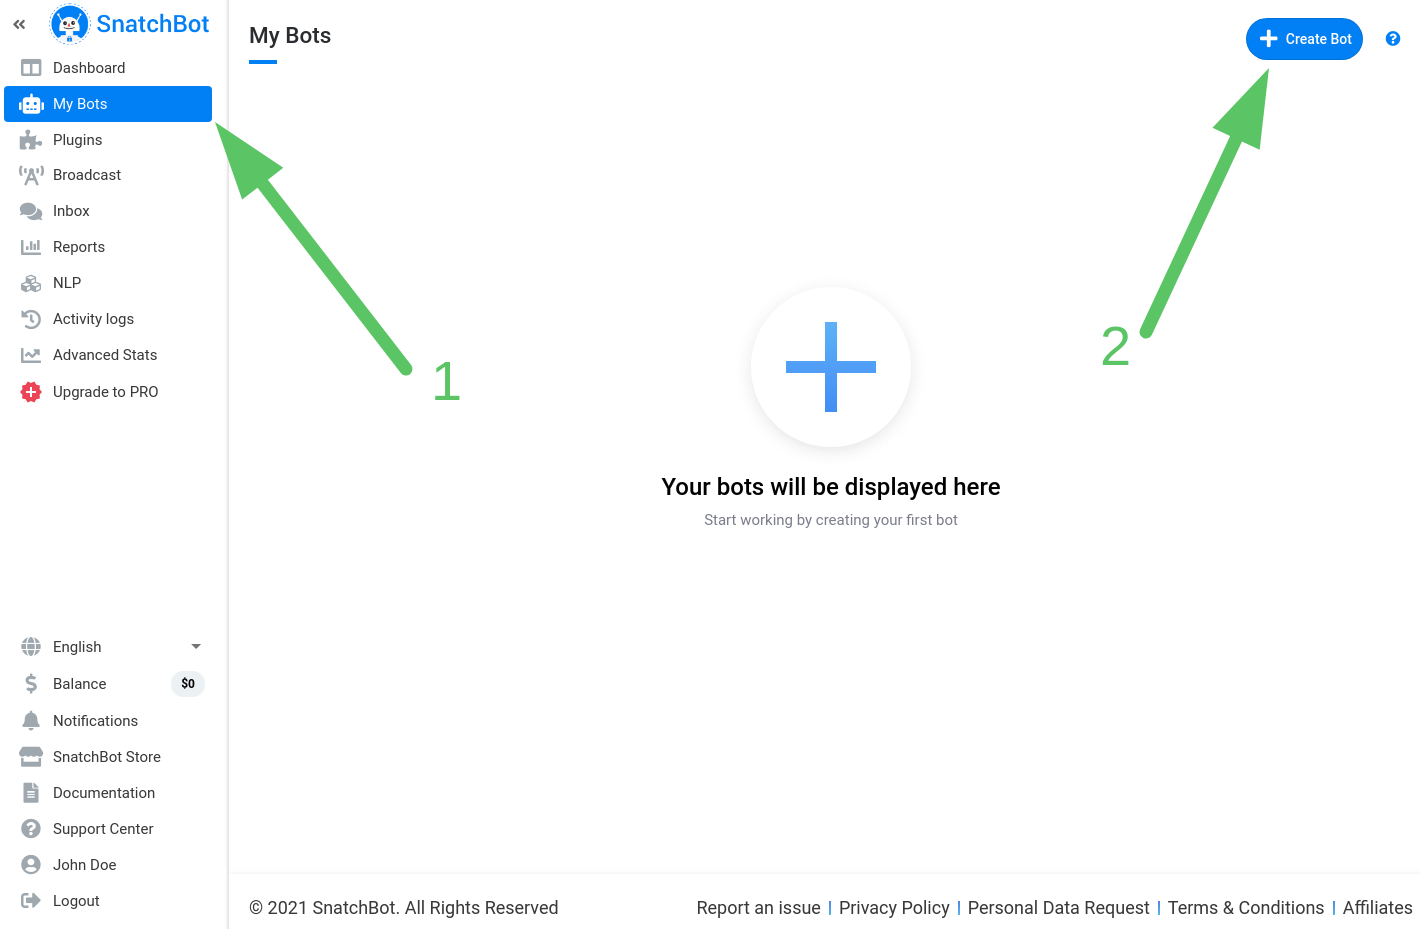
Select My Bots from the options on the left of the screen, then click the Create Bot button :
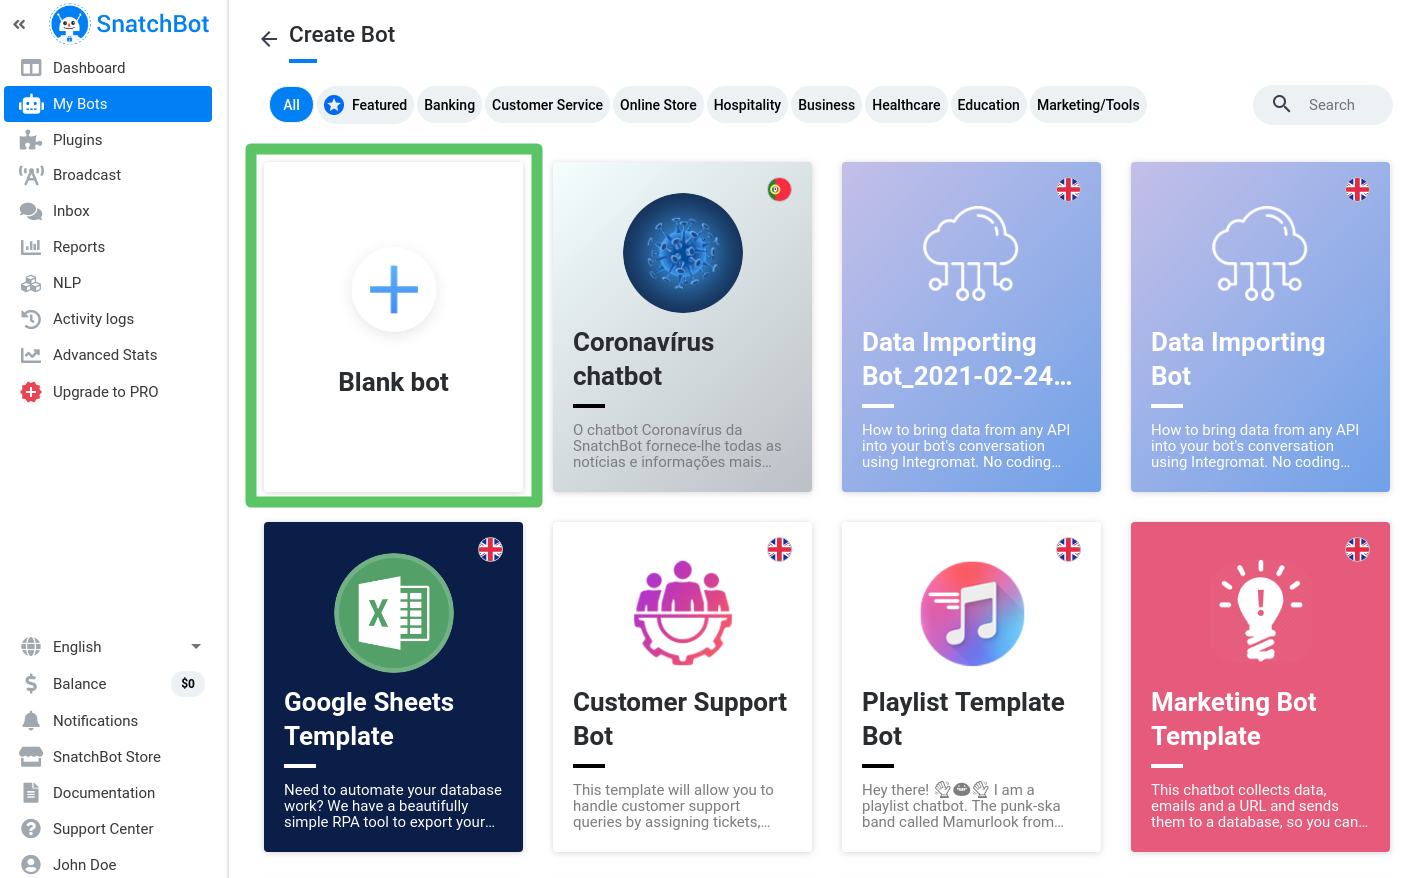
On this page, you can look through template bots, search them or filter by categories. Also, you can display featured bots for each category.
There are more than 50 templates in different themes suitable for various business targets. All template bots are completely free, you can use them right away or quickly try them in demo mode.
To create a new bot press Blank bot:
A pop-up will open for you to name your chatbot, specify the description, upload an image and choose the language of the chatbot:
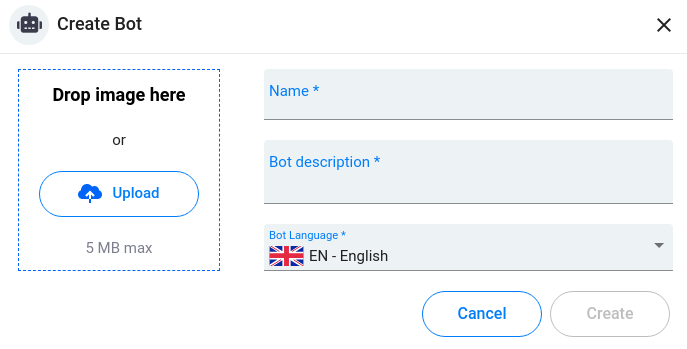
All these fields are mandatory. The chatbot’s name and description must be at least two characters.
The language of the chatbot is set by default to the language that was selected on the landing page, but it can be changed to one of 135 languages.
The chatbot language affects the followings:
- TTS language
- Customization settings in Channels->Webchat->Customize (Chat Input Placeholder, Get started, Greeting Message)
- The language of the restart command in the Persistent menu
- The language of the Restart command and the language of the default Error message (Configure->Bot Settings tab).
Complete the form for your new bot and upload an icon to be displayed to represent the chatbot. To add a bot image, press Upload and select a file or drag and drop it into the dotted area.
The image must be in jpg, jpeg, png, gif format and no larger than 5 MB.
To complete the process of creating a chatbot hit the Create button.
Build
Next, comes the real fun, your bot will communicate with users through ‘interactions’. Interactions come in a wide variety of type, which we have created so that you have a flexible and powerful range of choices for what you want the bot to do, without your needing any programming skills:
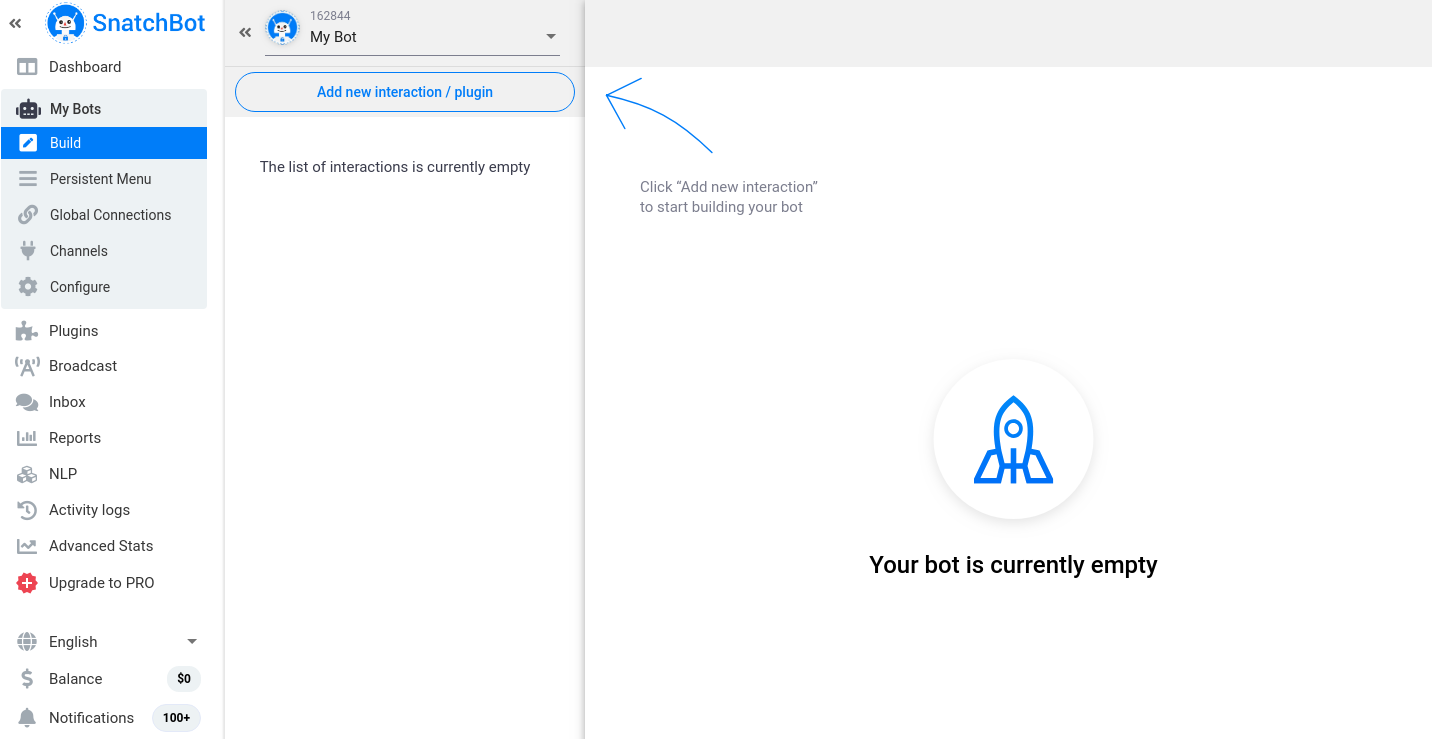
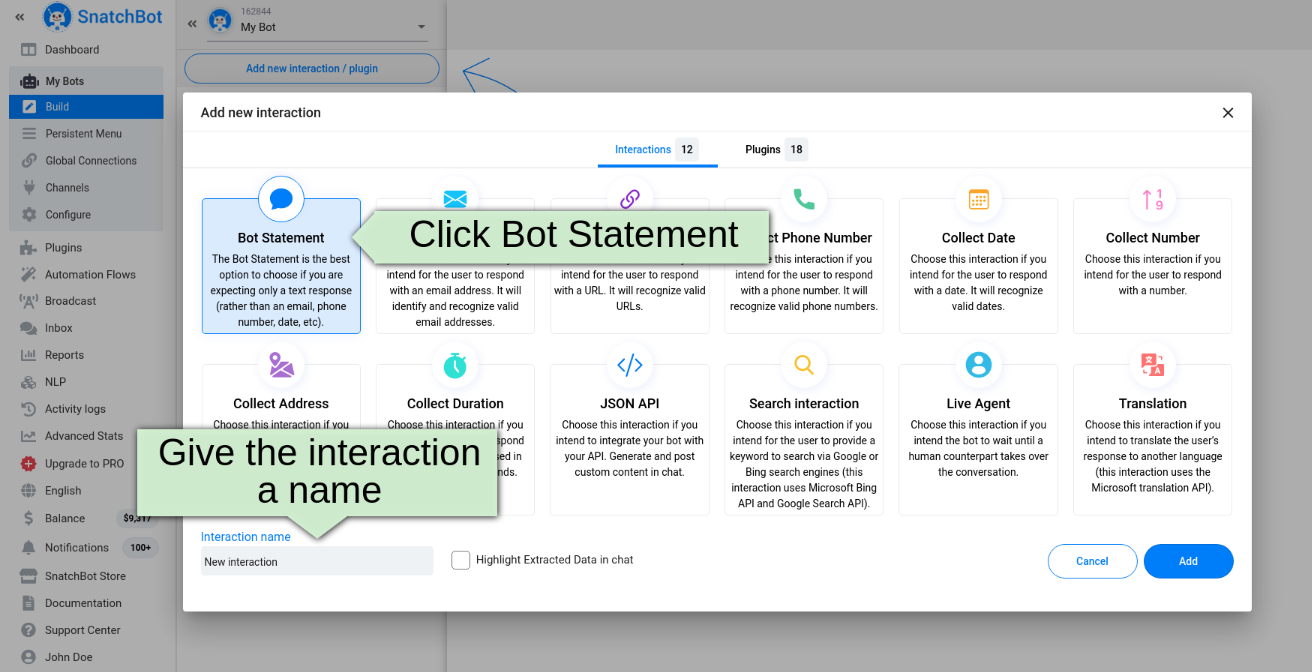
Later you will want to take advantage of the various complex functions and built-in features such as action buttons, translations, payment processing, email collection and much more. All these additional features can be added without you needing any technical knowledge. But for now click Add new interaction / plugin , choose Bot Statement and give the interaction a name:
Tip
Pick names for your interactions that will allow you to distinguish them from each other. Later, as your bot becomes more complex, you will want to be able to accurately identify the right interaction to make connections with. So, ‘Yes to email’ is better than a simple ‘Yes’.
Rename interaction
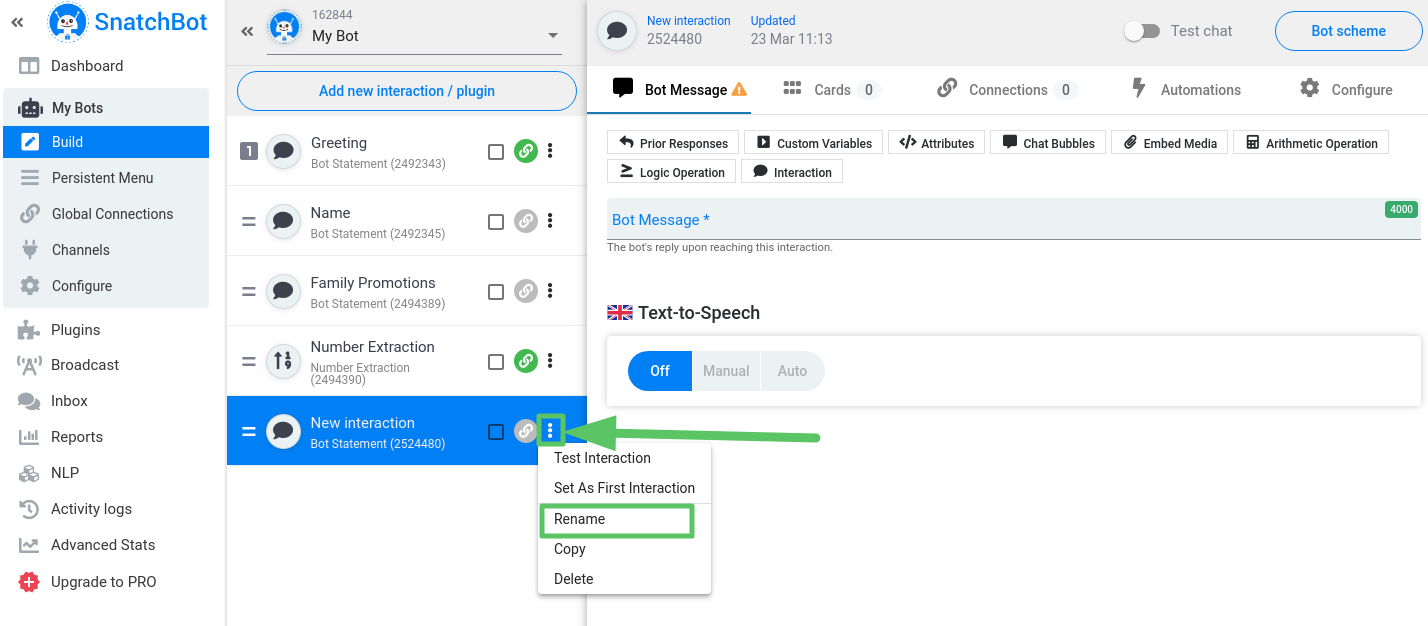
To rename an interaction click the three dots on the right-hand side of the interaction summary and select Rename. Type the new name and click the small tick to confirm the change:
Interaction settings
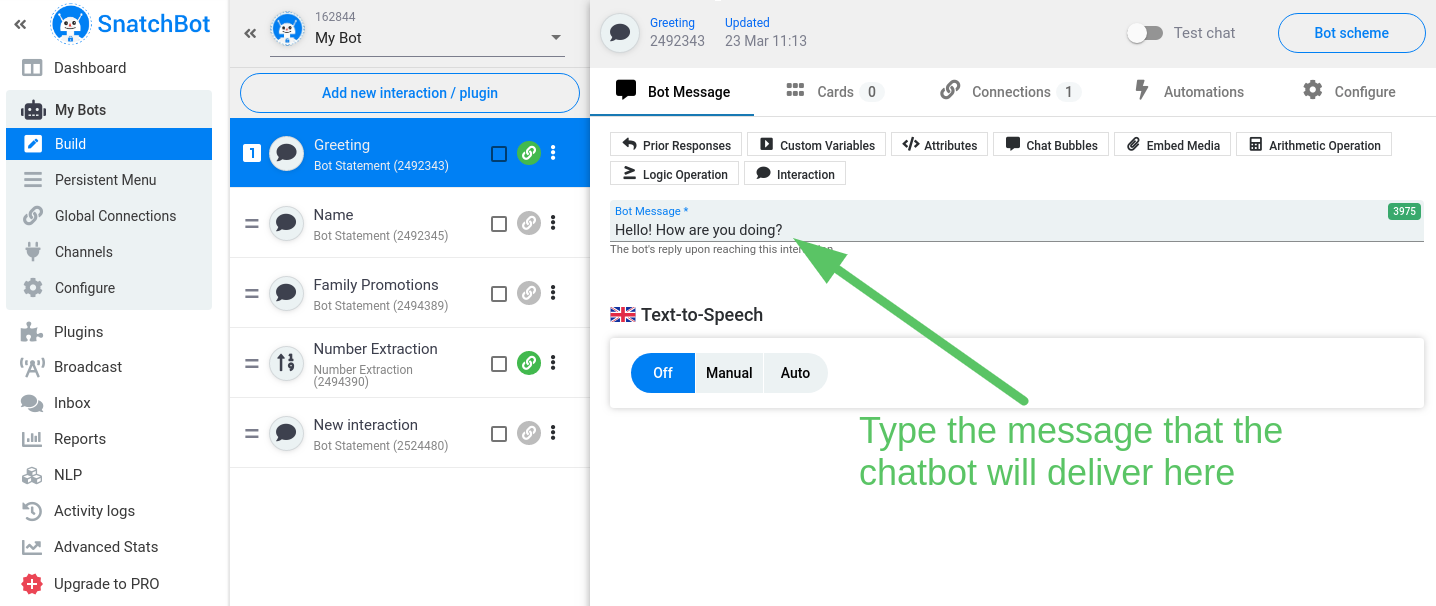
When you click on an interaction you’ll see editing tools appear on the right-hand side of the page. Start by filling in the text for the bot’s statement on reaching this interaction. For example, if this is going to be the starting interaction, your text might read: ‘Hi, I’m a chatbot for the company, would you like to talk to me about our latest offers?’:
Note
You do not need to save your bot-in-progress, it is automatically updated as you work.
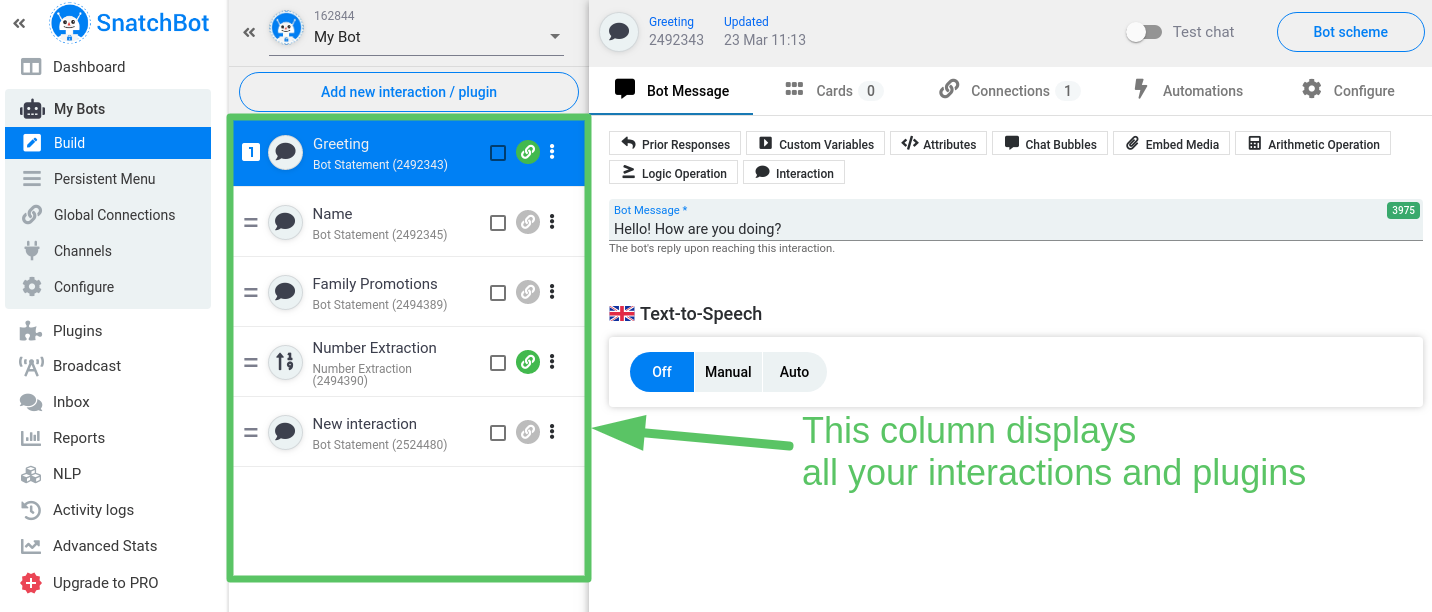
Next, you will want to make connections between the different interactions. It is very simple to do so and we’ve given you a comprehensive range of logical possibilities to allow the tree of the conversation to branch according to user responses. First, though, you’ll have to create the interactions that you intend to link to. So go ahead and create two or three more, by clicking the 'Add new interaction/plugin' button again. Of course, they will all be blank for now:
Connections
Go back to your first interaction by clicking on it. Then click Connections above the edit message area to make a connection:
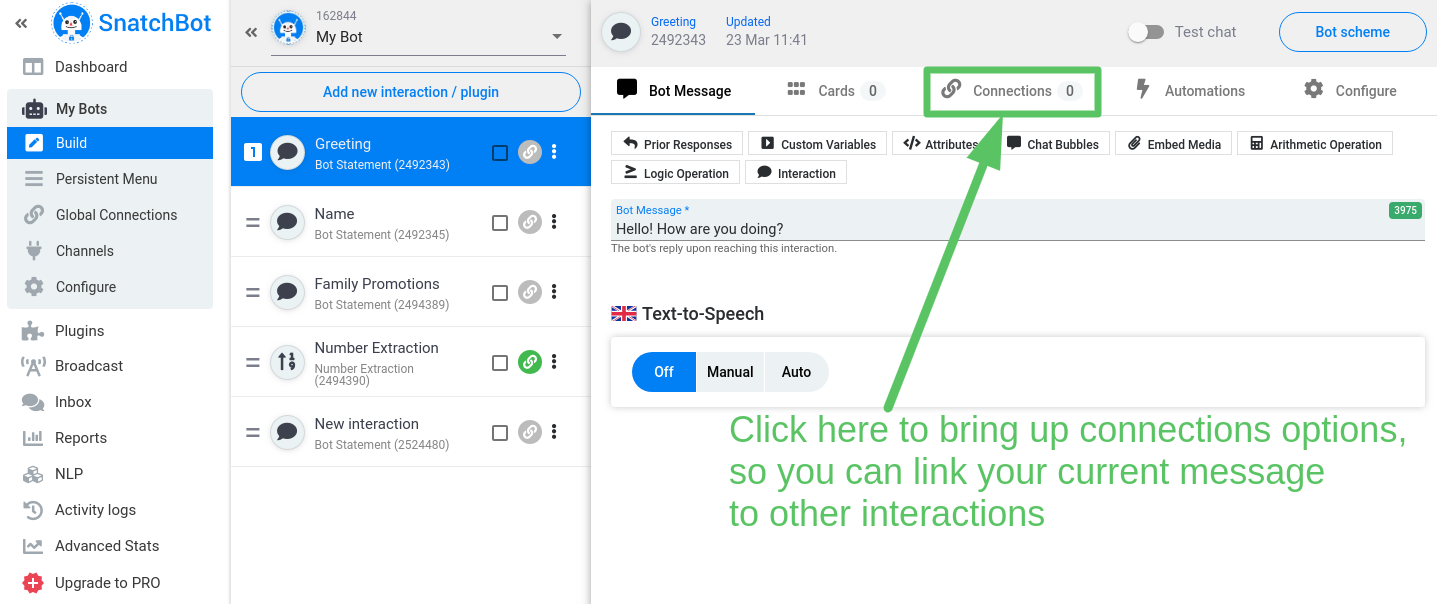
You will now see a connections page with several options. There are powerful features here, including NLP connections, Fallback and Quick Replies. Despite their sophistication, they are simple to use and you'll find documentation on them all. But for now, to get the hang of making connections between your interactions, just press Add Connection.
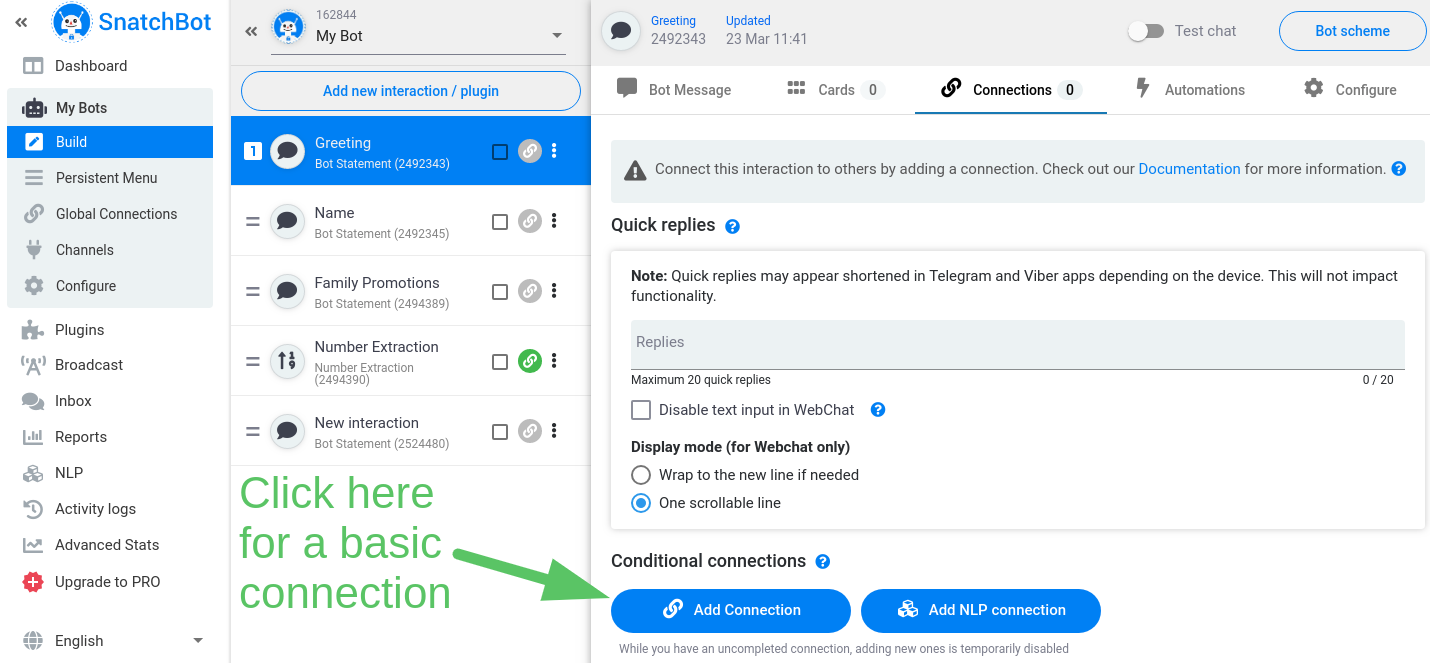
All connections take the form of a logical statement: if x then y. It’s very straightforward and intuitive and we’ve covered all the possibilities you might need. The best way to learn about your options here is to open the drop-down menus and look at what is available to you.
You can make connections on the basis of simple responses but also, by using the Exactly Matches option, you can identify particular phrases in the user’s response and make a connection to the relevant interaction.
You can also direct the conversation according to what the user hasn’t said.
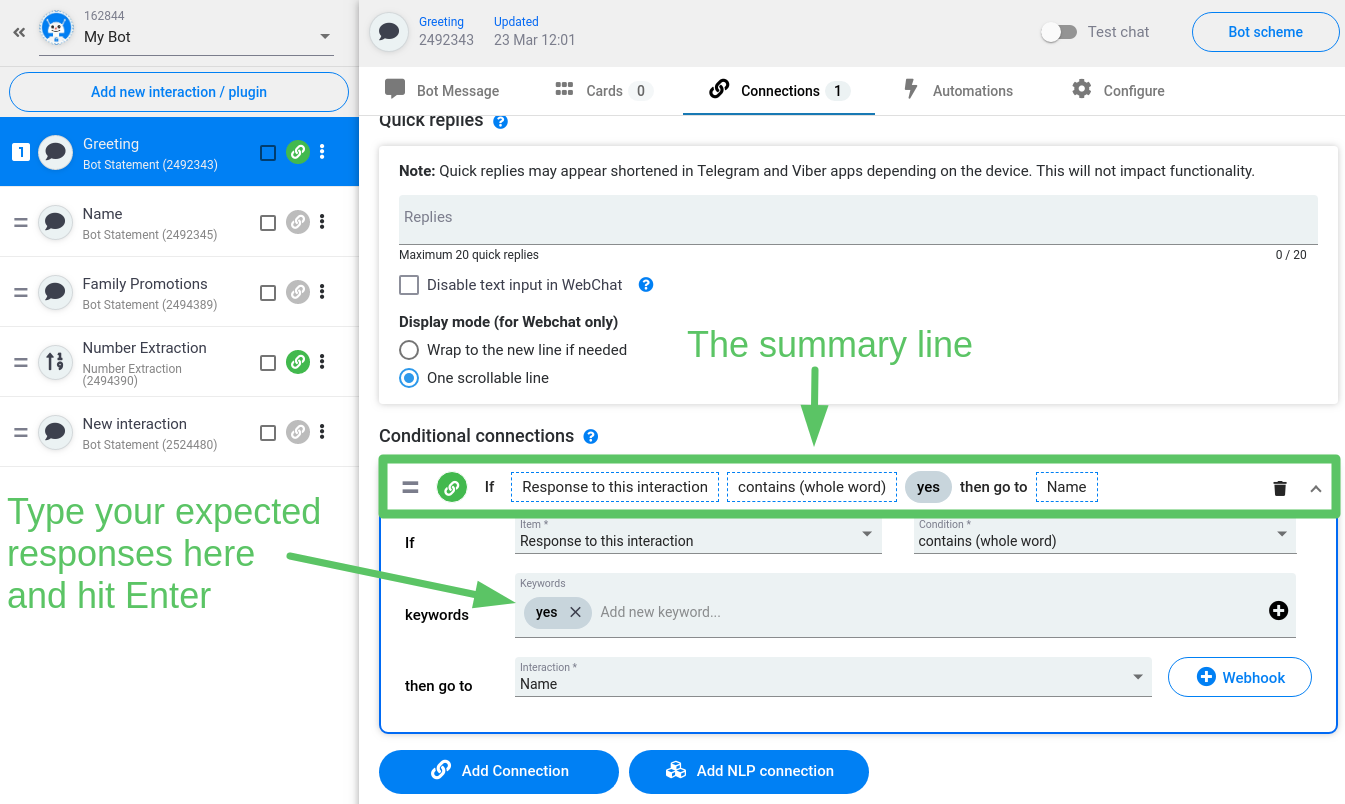
You’ll spend some time at this stage creating interactions and connecting them. For example, if your first interaction says: 'Hi, I'm a chatbot, would you like to talk to me?' then you would then create connections to other interactions, depending on whether the user's response was 'yes' or 'no'.
As you make the connection, you'll see a summary line automatically populate, informing you of the logic of your choices.
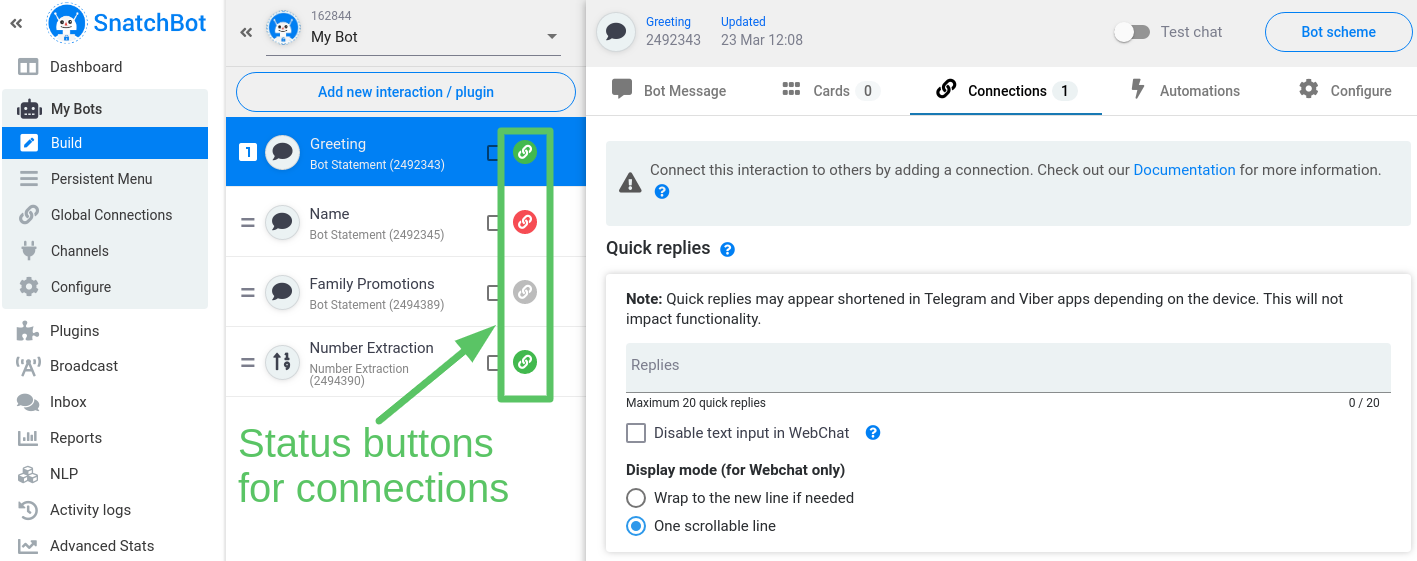
When you have made at least one connection from an interaction, the coloured button beside the interaction's name turns green. Interactions that have no connections display an orange button and interactions that are connected to an interaction that has subsequently been deleted are red (to alert you to fix this).
Test chat
As you build your bot, you’ll want to test your progress regularly. This is straightforward. The button you need is in the bottom right corner of the screen:
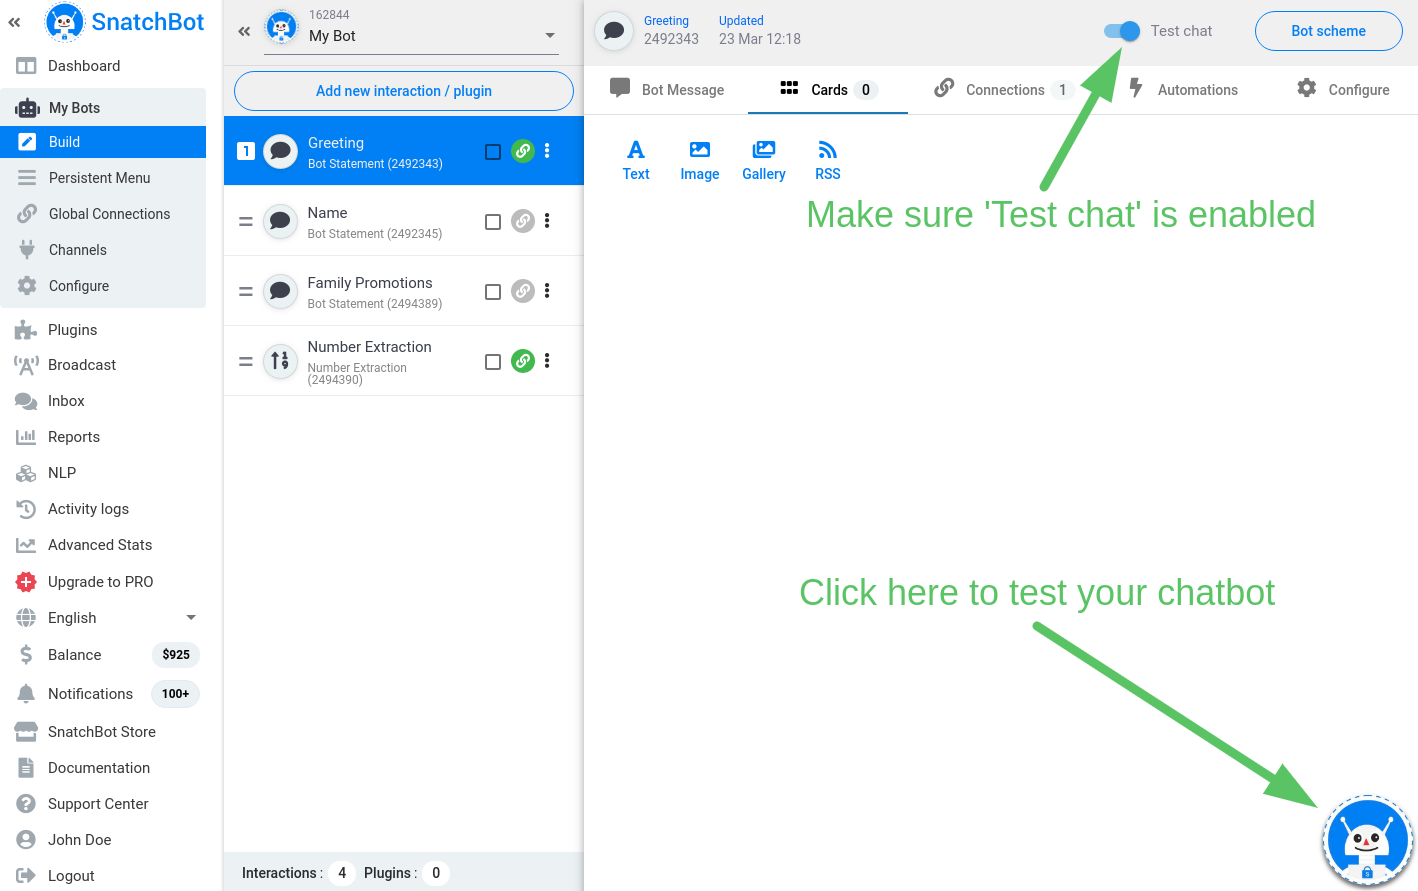
Attributes and Custom Variables in Test Chat
Note that test chat does not keep any variables or attributes - each run of the test chat works as if you are a new visitor without any previous history.
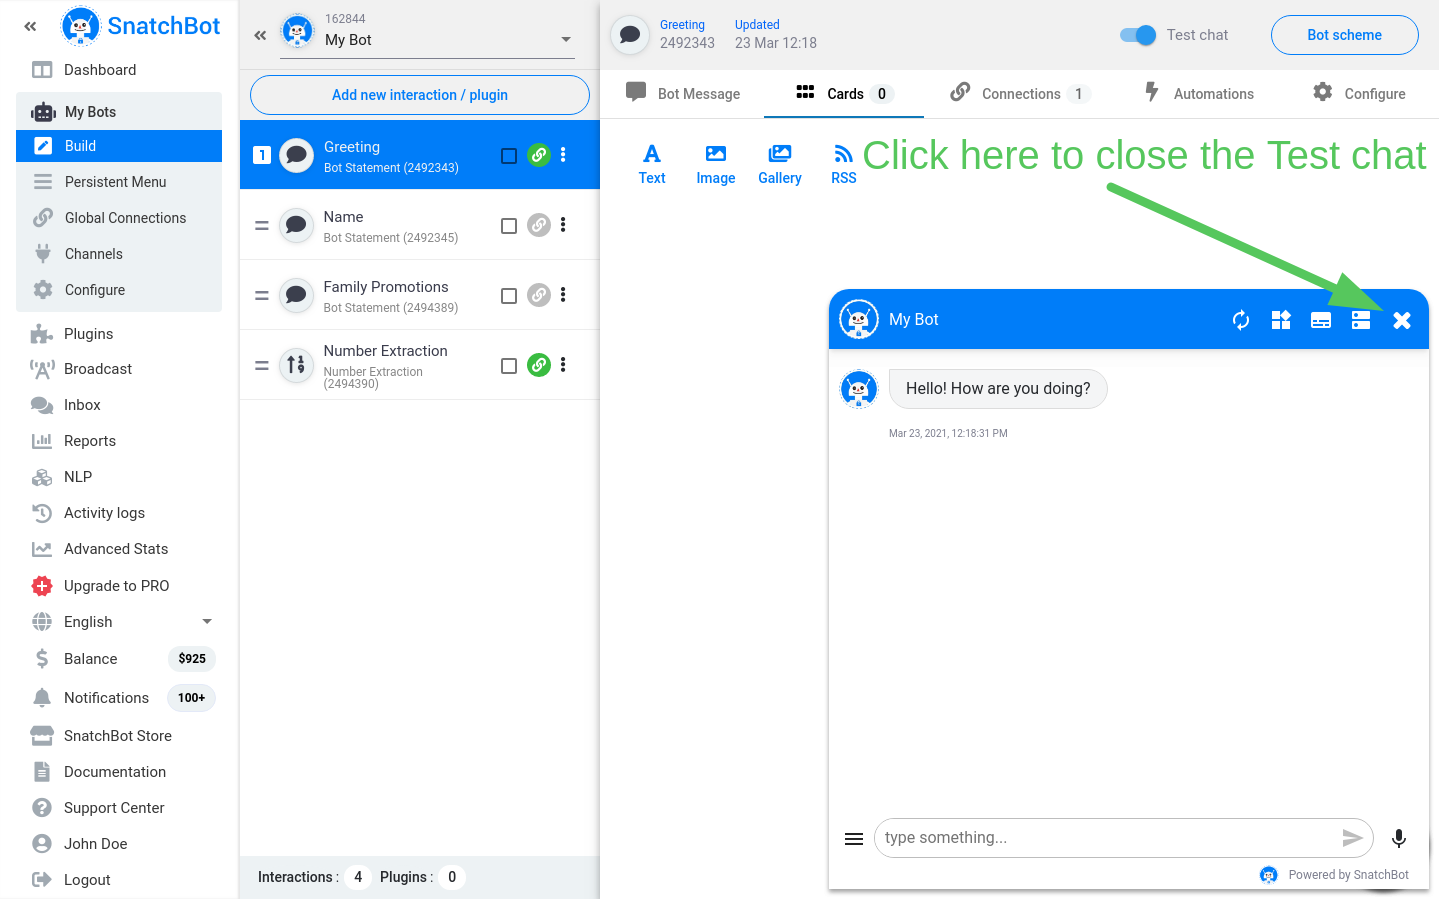
When you’ve finished the test, just click the X in the chatbox and you’ll return to your bot.
After configuring your Bot, you will want to deploy it for users to access it. We use the term channels for the platforms hosting your bot, e.g. Facebook, WhatsApp, Telegram, Email, API and Webchat.
For information about configuring your bot for a particular channel, access our guide to Connecting Channels.
You can also place your bot in an app or a web page. To learn about that, please go here.
Watch this video tutorial "Make your first chatbot with SnatchBot"
Updated about 2 years ago
