Translation
Identifies the language of the user’s messages and translates them into another language. This Interaction uses the Microsoft API translation.
This interaction is designed to provide you with the possibility to translate the text of the user’s messages to the language specified in the Translation Settings tab.
How to add interaction
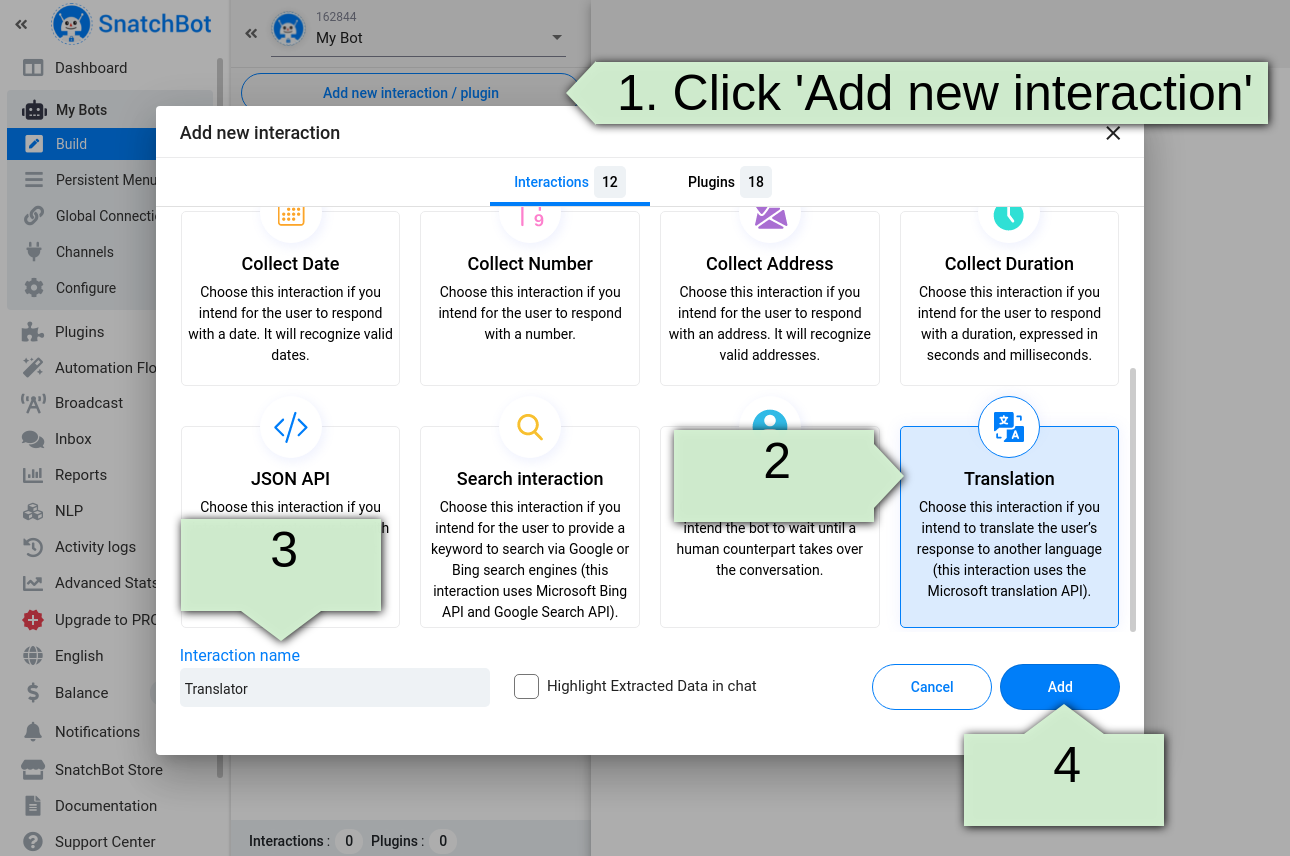
- Click Add new interaction/plugin
- Select Translation
- Specify the interaction name, e.g. ‘Translator’
- Click the Add button to add the interaction to the bot’s structure:
How to configure Translate interaction
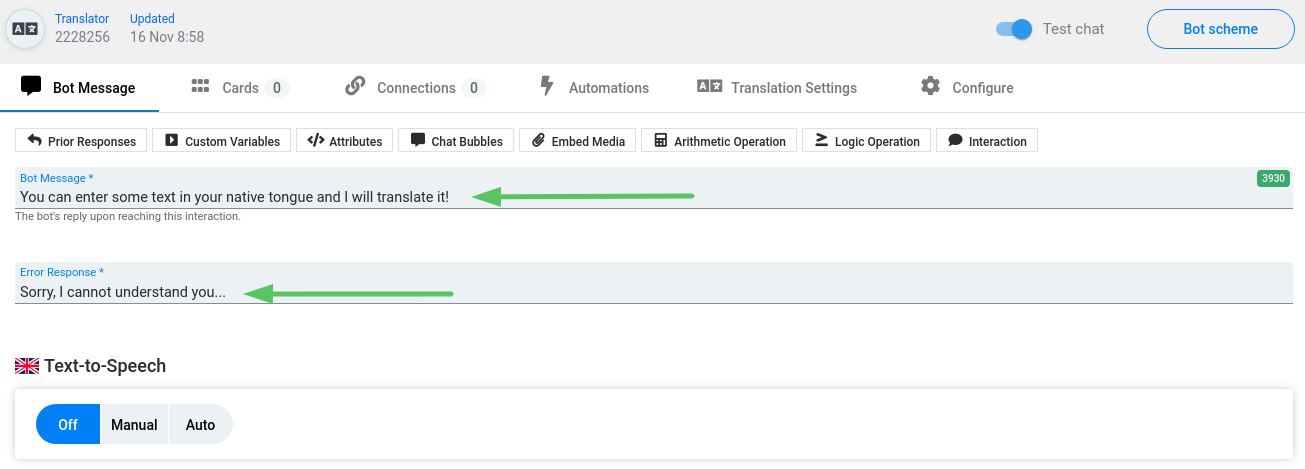
Bot Message tab
To start working with the interaction, initially you need to specify the Bot’s message as well as the text of the Error response (required field):
Translation Settings tab
You should specify translation settings in this tab.
Since this kind of interaction uses the Microsoft API translator you need to obtain an API key.
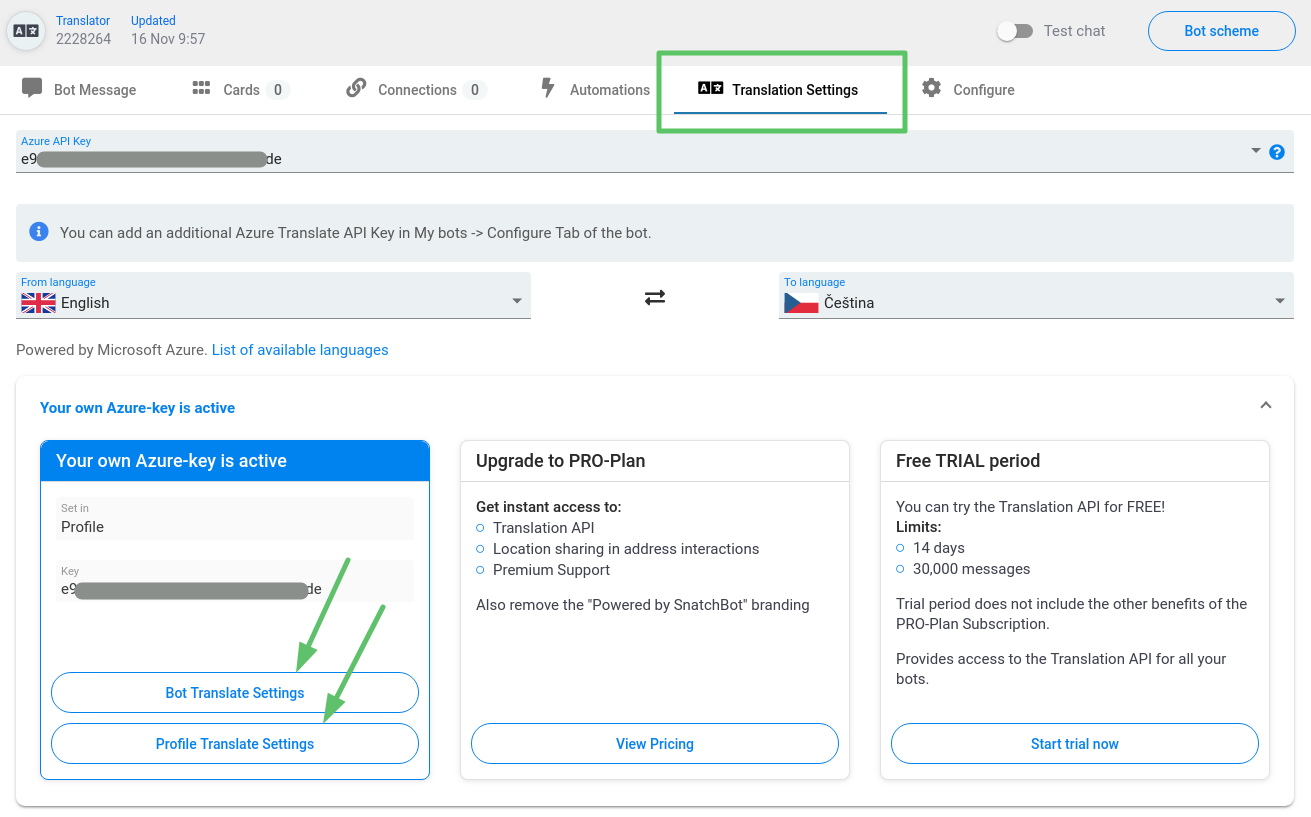
There are 3 options:
1. Use your own API key
You can enter your own API key. Click the 'Bot Translate Settings' button to open the Configure->Translate tab or press the 'Profile Translate Settings' button that redirects you to the Profile page -> Translation Settings tab. Follow the instructions in the tabs to get a key.
Once you have entered a key it will appear automatically in the Translation interaction’s Translation Settings tab.
The key from the Profile section applies for all bots in your account, but the key from the Configure tab applies only for the selected bot.
When using the Collaboration feature, keys are hidden for bot administrators. Only the chatbot owner can see the key.
2. Upgrade your bot to PRO-Plan
Bots upgraded to PRO-Plan can utilize the Translation module without the need to input an Azure service key. It is the SnatchBot system that pays for translation requests.
All other benefits granted by PRO-Plan subscription are mentioned here.
3. Start free trial
You have the option to activate the free Trial period from this tab. Free Trial gives you 30,000 free messages for 14 days. The trial applies to the Translation and Collect Address interactions, so you can use them freely without entering API keys.
A trial period can be activated only once in a single account.
The free trial does not apply to the administrator’s bots when using the Collaboration feature.
Once you have chosen one of the above options, you need to specify the language you are translating from and to in the ‘From language’ and ‘To language’ fields:

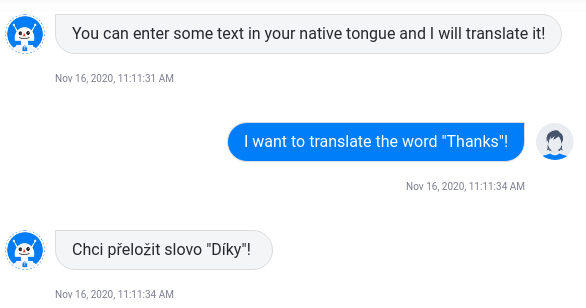
Now the interaction is ready to use. When testing your bot, you will see that the user’s response will be translated into the language specified in the ‘To language’ field:
If needed, you can connect Translation interaction to the other types of interactions. To do this, open the ‘Connections’ tab and click the ‘Add Connection’ button:
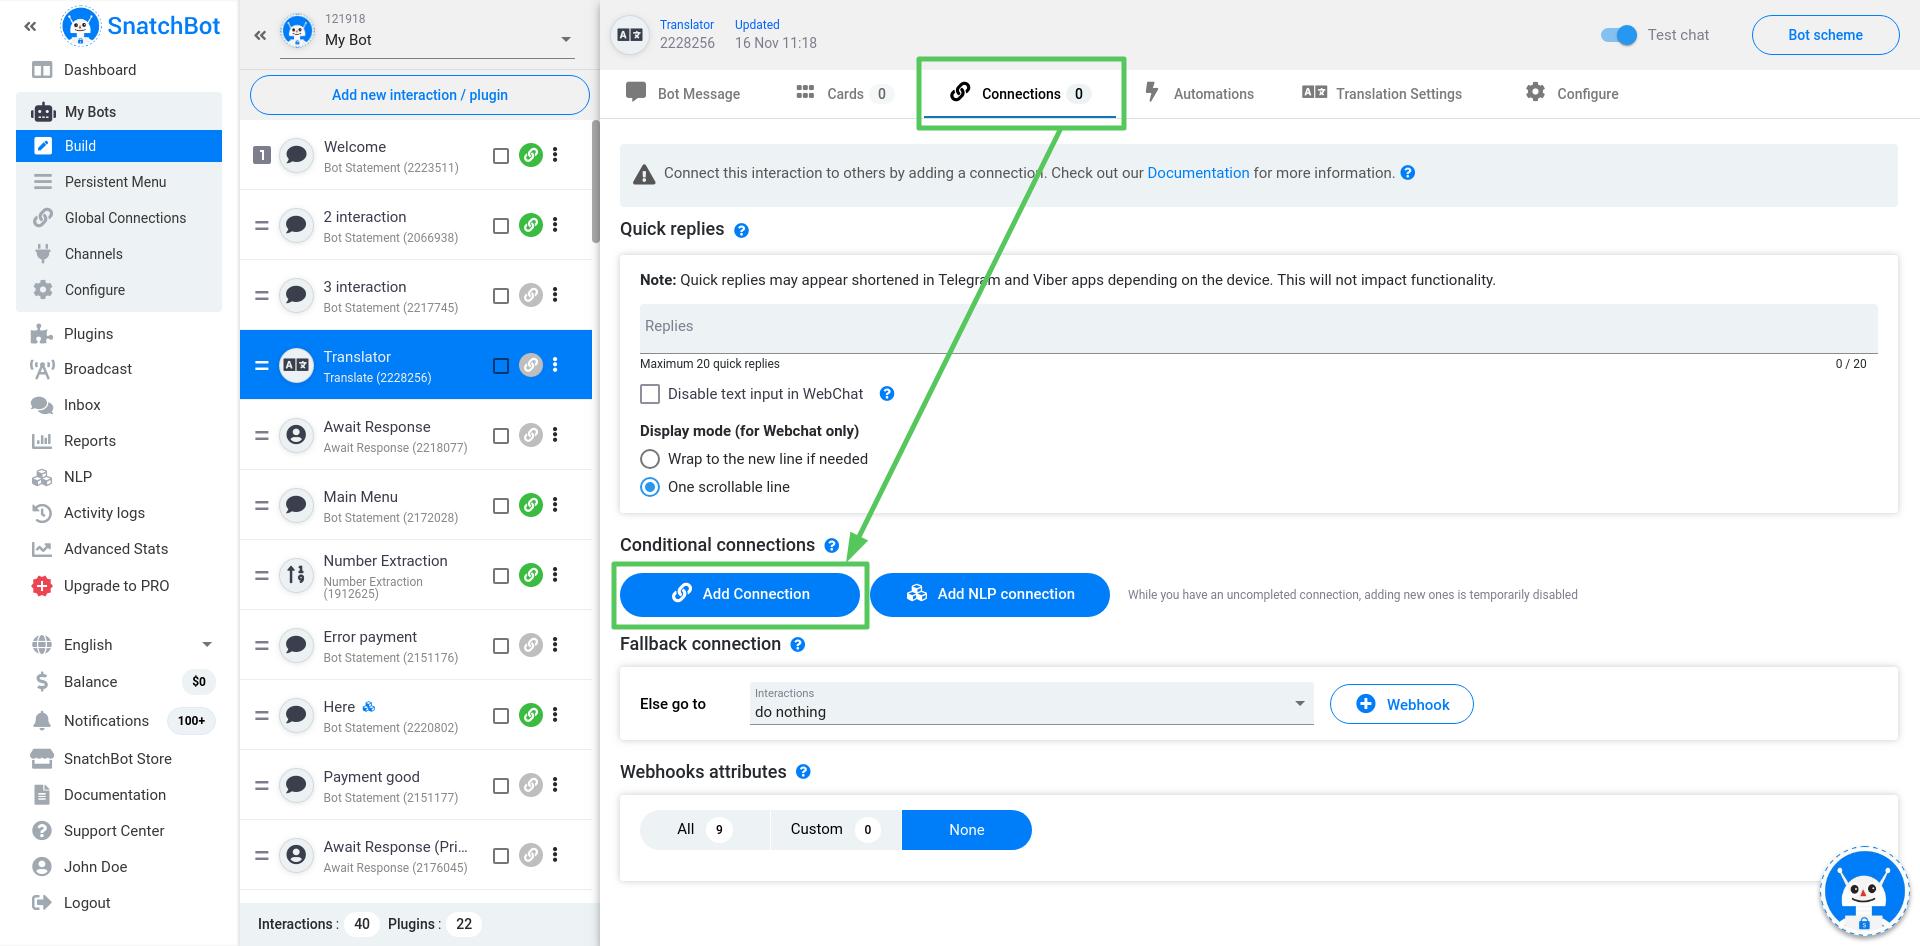
After that, you will see that Connection acts as an ‘if’ statement:

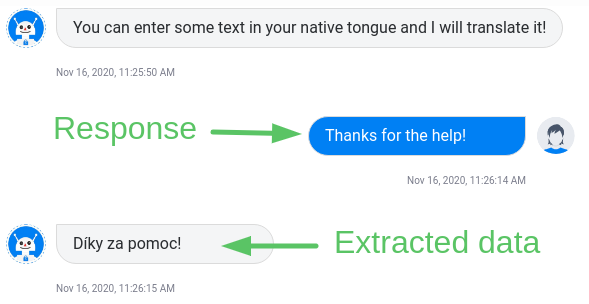
Please note that ‘Extracted data from this interaction’ is the bot’s translation and ‘Response to this interaction’ is the message that the user has entered in his or her language:
- The TTS feature is not applicable to the results of the Translation interaction.
- The system does not translate the Restart command.
Watch this video tutorial "The Translation interaction"
Updated over 3 years ago
Integrates your bot with API. Gives an opportunity to generate and post custom content in a chat.
