Facebook Messenger
Creating a Facebook Messenger bot is easy.
Snatchbot gives users the possibility of deploying a bot that will interact with people on their Facebook pages.
To start with, you will need to create a bot (you can also use an existing bot). Then go to the bot’s settings and open the Channels section. In the column of available channels please choose the ‘Facebook’ channel. Once it is done you will be redirected to log in to Facebook if you have not done this already:
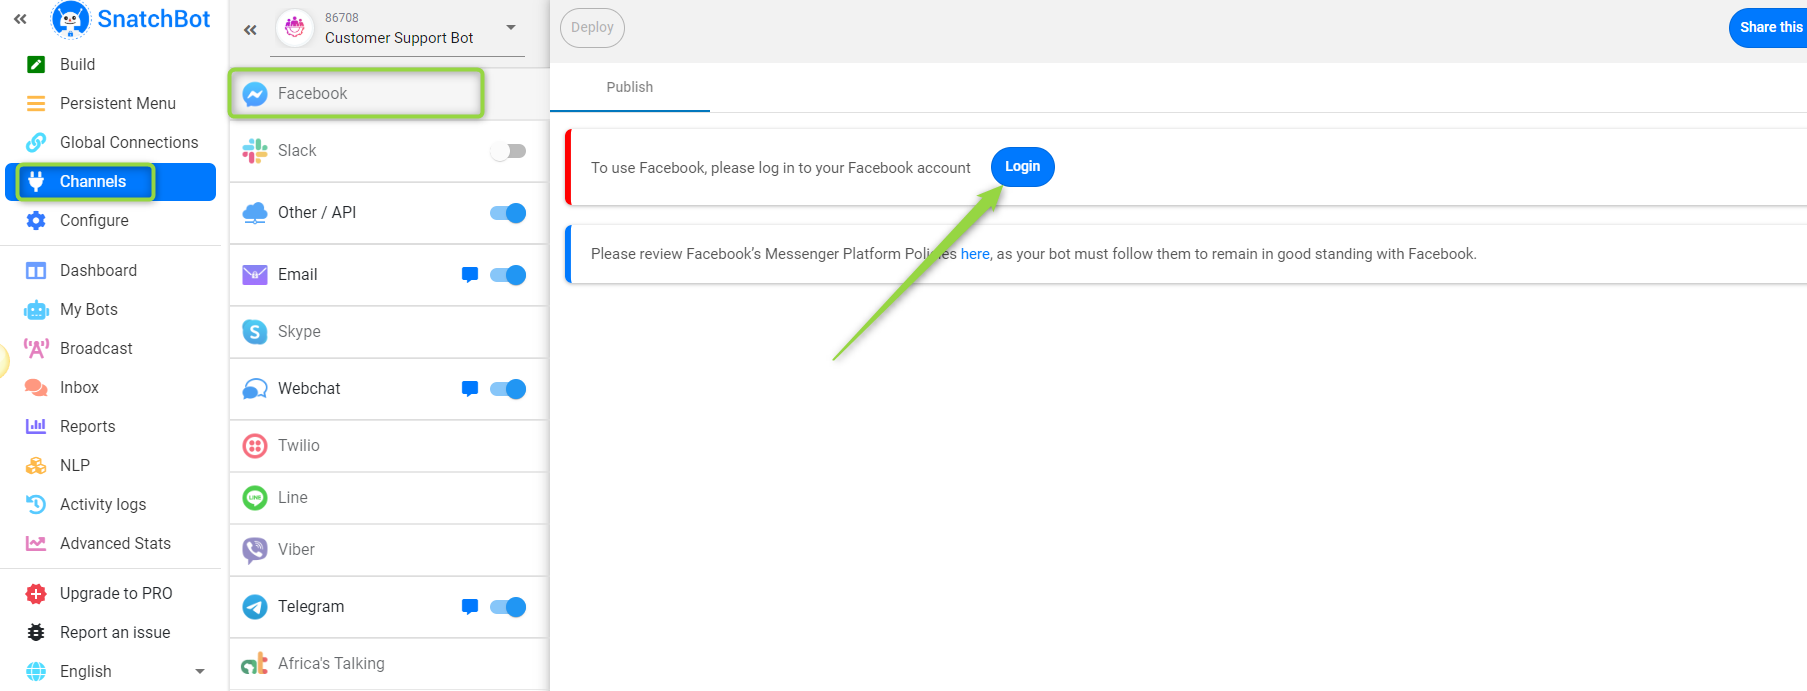
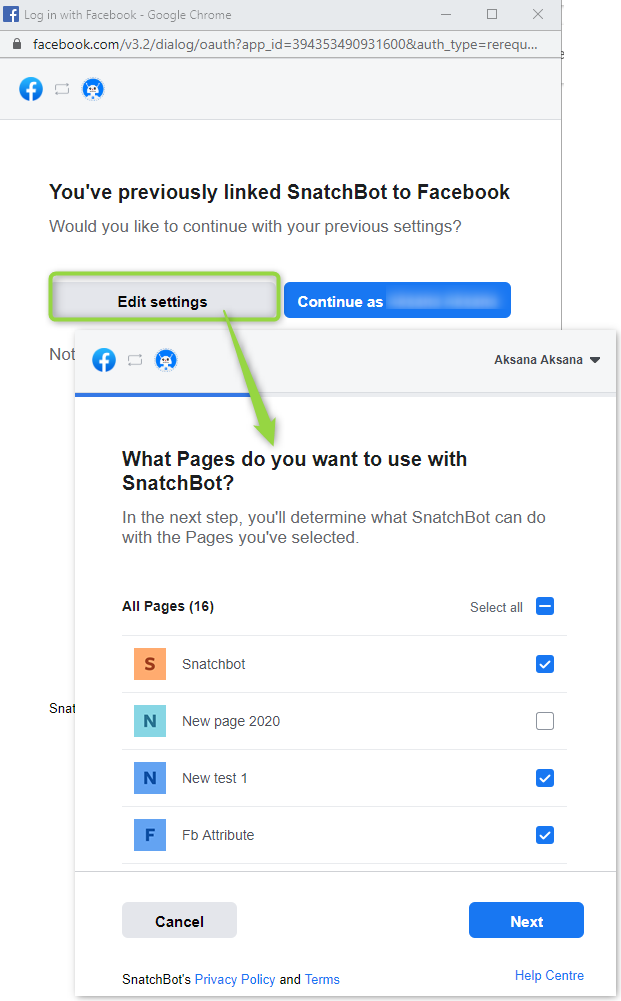
In this step, you can determine what SnatchBot can do with certain Facebook Pages
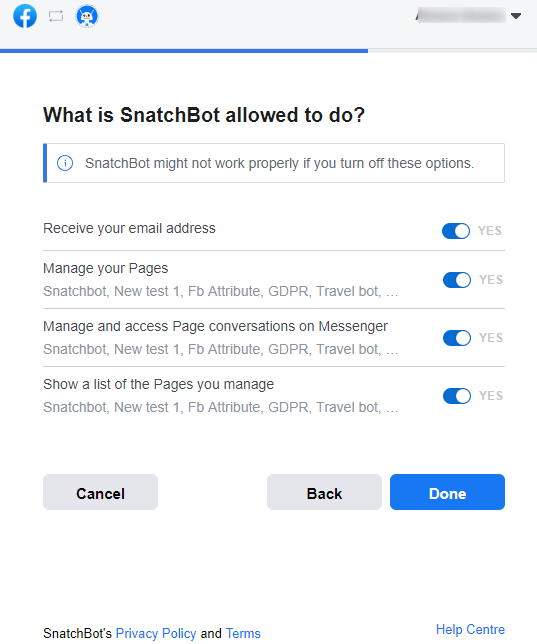
Next, you need to check if the following options are turned on so that Snatchbot works properly:
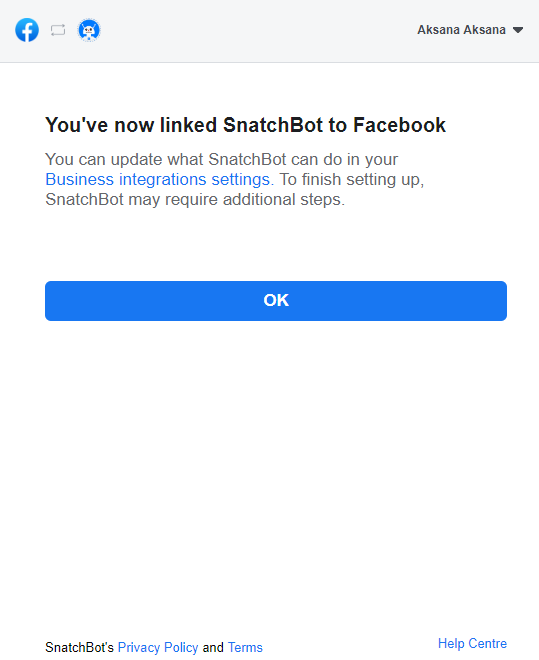
As soon as you press the "Done" button a pop-up window with the confirmation that you have linked. Snatchbot to Facebook will appear. To finish the settings up please lick on the "OK" button
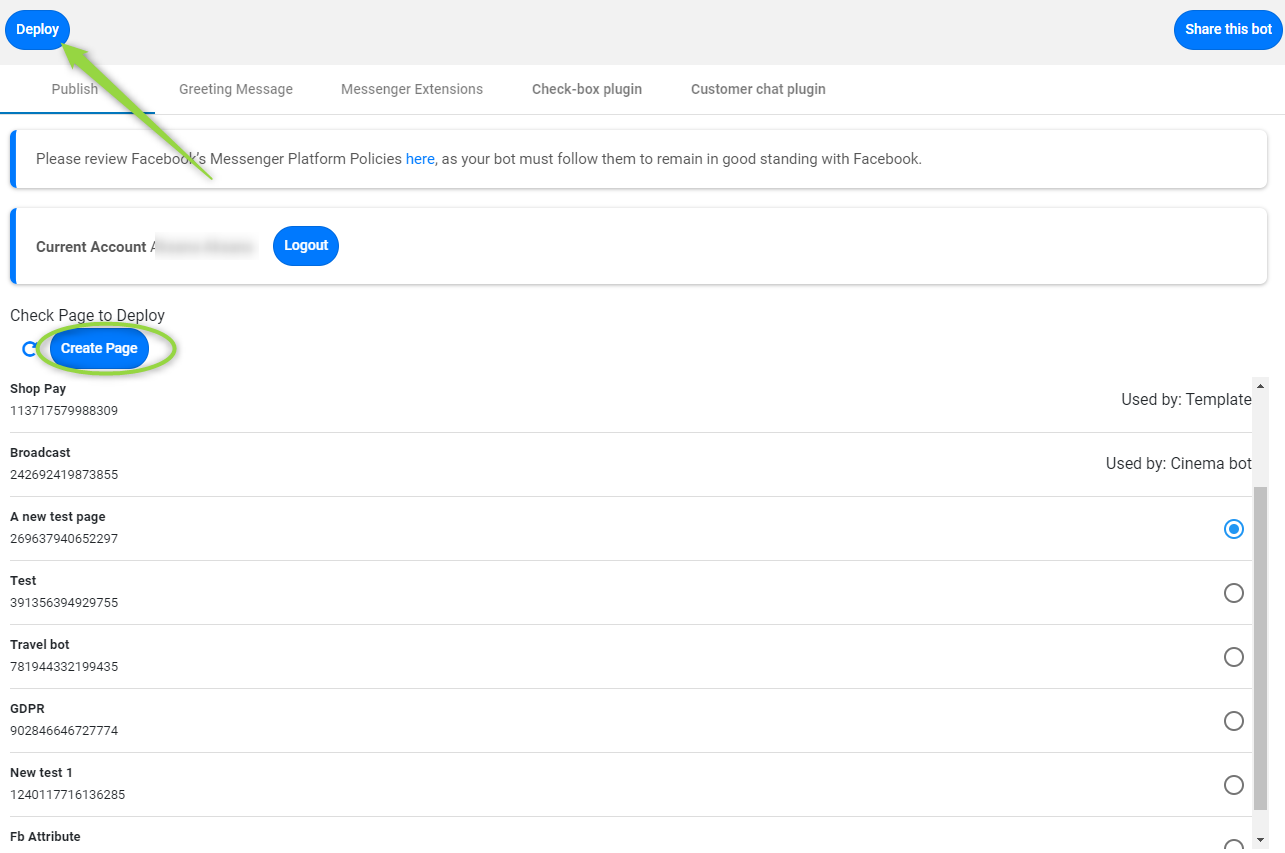
After logging in, under the "Publish" tab you can see a list of the Facebook pages you are managing and to which you can connect the bot. If you do not have a page, press “Create page” to create a new one. You will be redirected to the “page creation” page.
Select the page to which you want to deploy the bot – and that’s it – the bot is ready for communication in a chat. Visiting your page, a user can send a message to the bot, and the conversation will begin.
If some of your Facebook pages are not displayed in the "Publish" tab please visit our article here
You can connect only one page to the one bot. You can switch the bot to another page at any time.
As soon as your bot has been deployed on the Facebook page 5 additional tabs will be available

Hootsuite (only for Pro bots)
If Hootsuite is connected and if the toggle in the AR interactions is on, then agents from Hootsuite will be able to use a trigger phrase to restart a bot and stop conversations with users who reached the AR interaction.
Greeting message
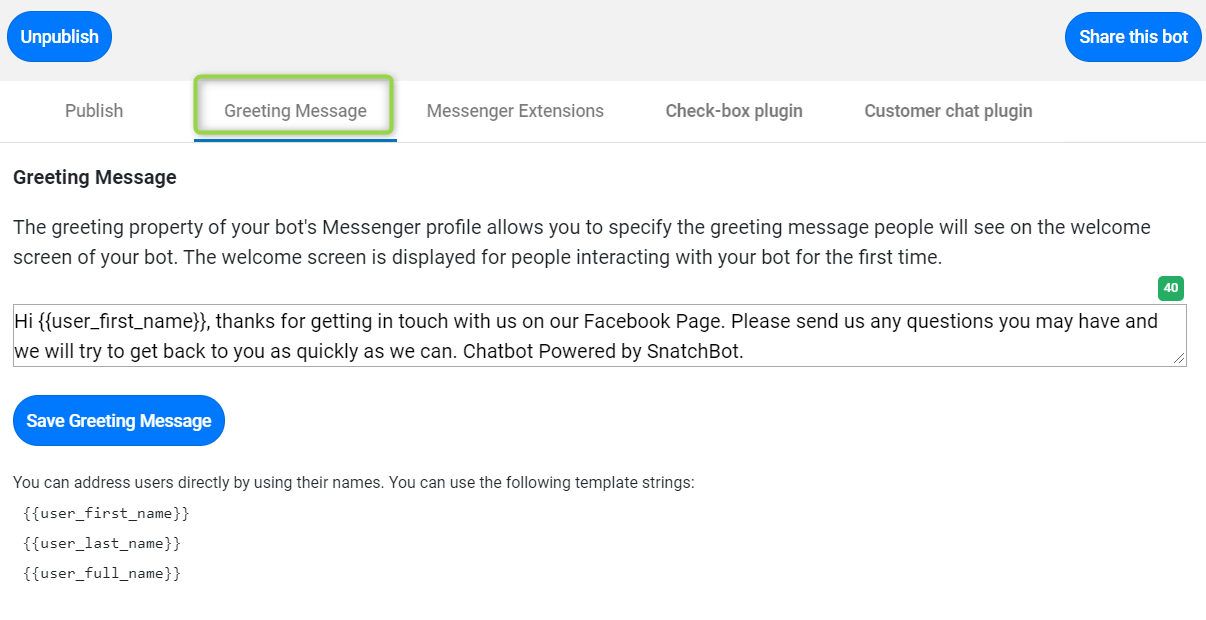
Here you can configure the greeting message people will see on the welcome screen of your bot. The welcome screen is displayed for people interacting with your bot for the first time. You can address users directly by using their names (provided to you by Facebook and available as attributes).
How the Greeting message appears in Facebook Messenger
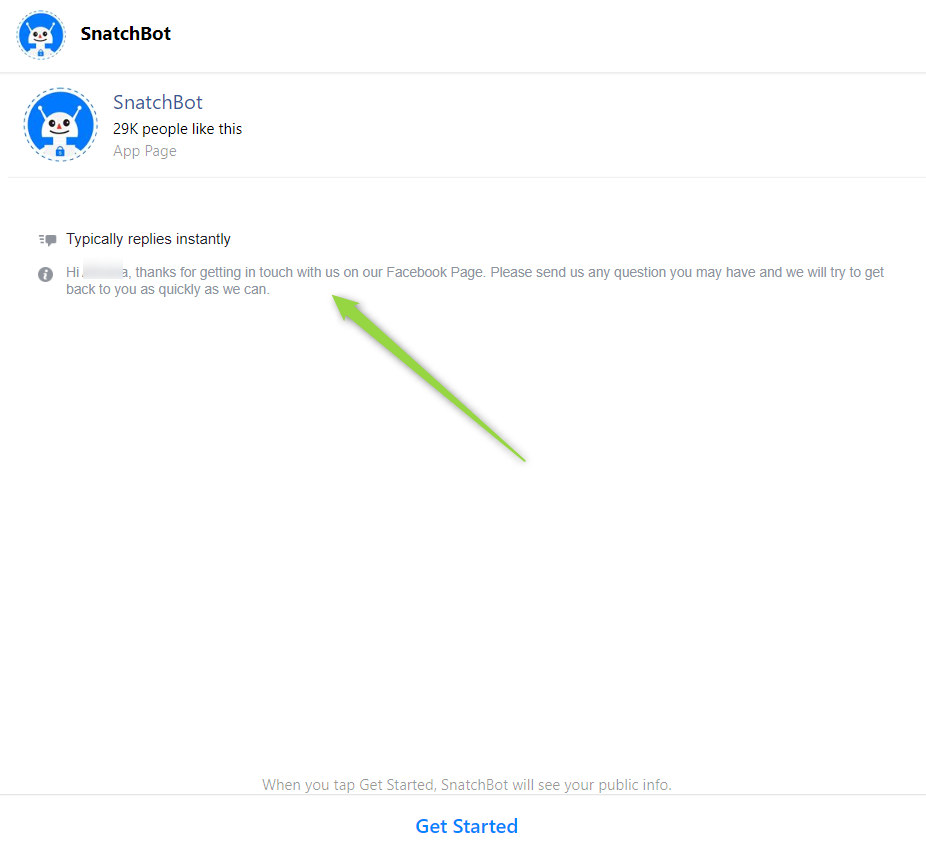
on a desktop version
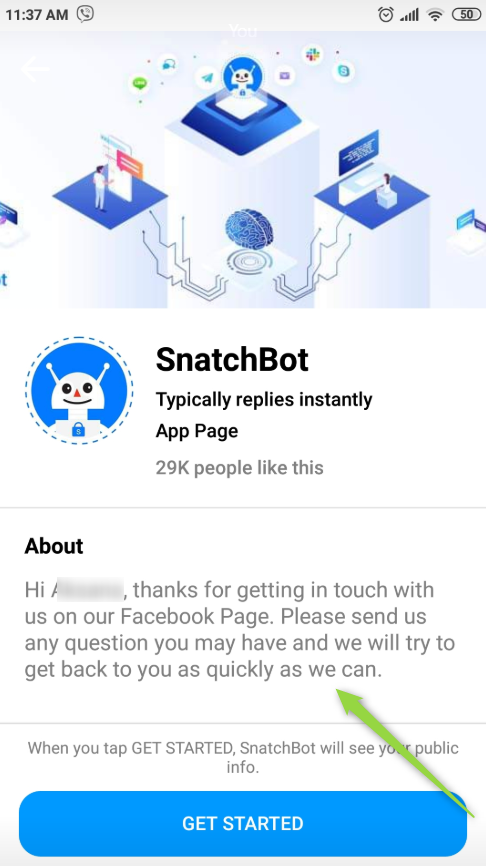
on a mobile device
Messenger Extensions
The "Send to Messenger" plugin is used to trigger an authentication event to your webhook. You can send data to know which user and transaction was tied to the authentication event, and link the user on your back-end.
This feature allows you to integrate a bot into your website and establish a connection between your bot and Facebook.
In order to install the Messenger plugin you need to choose the color and size of the button, then copy the code provided on this page and paste it in the HTML code of your page
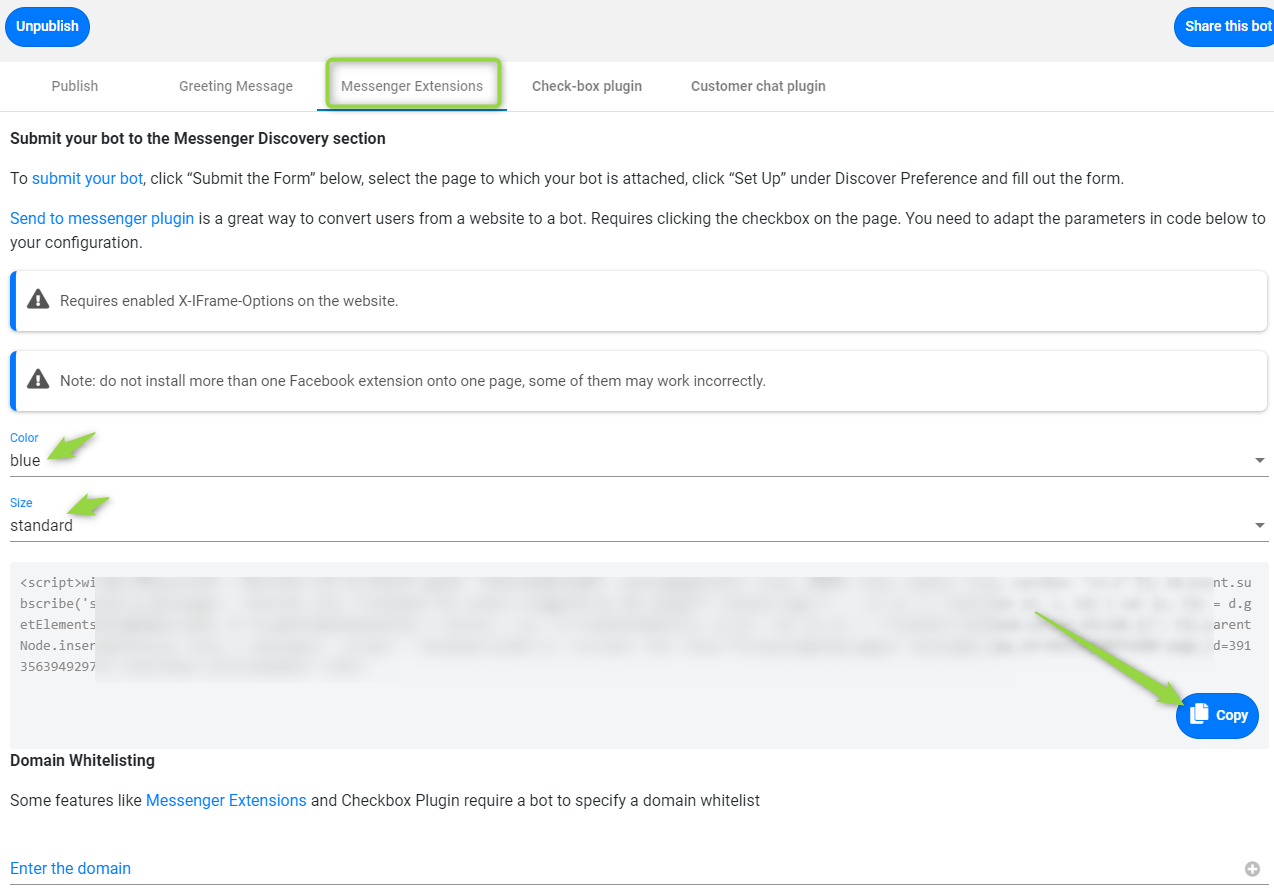
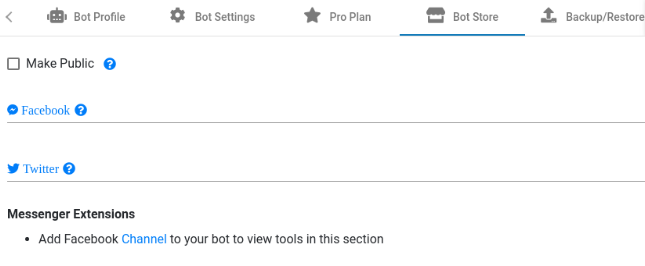
At the bottom of this page you can enter a domain and add it since the "Messenger extensions" plugin requires a bot to specify a domain whitelist. Moreover, once you have deployed your bot on a Facebook page, you will see a Domain Whitelisting settings in the Bot Store tab, too. So you can add the domain names here as well:
The size and color of your "Send to Messenger" button can vary depending on the pre-configured settings:

The first time a person clicks on this button, a confirmation popup will appear.

Check-box plugin
The checkbox plugin allows you to display a checkbox in forms on your website that allows users to opt-in to receive messages from your bot in Messenger. If the person is currently logged in to Facebook, their profile photo and name will be displayed next to the checkbox. If the person is not logged in to Facebook or wants to log in as a different user, they can do so.

If the identity displayed isn't the person using the site, they can click the "Not you?" link to log out. It will clear the active Facebook session and present a login dialog
Before copying the code provided under the "Check-box plugin" tab and embedding it on your website you need to enter the domain name you want to render the plugin on (1) and choose the appropriate option from the following drop-down lists: Allow login (2), Opt-in button (3), Size (4), Skin (5), Center align (6)
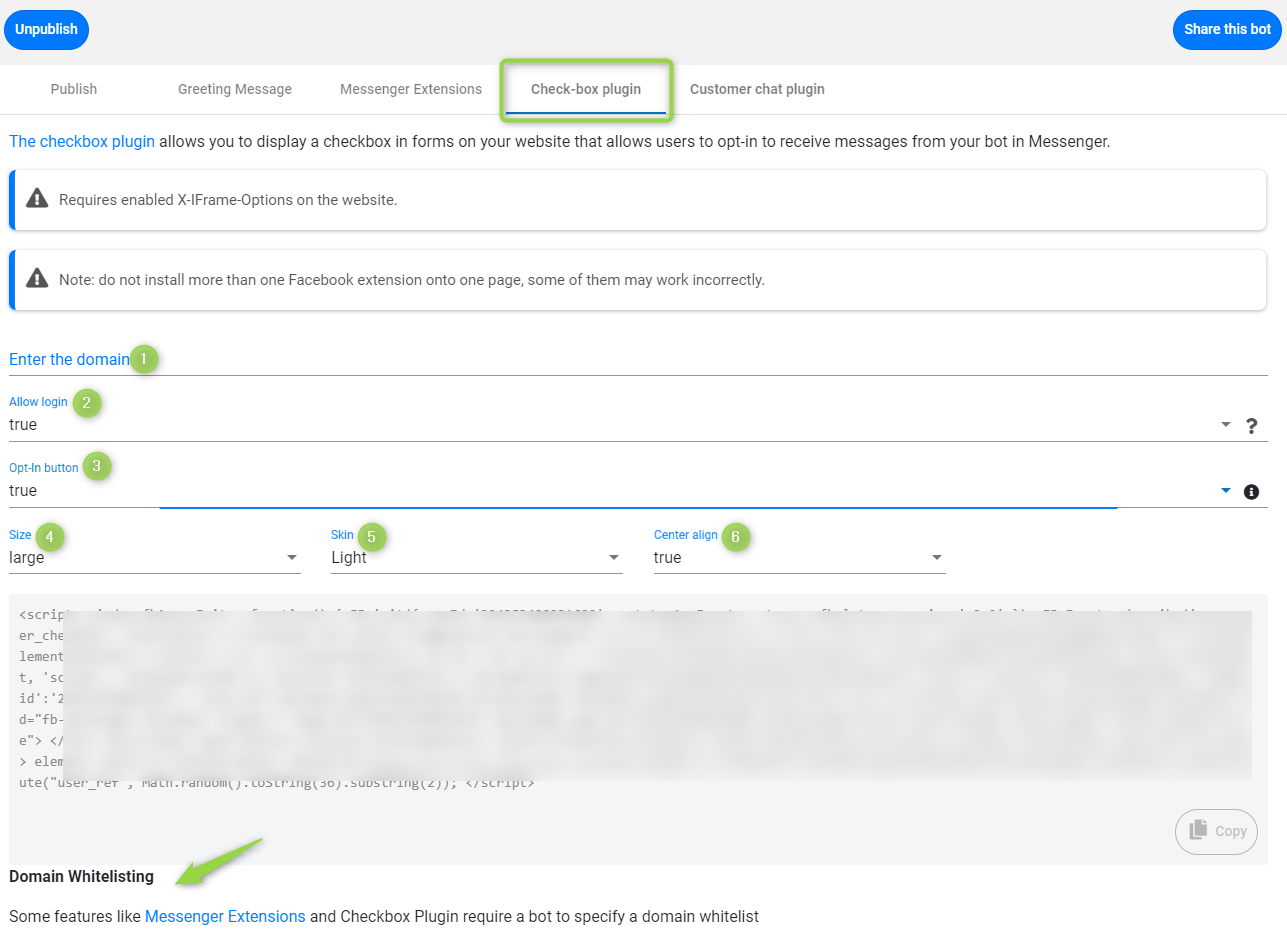
At the bottom of this page, you can enter the domain name and add it since "Check-box" plugin requires a bot to specify a domain whitelist.
The checkbox plugin is similar to the Send to Messenger plugin, but is optimized for forms, and can be used for just about any form-based flow on your site. For example, you could include the plugin on an eCommerce website, where you wish to send receipts and order updates to the user.
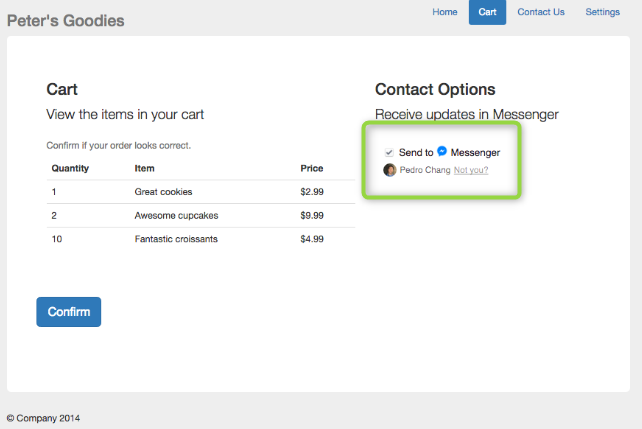
In the case shown in the screenshot, you would add the HTML code in the div which renders the "Contact Options" section of the website while making the JS code trigger when the user clicks the "Confirm" button.
This would then only make the bot message the user if they confirm their order.
Customer chat plugin
The Messenger customer chat plugin allows you to integrate your Messenger experience directly into your website. This allows your customers to interact with your business anytime with the same personalized, rich-media experience they get in Messenger.
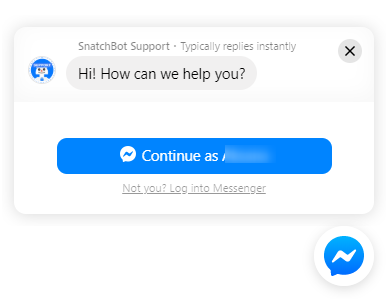
Let people start a conversation on your website and continue it in Messenger with a customer chat plugin. It's easy to set up, and we'll give you the code to add to your website
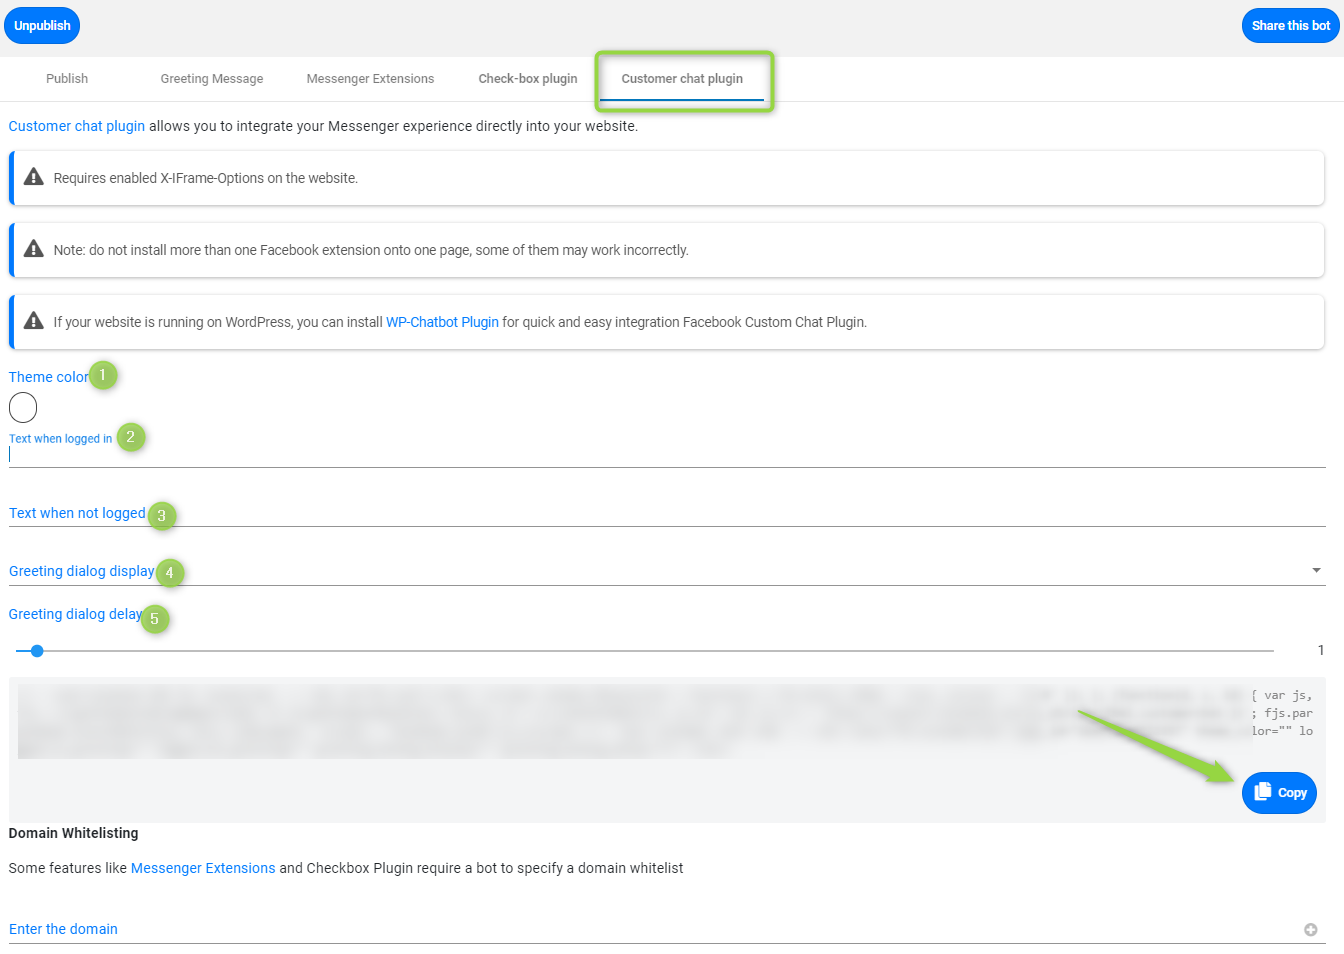
In order to add Custom chat to your website you need to:
- change the Theme color (1) including the background color of the customer chat plugin icon and the background color of any messages sent by users (optional)
- enter the Text that will be displayed for the user who is currently logged (2) / not logged (3) into Facebook (optional)
- choose if you want the Greeting dialogue to be shown, hidden or faded (4) (optional)
- adjust the Delay for the Greeting dialog (5) (optional)
- copy the provided code by pressing the "Copy" button, open your website's source and paste the code between the tags of the HTML
You can share a direct link to your bot to acquire users. Use this Messenger link off Facebook, such as on a flyer, in an email or in an SMS message. Your Messenger link directs people to a conversation with your Page.
If your website is running on WordPress, you can install WP-Chatbot Plugin for quick and easy integration with the Facebook Custom Chat Plugin.
All the data in the Messenger Extensions, Check-box plugin and Customer chat plugin tabs are saved automatically.
Do not install more than one Facebook extension onto one page, some of them may work incorrectly.
Let’s see how your published bot works on your Facebook page!
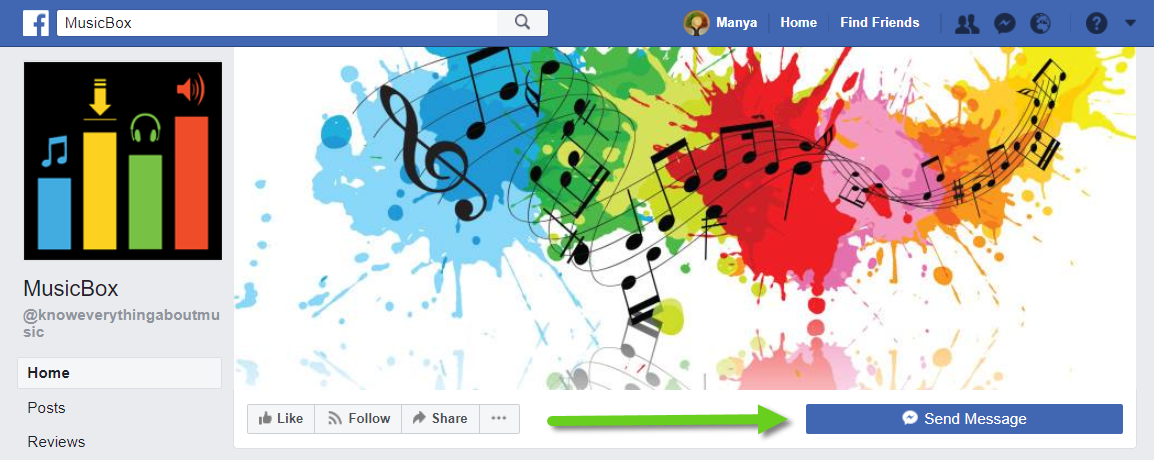
Visiting your page, a user can send a message to the bot:
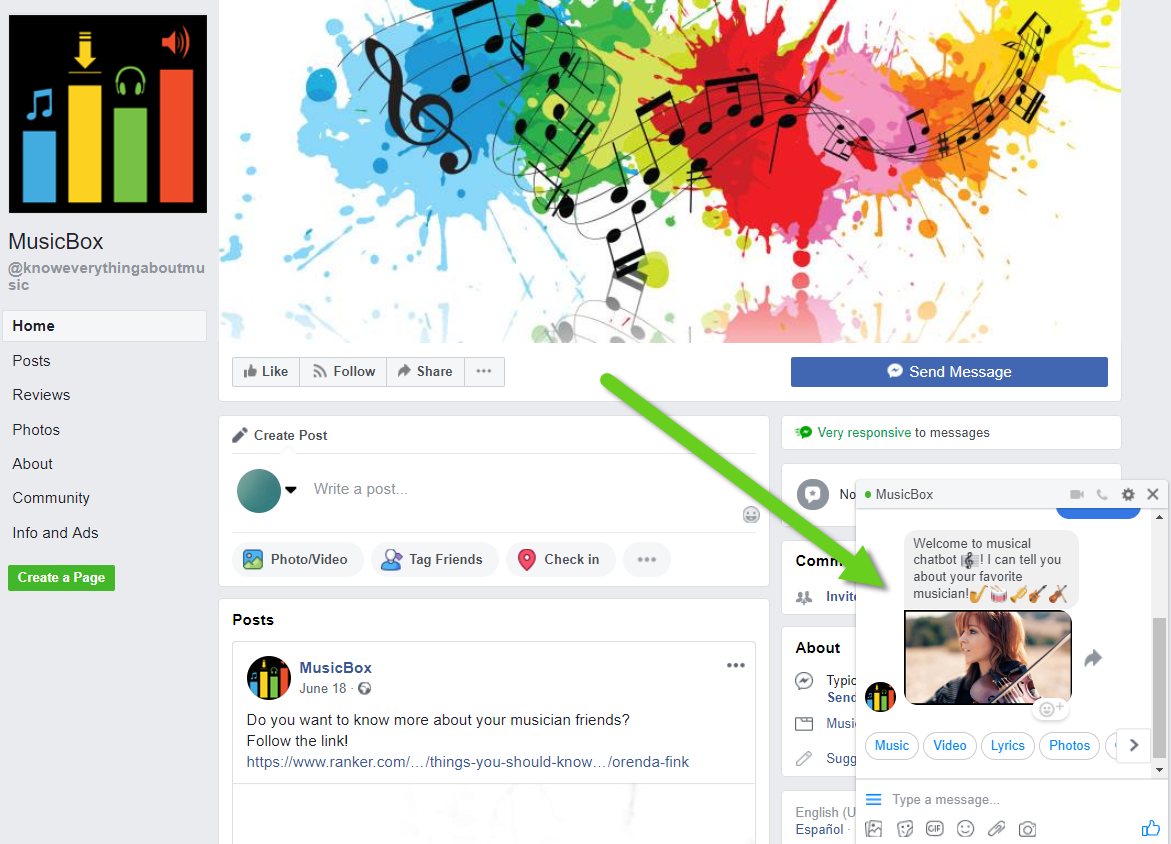
Depending on the bot’s configuration, a conversation will begin:
If a user connects to Facebook’s Messenger by smartphone, he or she can communicate with your bot as well:
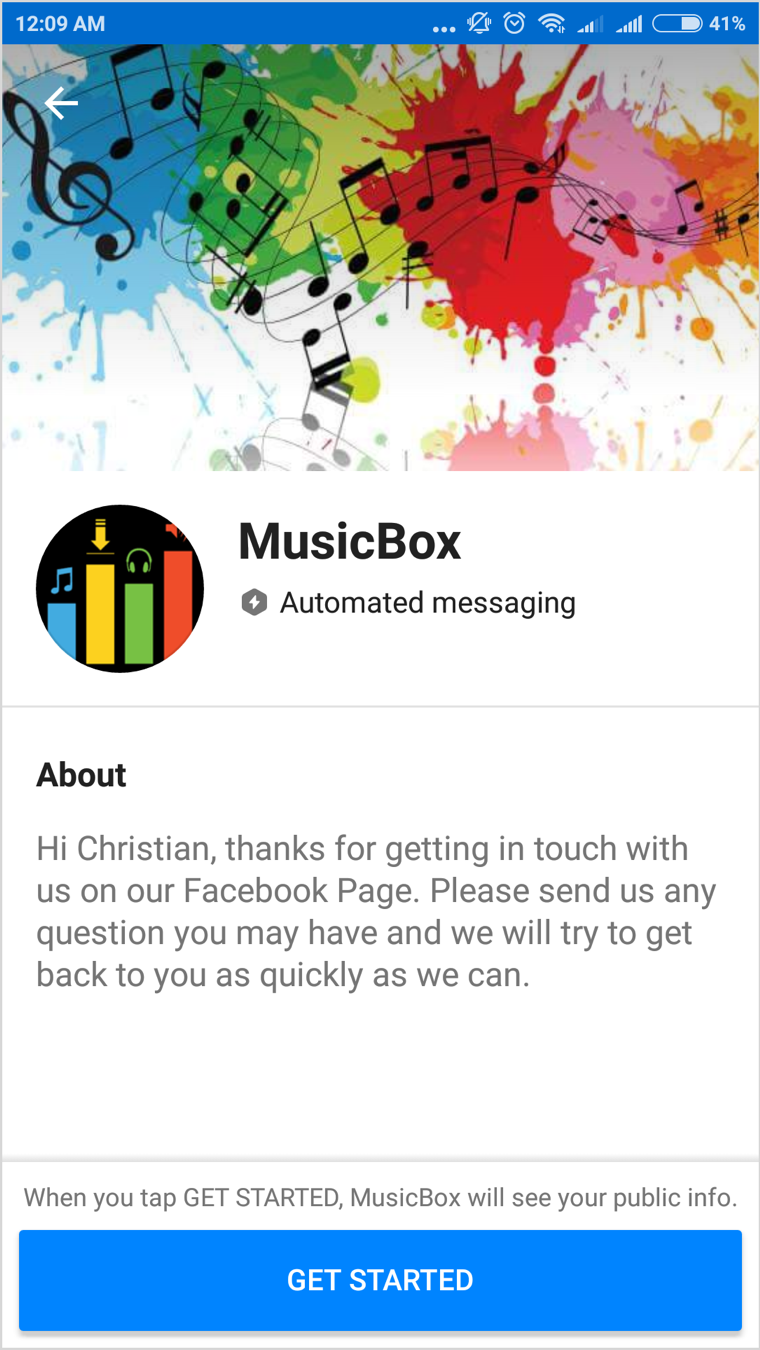
Now you are done, the bot is ready to use. When you want to disable it on the page, edit or delete, your options are under the Publish tab.
Some restrictions:
The following plugins are not available for Facebook: eBay, Giphy.
Persistent Menu: the maximum number of items is three.
The embed link feature doesn’t work on Facebook, but they can be placed in a text card instead.
Cards and buttons: the maximum length of the “Description” field is 80 chars.
The “Email” button is not available for Facebook.
Facebook limits the number of Quick Replies to 11. Additional Quick Replies won't be shown.
Along with the plugins mentioned above you can use our Multi-channel sharing widget that allows your end-users either to see the icons of the deployed channels to start a conversation with a bot or see a bot email address to share your email bot with a broad audience.
Watch this video tutorial "Connecting the chatbot to the Facebook Messenger"
Updated about 4 years ago
