Adding your chatbot to a website
How to deploy your chatbot on a webpage.
When you are ready to place your chatbot on a website, click on Channels.
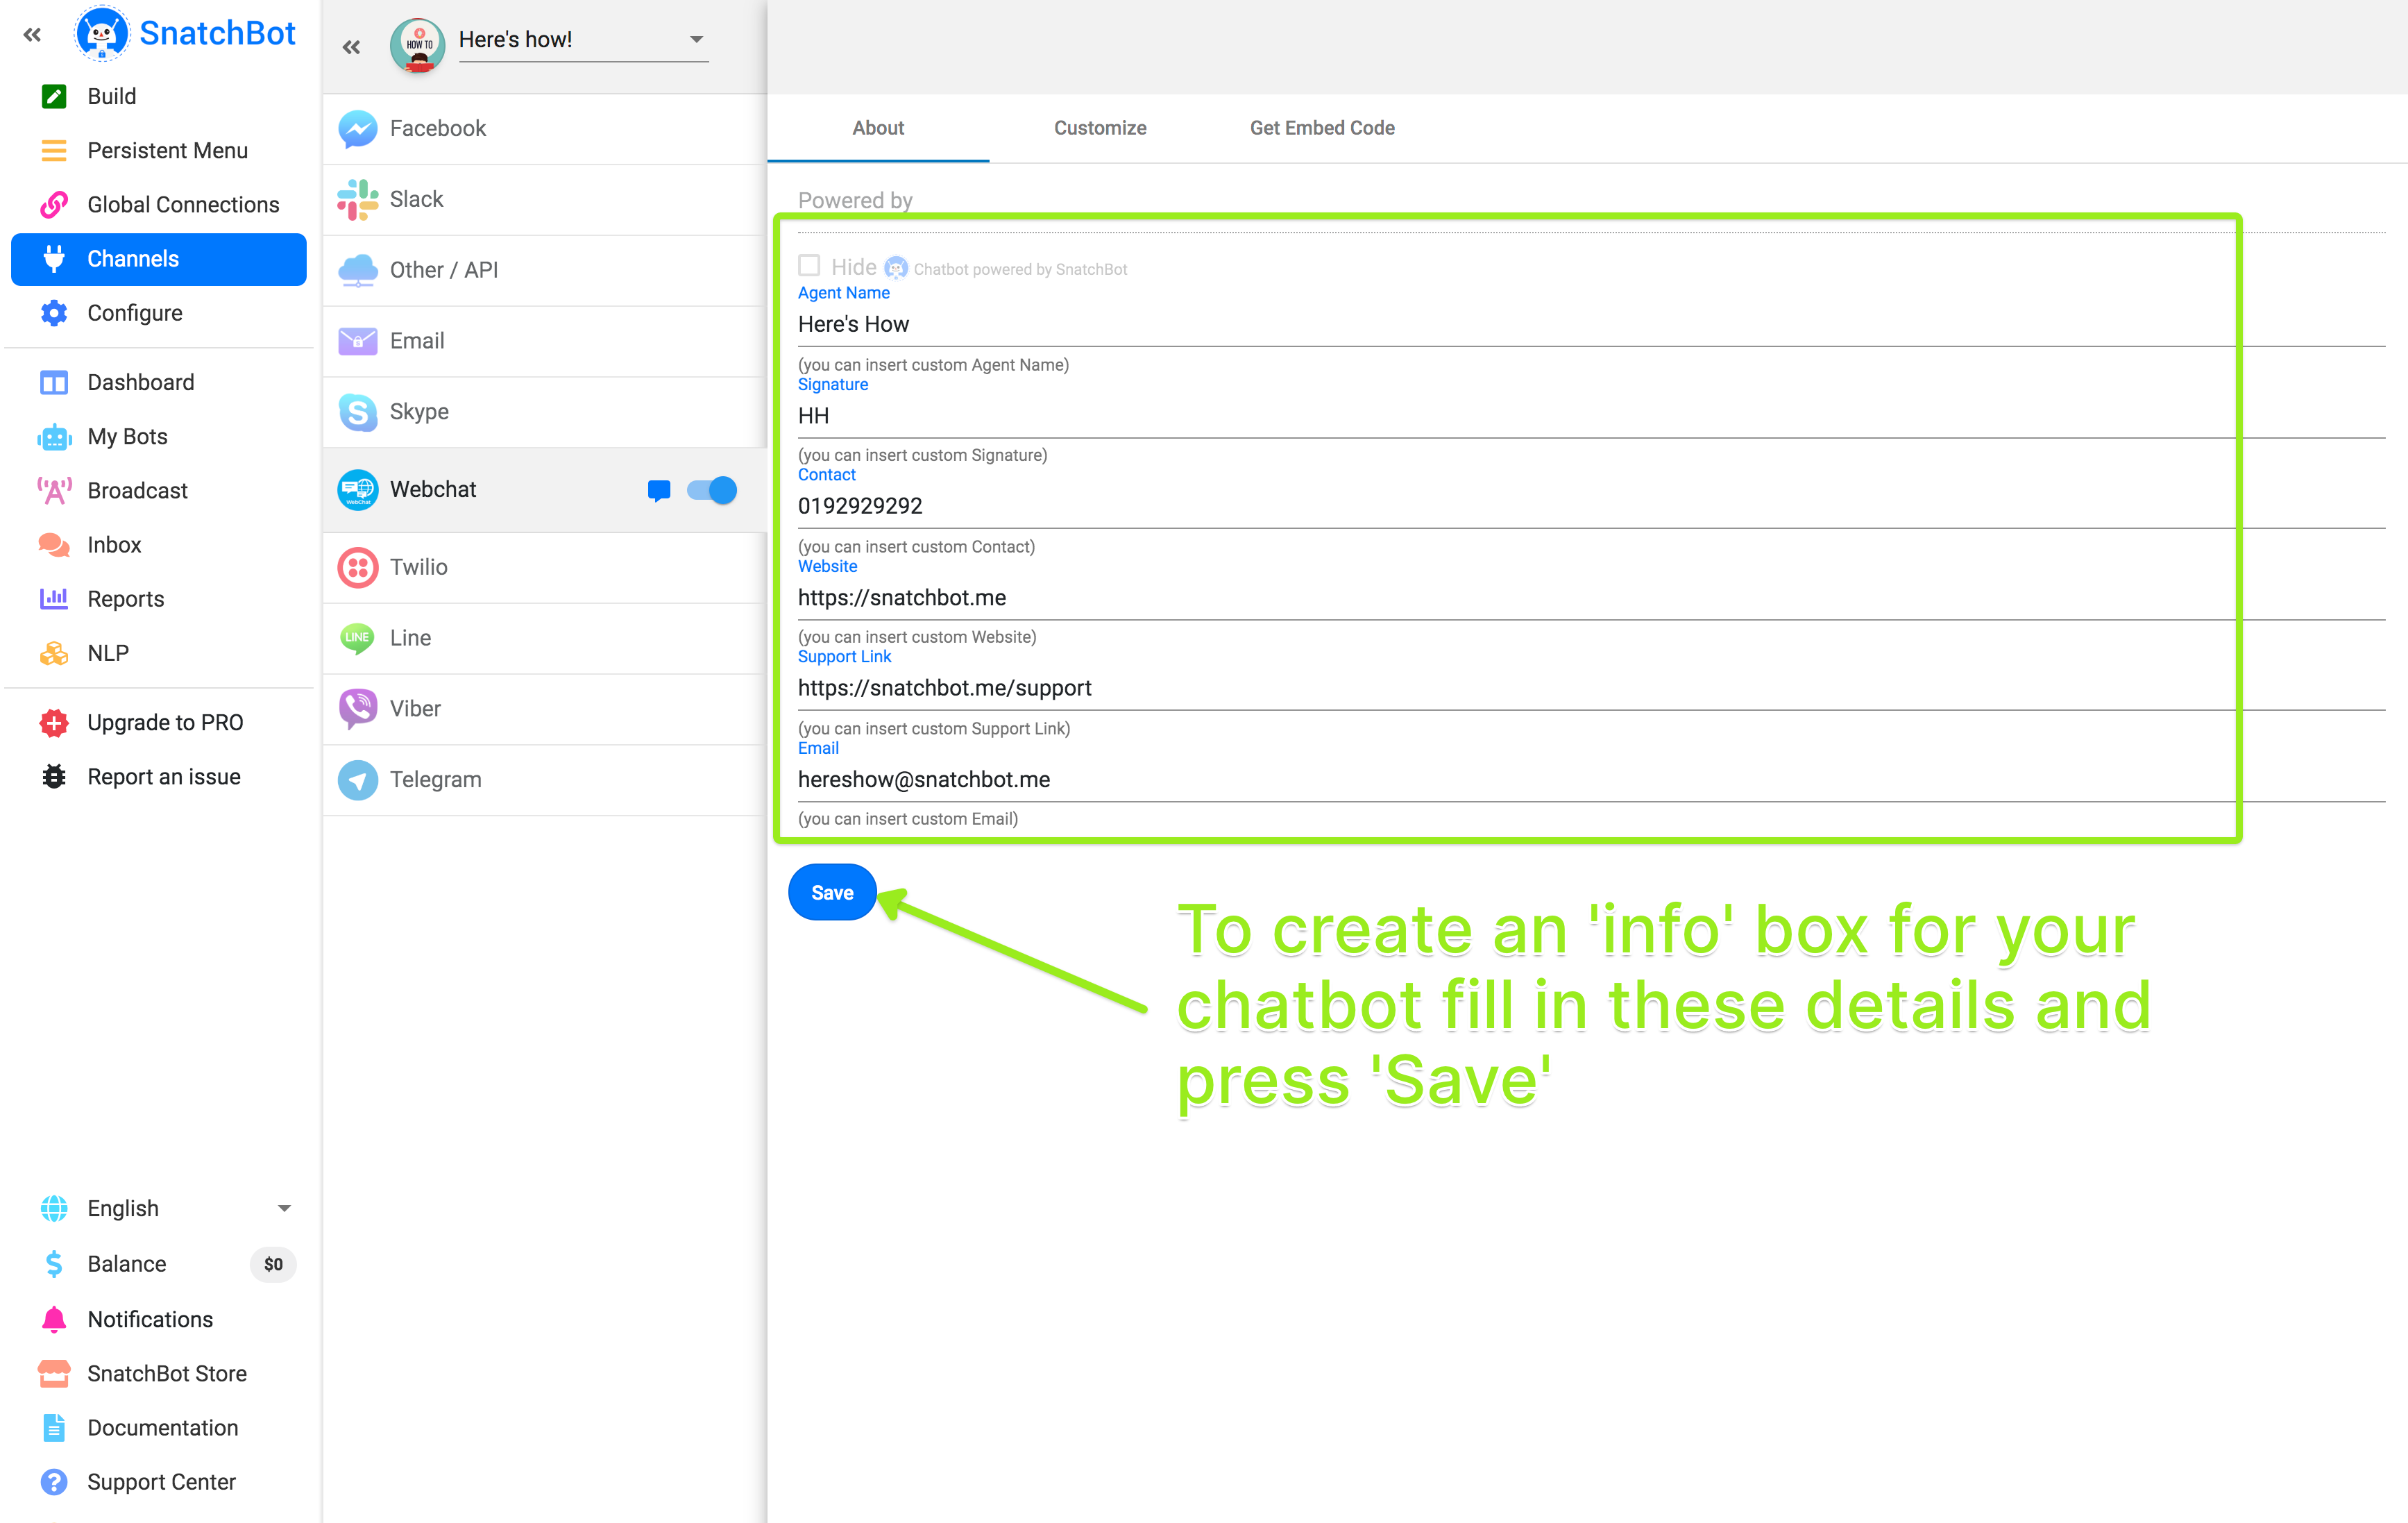
The 'About' page allows you to add useful links that the user can find when looking for information about the chatbot.
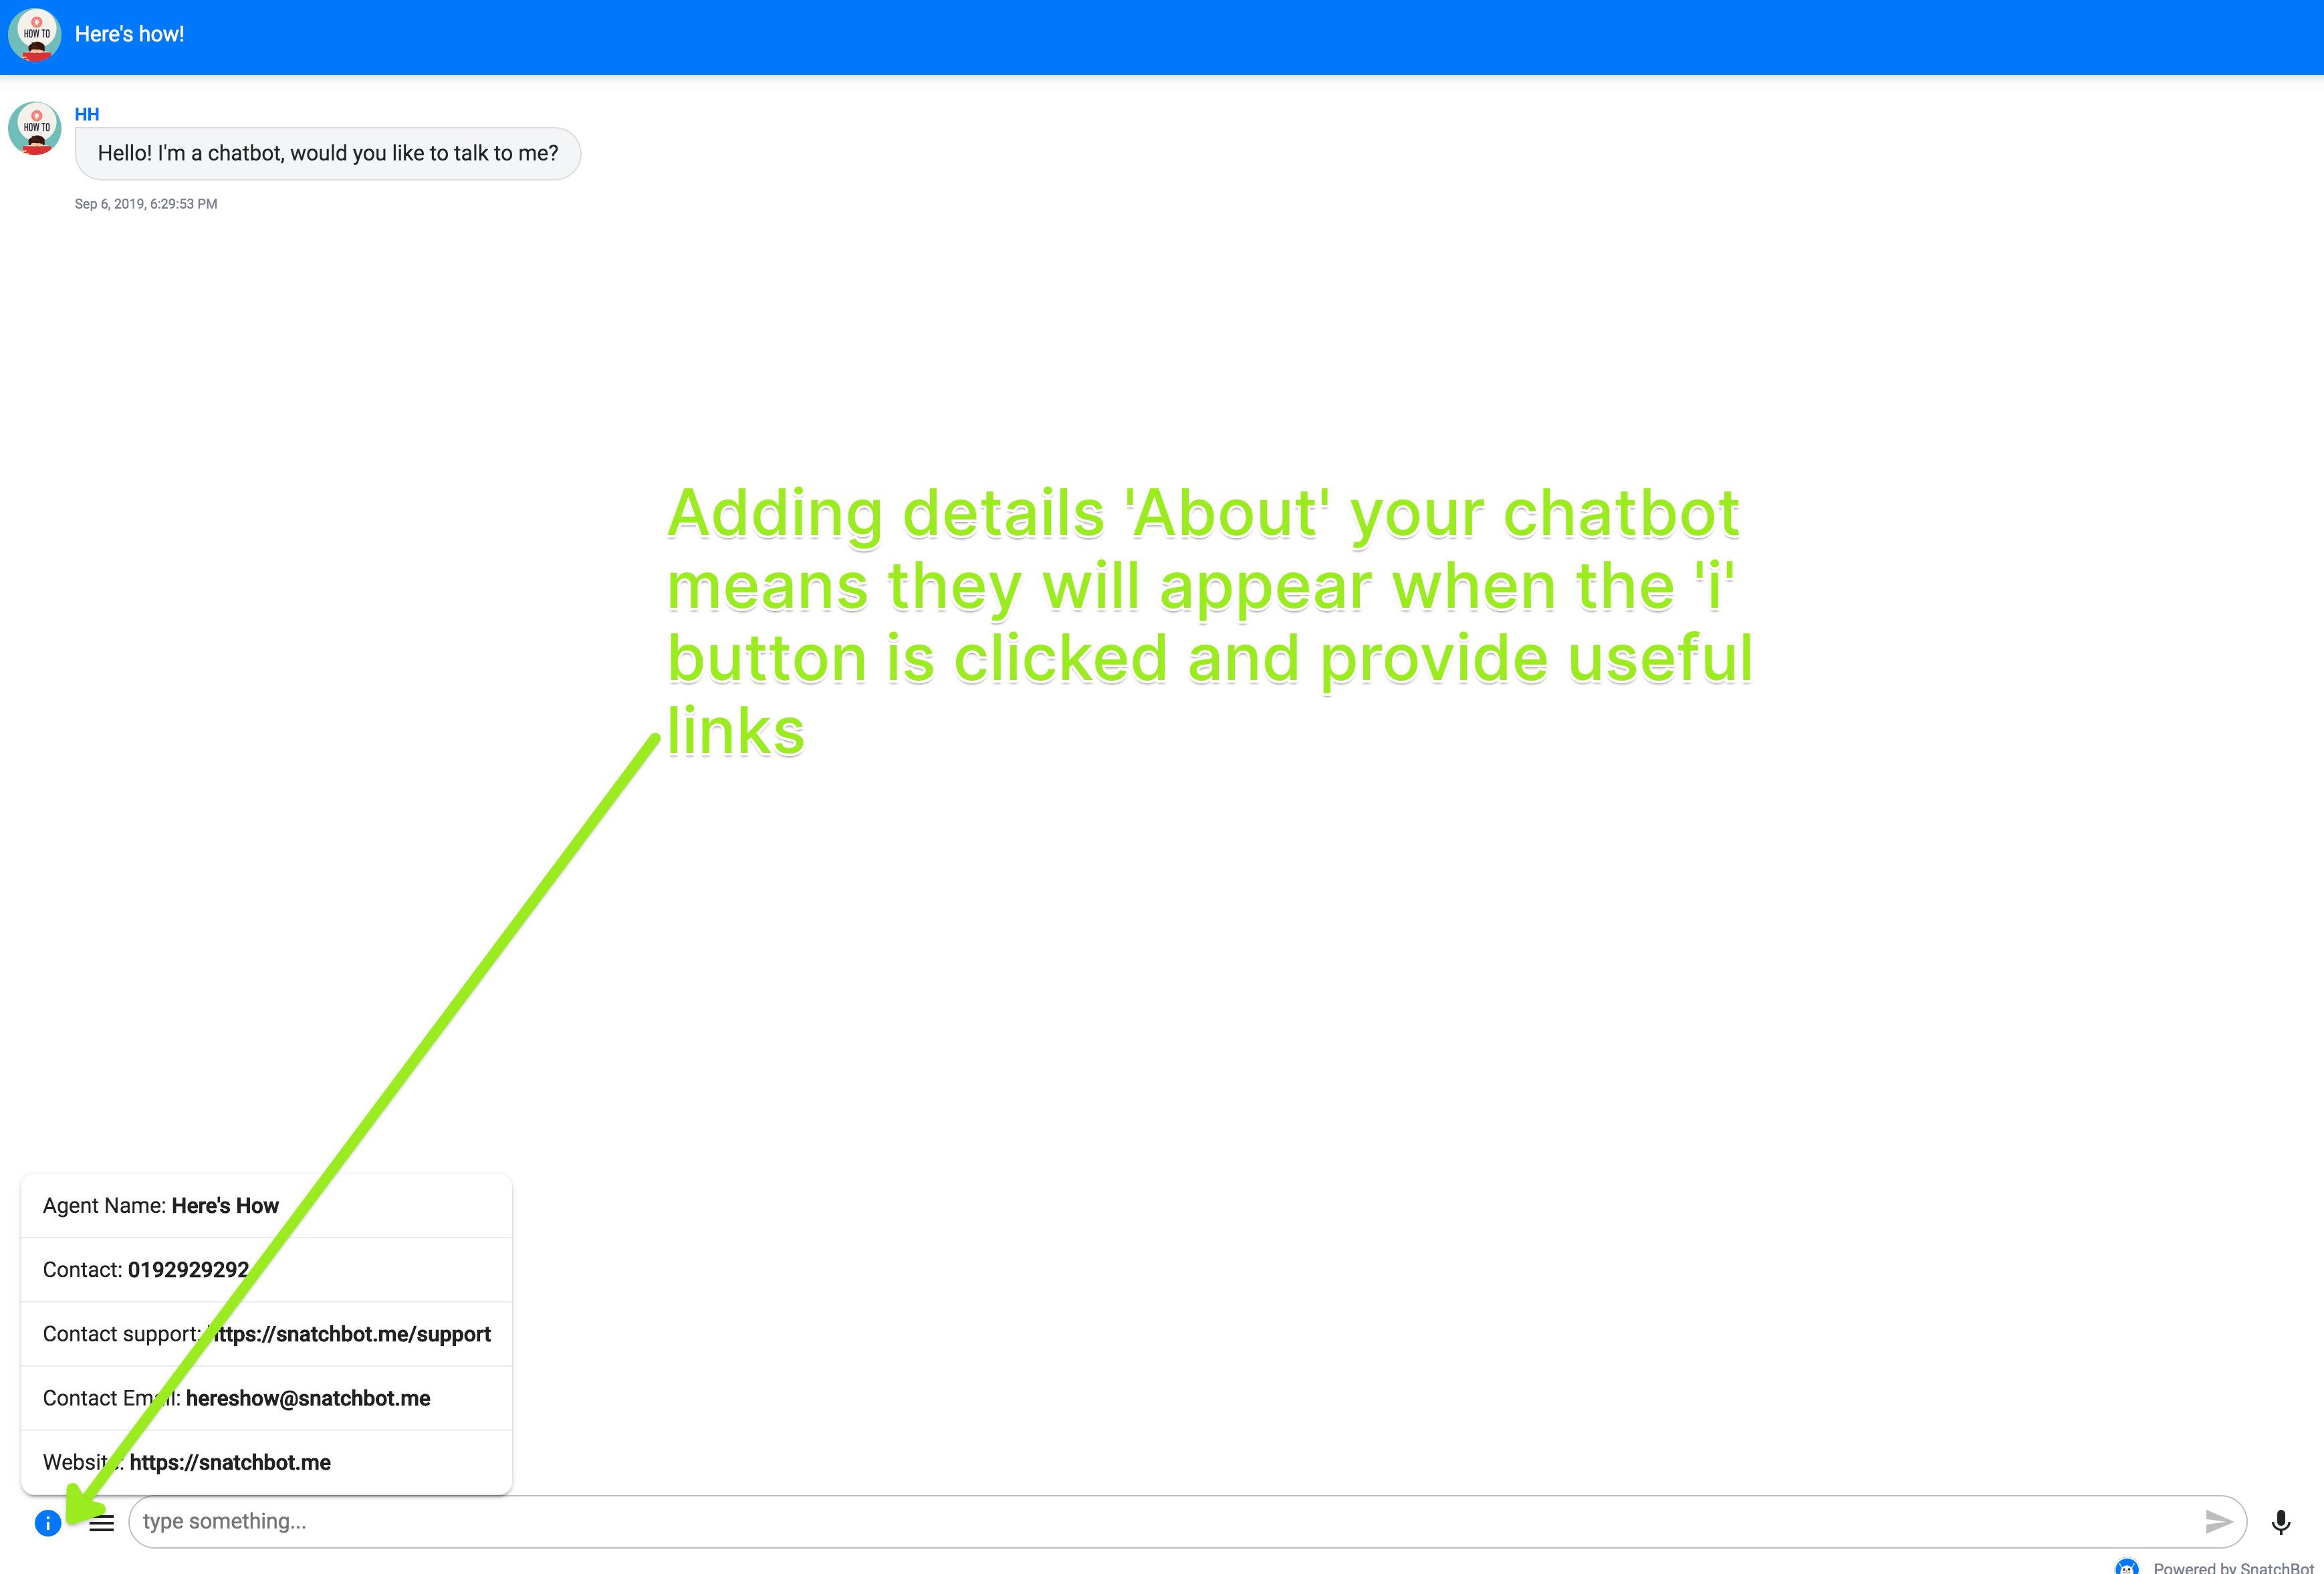
Then the user can see this information as clickable links in an info pop-up to the left of the chat bar.
Follow these steps to make the chatbot live on your webpage:
Step 1. Select Webchat and open the Get Embed Code tab.
Find the first clause on the tab (Embed the Bot widget on your site):
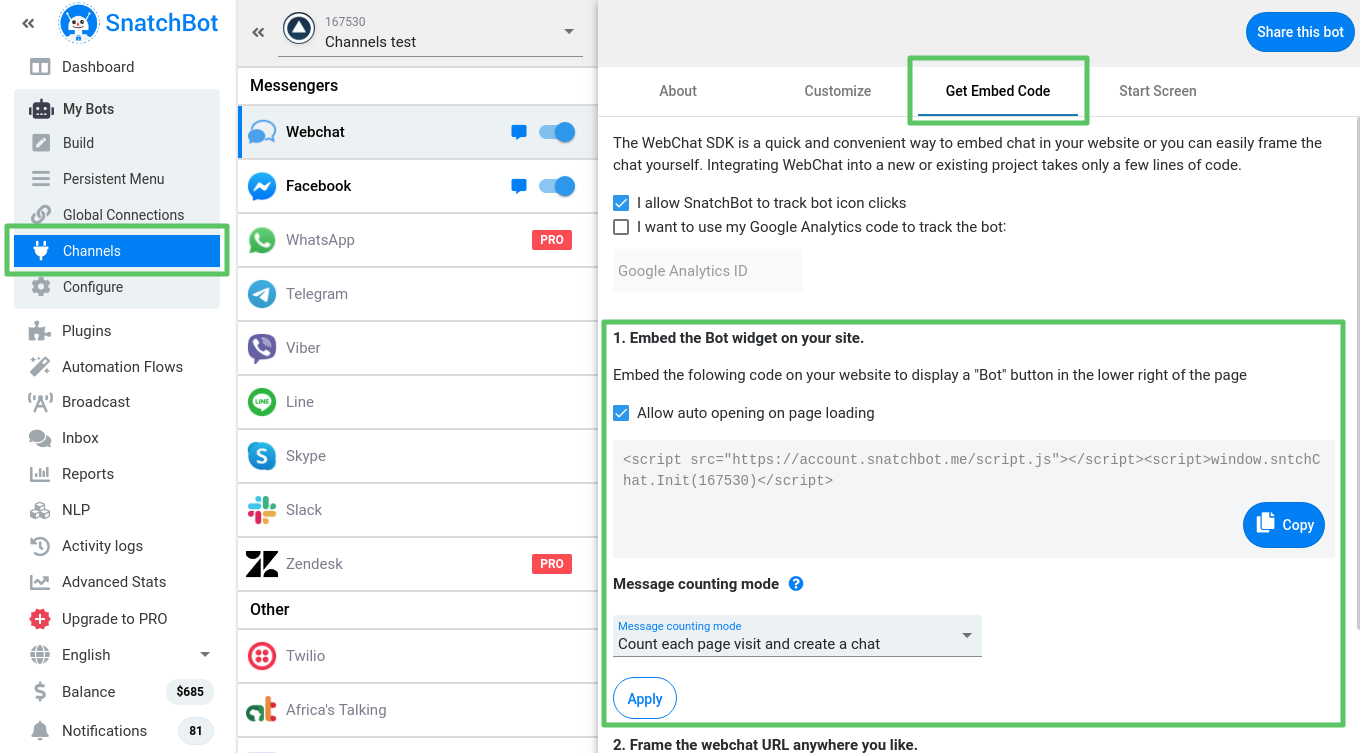
Step 2. Copy the code.
Copy the code to the clipboard:

Step 3. Add the code to your website.
Open your webpage and access the HTML. Scroll down to the bottom of the code and paste in your bot:
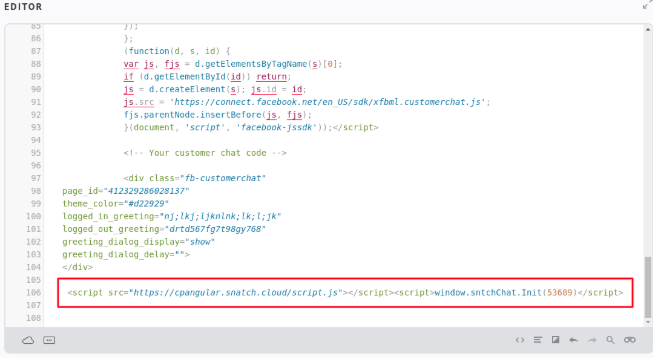
Step 4. Update your page.
The bot will appear as a button in the bottom right corner:
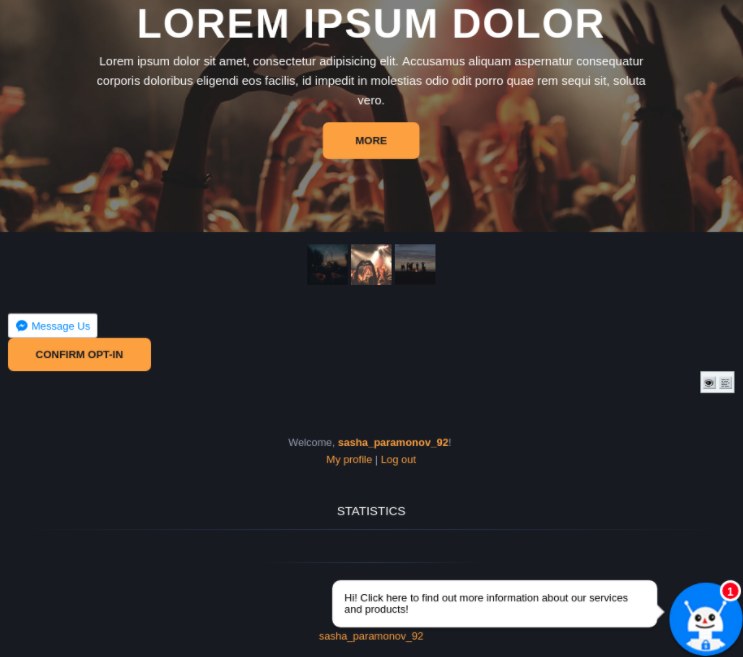
Optional settings:
1. Allow auto opening on page loading
Here you can choose whether you want the chatbot to automatically begin the conversation when the webpage is loaded or wait until the button is pressed. To have the chatbot automatically begin, select the ‘Allow auto-opening’ box.
Note: you don't have to re-embed the code if you change this option.2. Message counting mode
This option affects the message counting mode in Reports and Inbox, as well as the Pro messages counting.
- Count and create a chat only when the user has clicked on the bot icon
Once a user has pressed the bot icon on your page and started a conversation, the new entry will be created in the Inbox and Reports sections.- Count each page visit and create a chat
Once a new user has opened your page, the new entry will be created in the Inbox and Reports sections.Apply: save changes.
Do you use a CMS?
Check out this Wix integration tutorial.
It’s that simple and that powerful! Now you have a chatbot on your webpage.
If you’d like to adjust the positioning and look of your chatbot, you can do so by using the codes in the same window. Scroll down to steps 2 and 3, which allow you to place the webchat URL where you like and to use your choice of CSS styles:
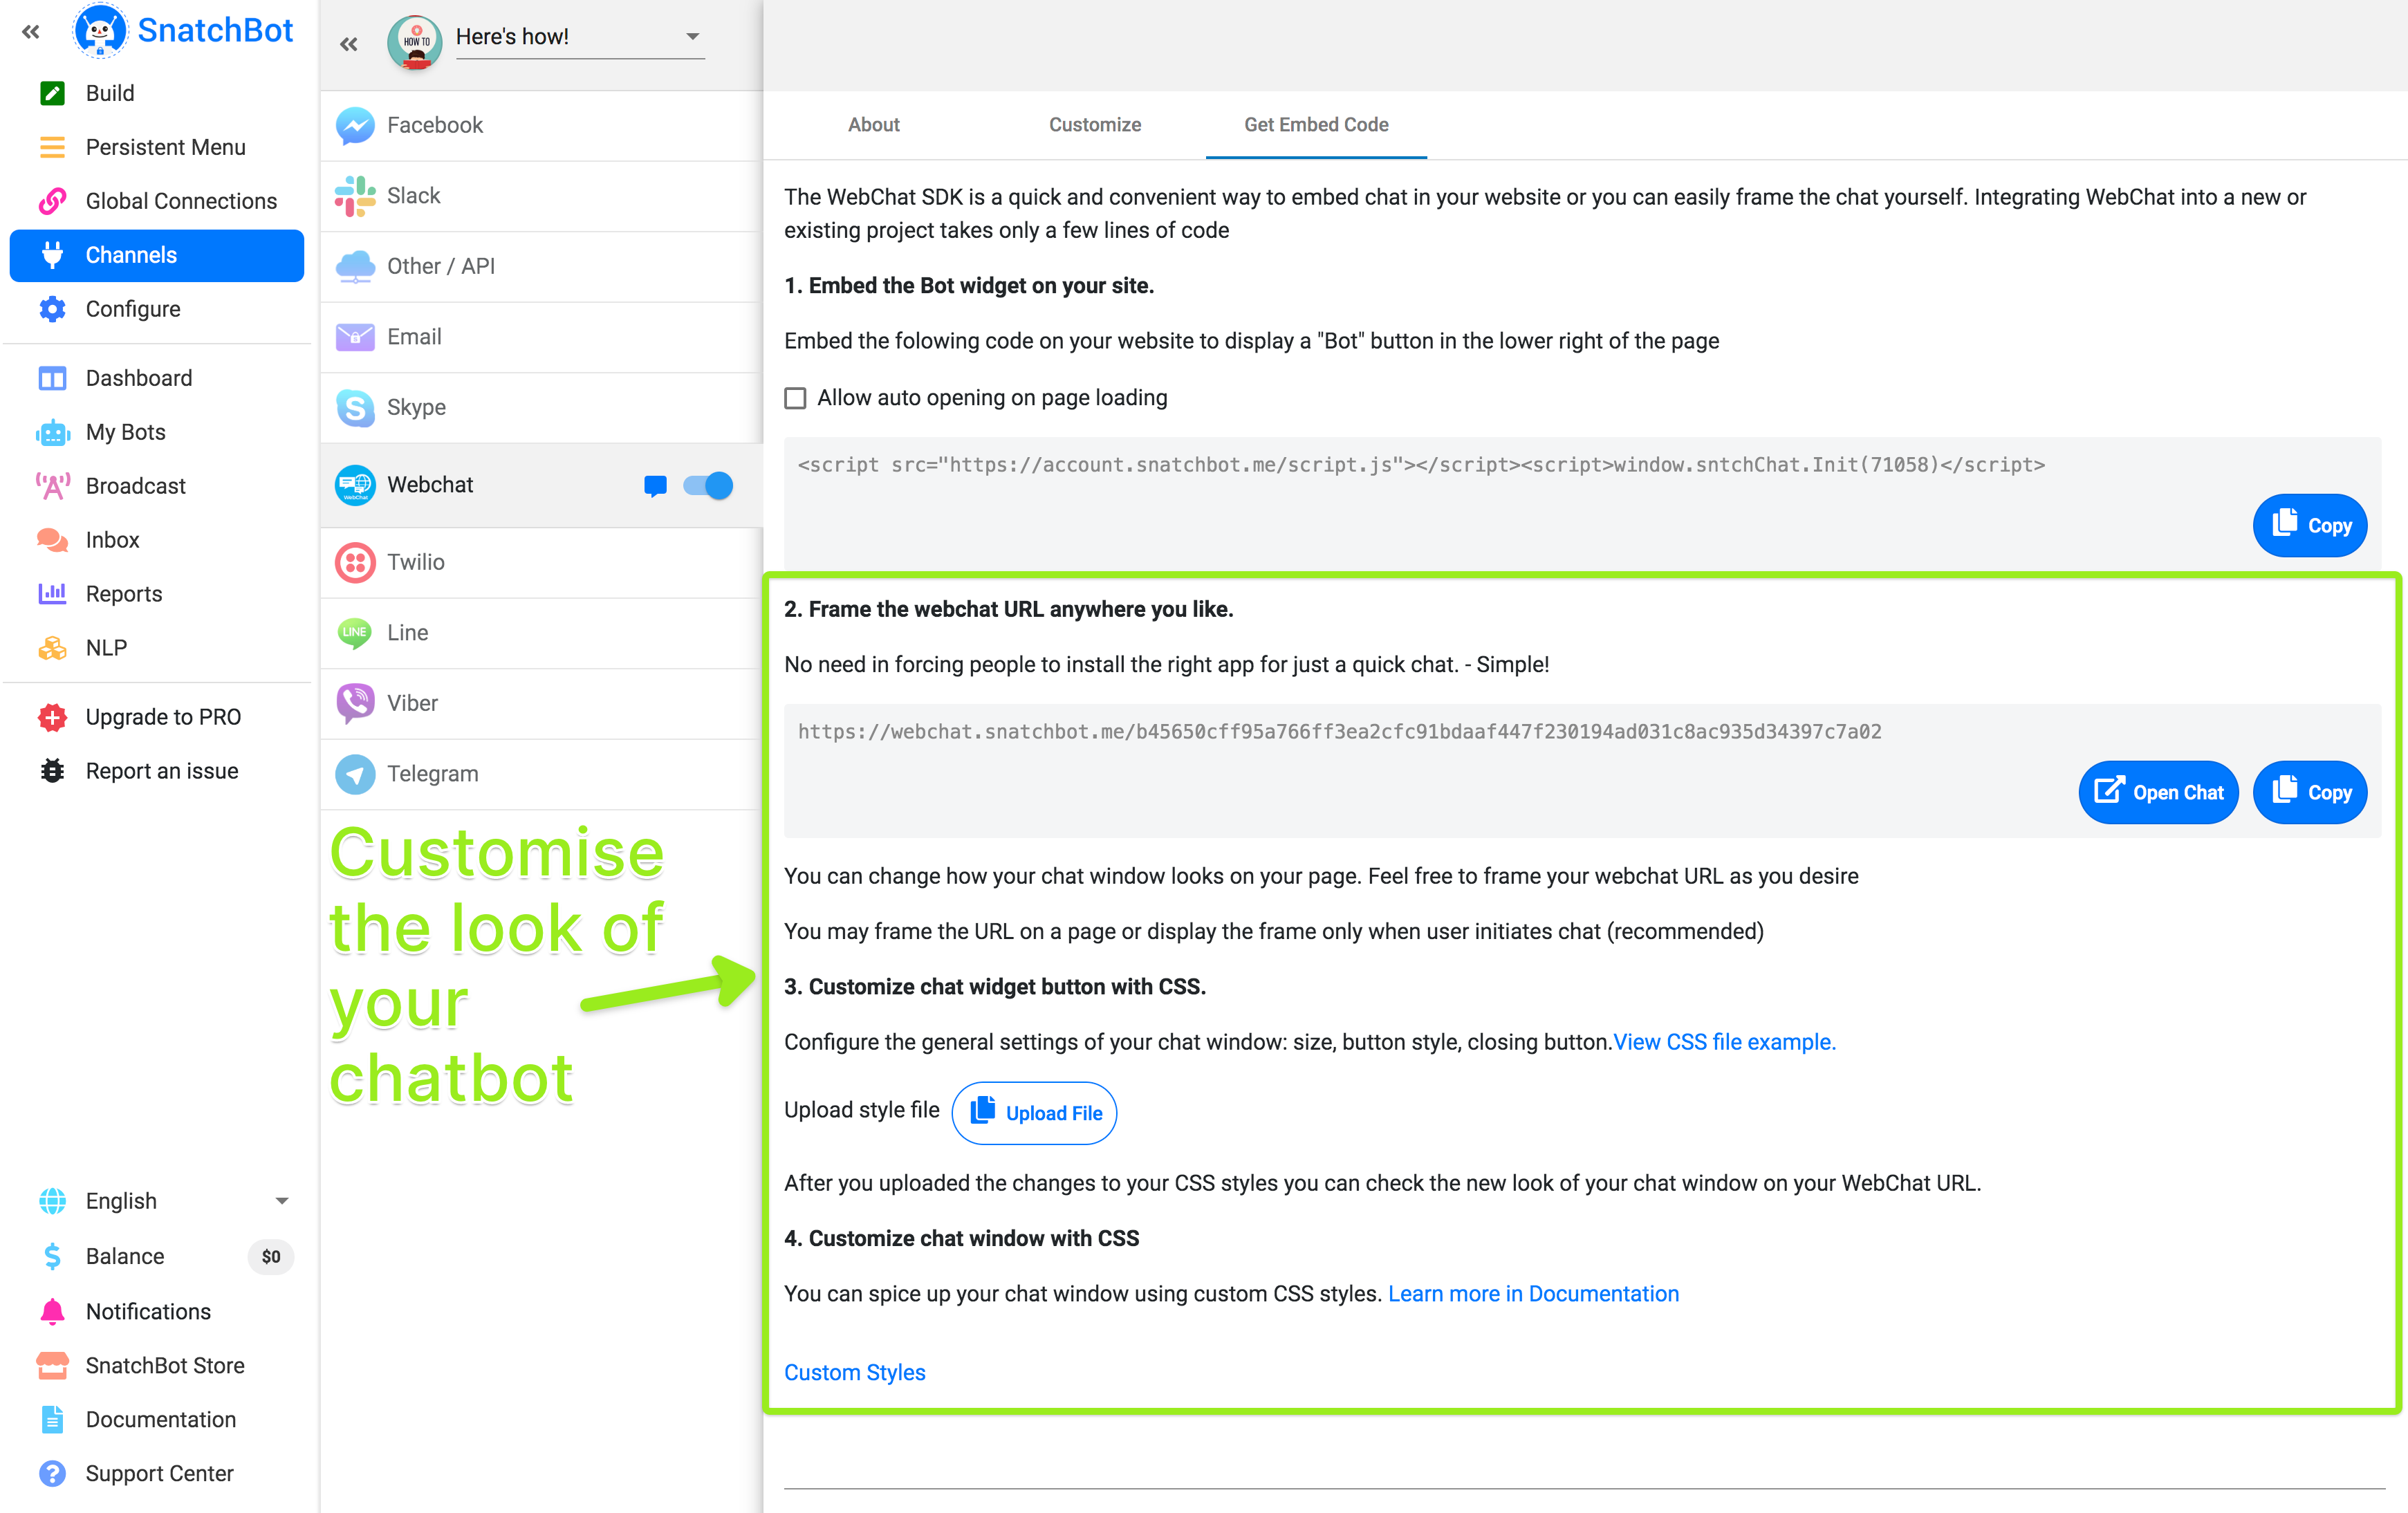
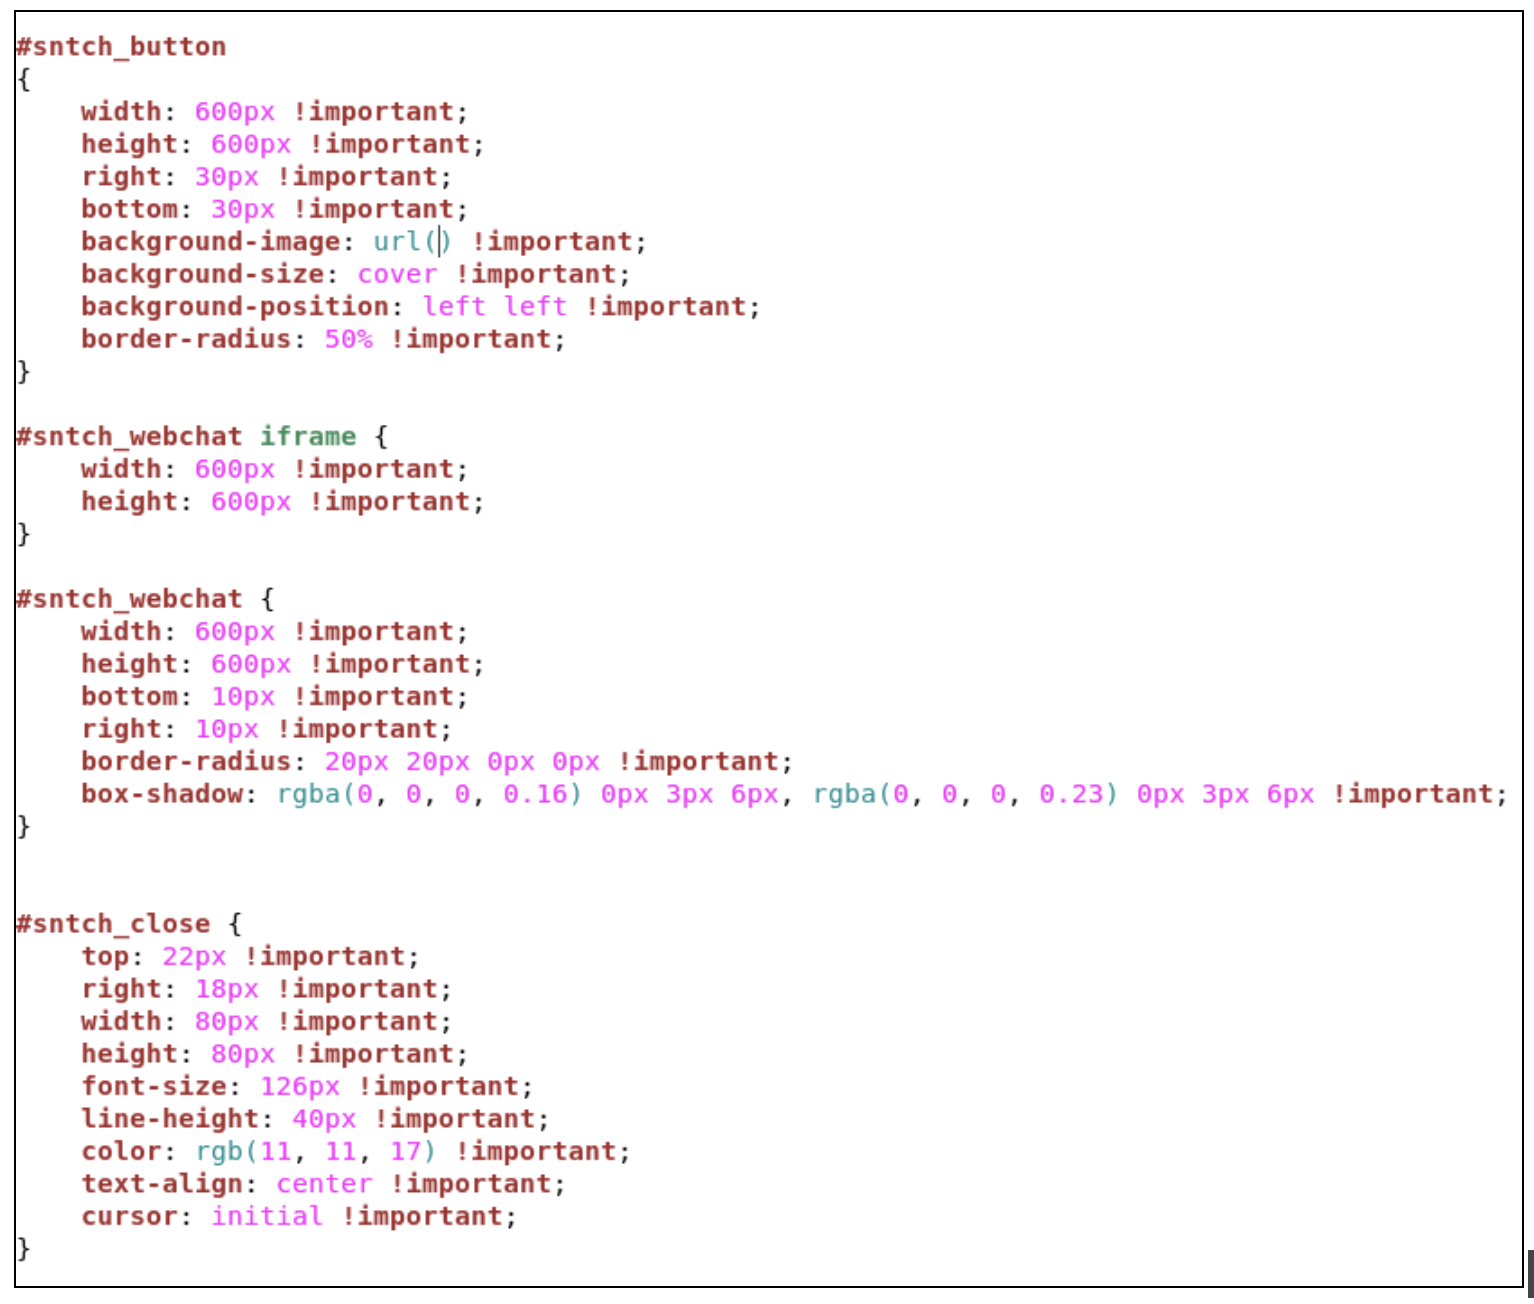
You can tailor your chat window to your brand using custom Cascading Style Sheets (CSS) styles. To do so you have to adjust the settings of the window in the CSS file. Then upload the file by clicking the button in the Get Embed Code tab.
After you have uploaded the changes to your CSS styles you can check the new look of your chat window on your WebChat URL.
You can adjust the following CSS settings:
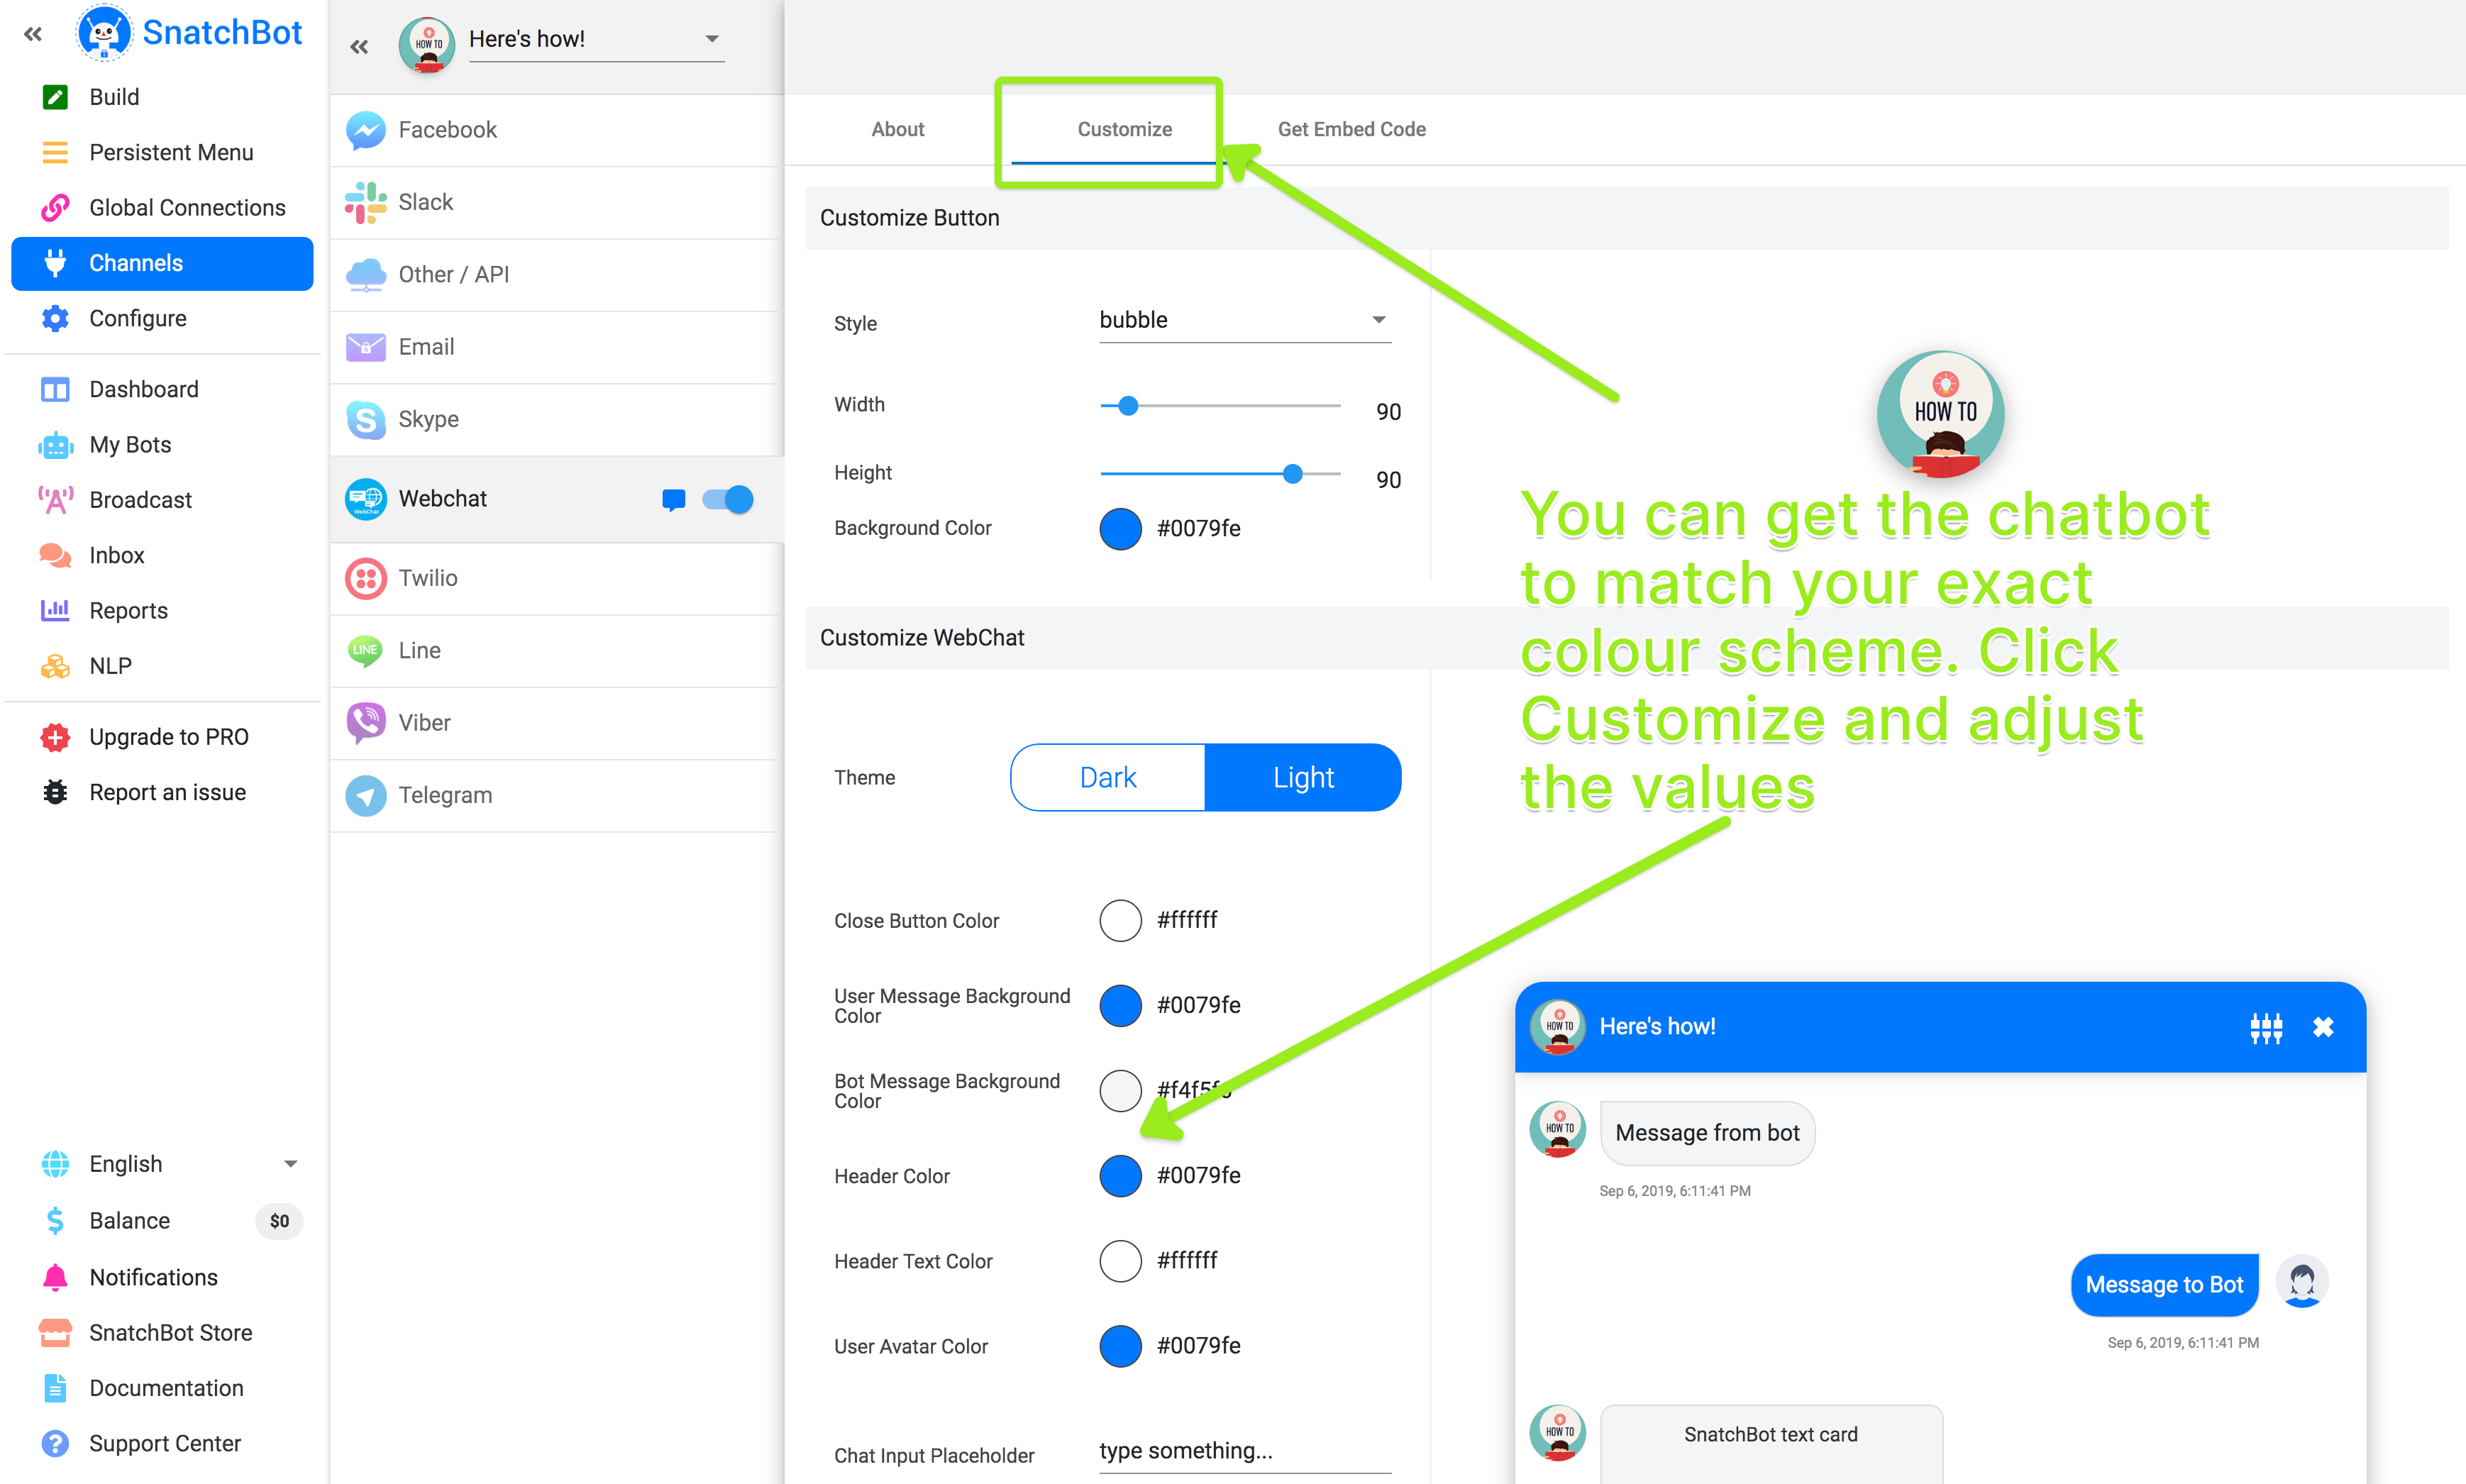
There are also some further options available for you to customize your bot and how it looks to the user. To adjust colour schemes and see options for the button shape click on Customise Webchat:
Watch this video tutorial ''How to give your website a chatbot with SnatchBot''
Updated almost 4 years ago
Chatbots are a new way for your customers to interact with your business. Publish your Bot on the SnatchBot Directory!
