Profile
1. My account
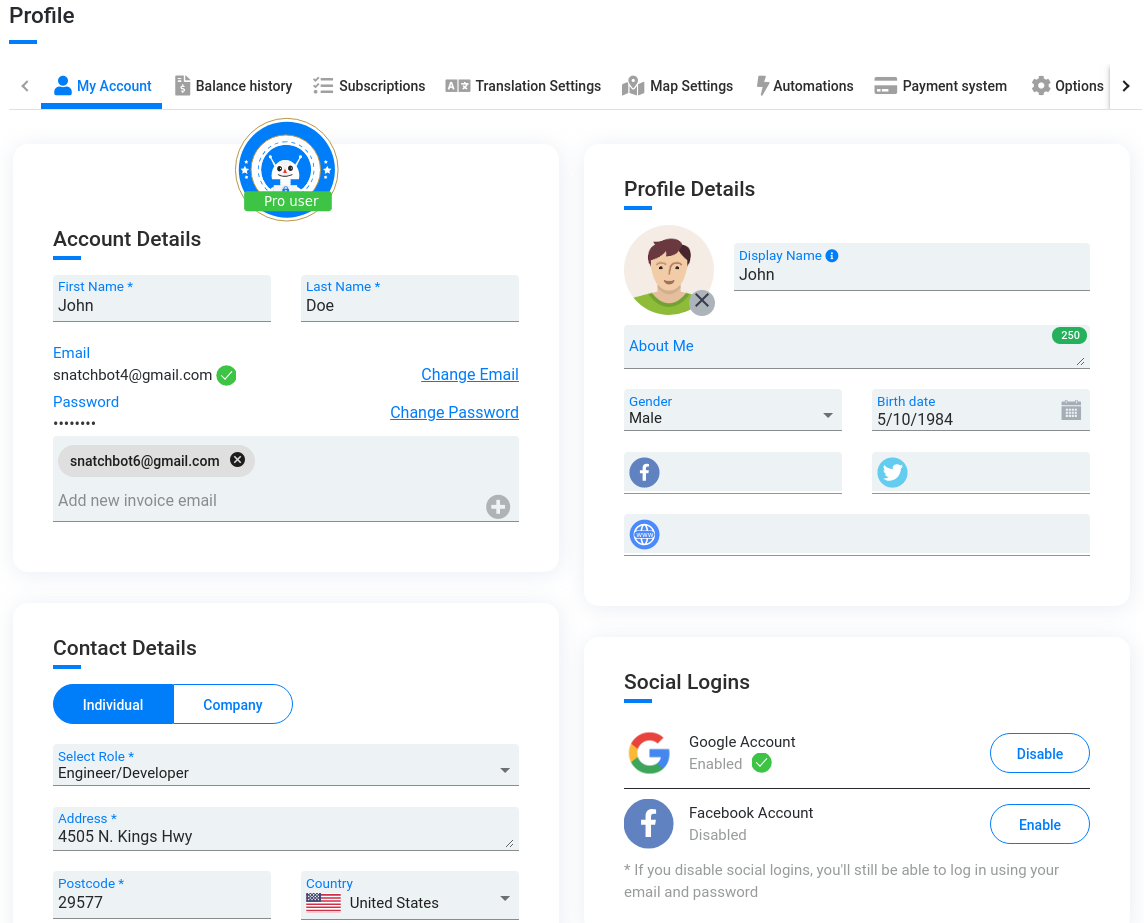
Tab functionality:
Private / Business - you can select whether you are an individual or a business. If a business account you will be offered an option to enter your company name and company number. There are no differences in functionality between these types of accounts.
Account Details:
- First Name (required)
- Last Name (required)
- Company Name
- Company Number
- Country - a field with a drop-down menu with a list of countries
- Phone # - a field with a drop-down menu with the list of phone codes of all countries (max 15 chars)
- Address
Account Information:
- Email (required) - the user’s email. You will be getting SnatchBot messages on this email such as newsletters or reports.
- Email for invoices (optional) - if you enter email here, you will be getting SnatchBot messages regarding payments on this email. Maximum 5 emails allowed. If you leave it blank, you will be getting SnatchBot messages regarding payments on your primary email.
Save - save changes
Delete account.
Newsletter subscription - subscribe / unsubscribe from the email newsletter. To apply changes press Save. Once you subscribe, you will receive an email.
Change password - open a new window to change the password
There are the following links in the footer of the page:
- Report an issue
- Privacy Policy - https://snatchbot.me/privacy
- Personal Data Request - https://snatchbot.me/personal-data-request
- Terms & Conditions - https://snatchbot.me/terms
Such links are in the footers of the Dashboard and My Bots pages, as well.
2. Balance history
In this tab, you can see your current balance, the next payment date, the total amount of money available for monthly subscriptions and check your payment and subscription history.
More information about the "Balance" section you can find here.
3. Subscriptions
The tab contains the list of subscriptions in your account and the total amount of money for active subscriptions for the current month:
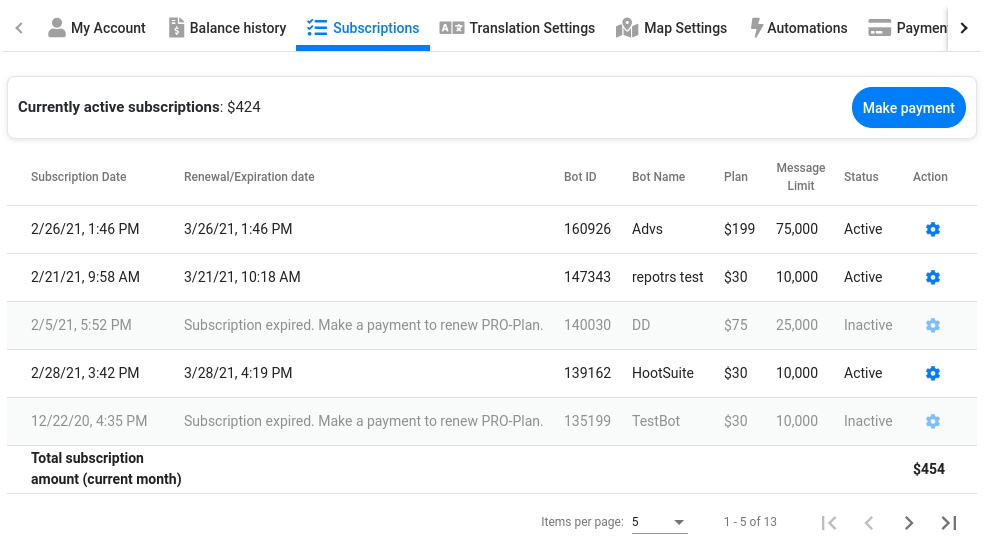
Make payment: add funds to your SnatchBot account.
Each record contains the following data:
- Subscription date
- Renewal / Expiration date
- If a subscription expires, the status will become inactive and the following phrase will appear in the “Renewal / Expiration date” column: “Subscription expired. Make a payment to renew your PRO-Plan.”
- Bot ID number
- Bot name
- Plan - the price of the current plan.
- If you change the plan, the price and date of the next paid period will appear in the column. For example: $75 ($30 after 2/23/20).
- Message Limit - the number of messages available for the current plan.
- If you change the plan, the number of messages and date of the next paid period will appear in the column. For example, 25000 (10000 after 2/23/20).
- Status of the PRO subscription (active/inactive).
A chatbot’s subscription status is considered to be active if you have activated Subscription to PRO-Plan for the subsequent period.
- If you manually cancel a subscription for a bot then the status will be inactive. But the bot still remains PRO until the end of the current period.
- If you do not have enough funds in your account to update the subscription, you will see a red triangle with the exclamation mark next to the status. If you hover the mouse over the triangle, the “Awaiting Payment” tooltip will appear.
- Action: open the Configure page of the selected bot.
4. Translation Settings
This tab contains the instructions and functionality to configure the Translation interaction in your bots.
To set up the interaction follow the instructions, enter a key in the field below and press Save.
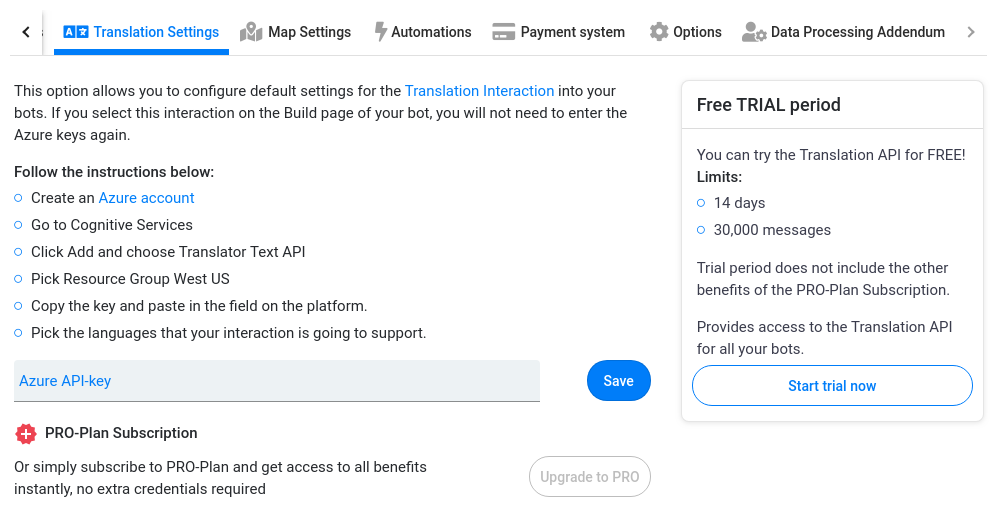
Upgrade to PRO: open the “Select the bot you want to upgrade to PRO” window.
Start trial now: activate a trial period.
5. Map Settings
This tab contains the instructions and functionality to configure the Collect Address interaction in your bots.
The functionality of the tab is the same as of the Map settings tab in the Bot settings tab (Bot -> Configure -> Map settings):
To set up the interaction follow the instructions, enter a key in the field below and press Save.
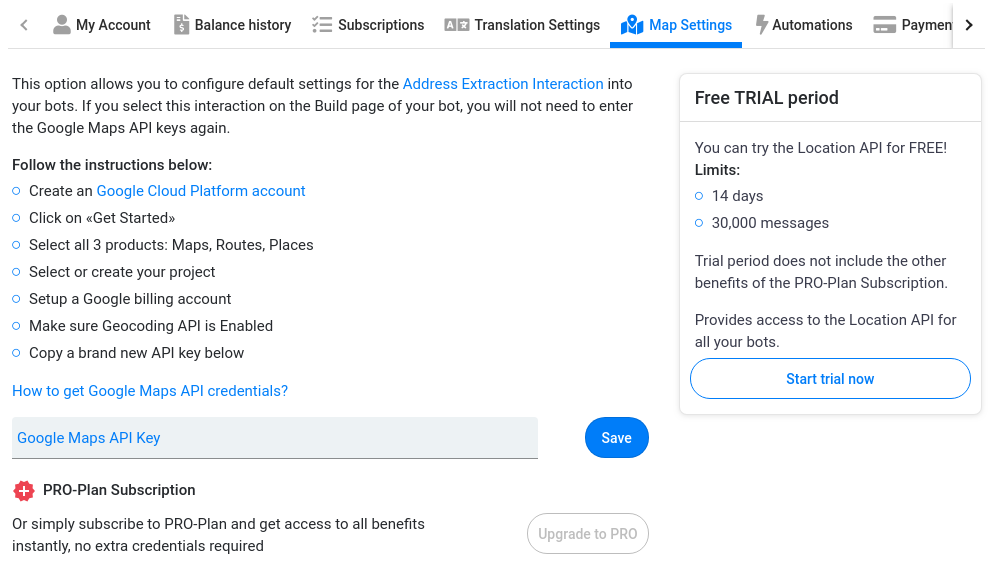
Upgrade to PRO: open the “Select the bot you want to upgrade to PRO” window.
Start trial now: activate a trial period. Upon pressing, the confirmation window appears.
6. Automations
On this tab you can see the list of Google accounts connected to the current SnatchBot account. These accounts are used for the Google Sheets Automations feature.
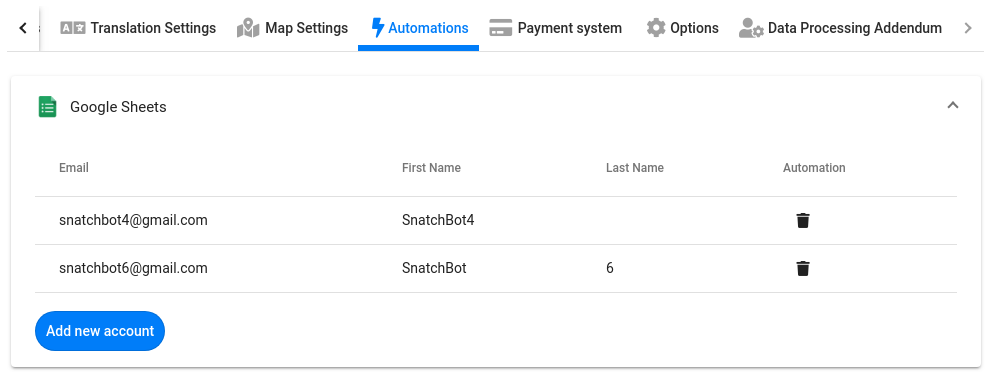
You can authorize a Google account by pressing the Add new account button. You can do the same from the Automations settings in the Build section, as well.
Delete: remove automation.
If you remove an account from the tab, then you will lose all automations connected to this account.
7. Payment system
Here you can add your PayPal credentials in order to integrate PayPal’s payment system into your chatbot:
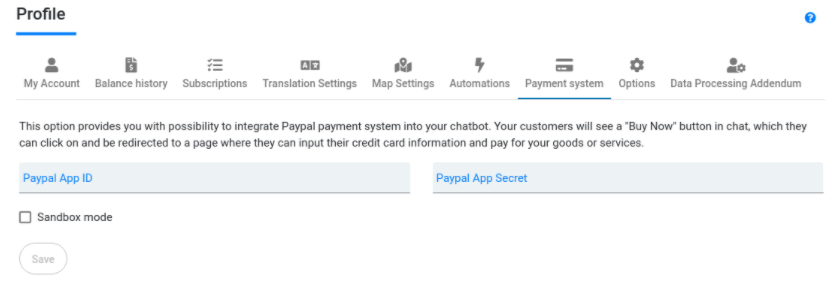
You have to enter the Paypal App ID and Paypal App Secret and press Save.
Sandbox mode: this allows you to use virtual money to test payments.
8. Options
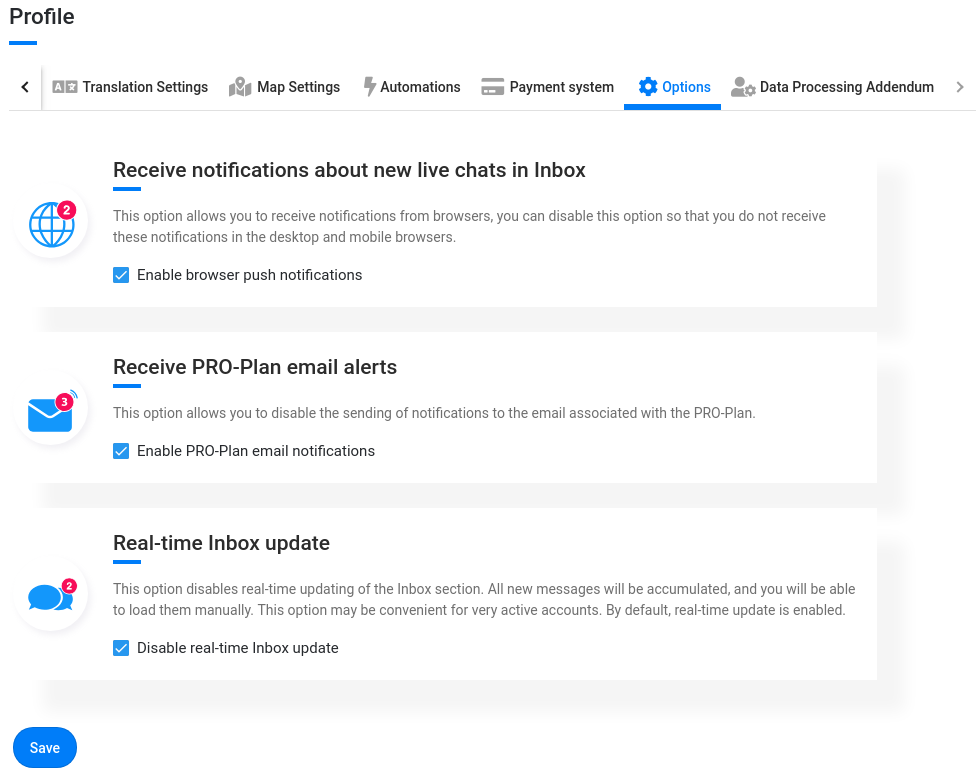
- Enable browser push notification.
- Enable PRO-Plan email notifications.
- Disable real-time inbox messages.
If on: the Refresh button will appear in the Inbox section in the Recent tab.
To save changes press Save.
9. Data Processing Addendum
Here you can sign up for a data processing agreement or view a sample of a Data Processing Addendum.
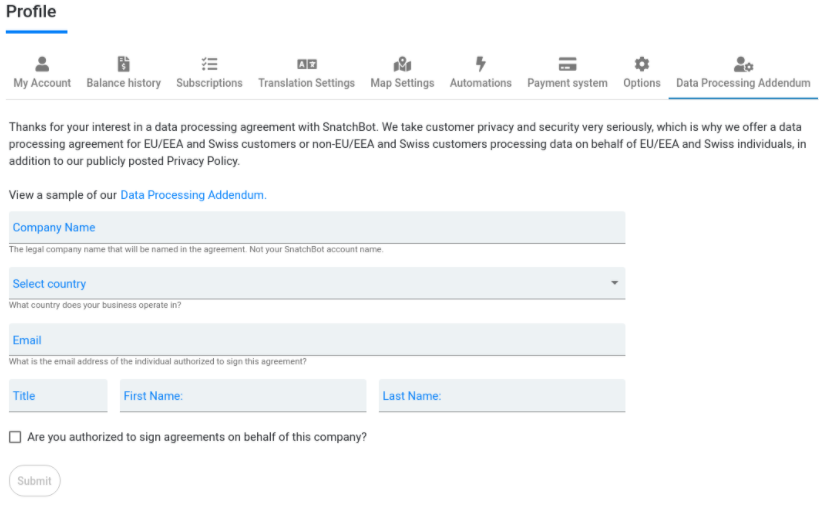
All fields are required. To proceed, tick the checkbox and press the Submit button. You will get to an agreement page, where you have to read and sign the agreement. You will receive a copy to an email you specify.
Updated over 3 years ago
