Create your NLP models
A step-by-step guide
1. Getting started with NLP
Before you can assign NLP decision-making capability to your chatbots, you'll need to create NLP models that you can use to analyse the user's sentences. Each NLP model that you create will be available to all your bots.
Your first step should be to avail of the Pre-trained models. They are free after all and drawn from enormous datasets that would take you weeks to create if you were starting from scratch.
Log in to your SnatchBot account, click NLP, select 'Pretrained models' and click the 'Get Default Models' button:
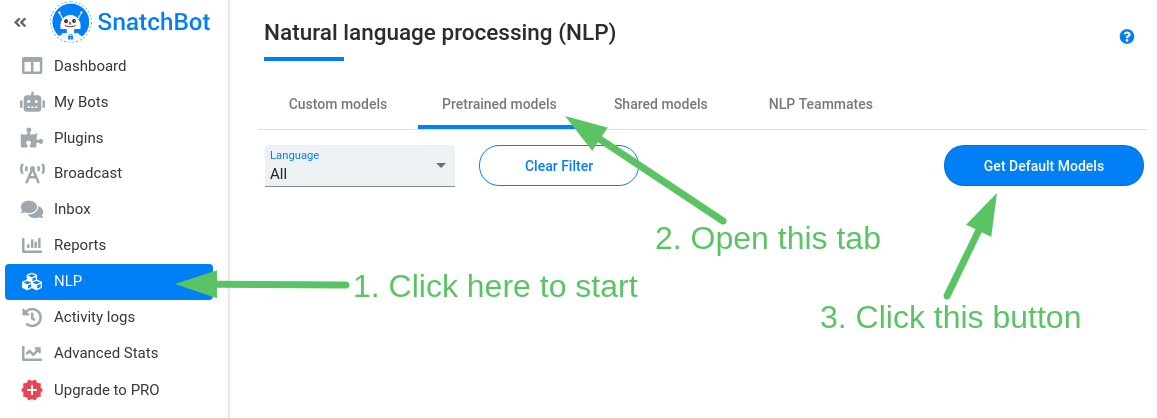
The 'Get Default Models' window will open up. Click Confirm, select your language and press Get Models.
In just five clicks, you have placed powerful NLP models at your disposal. At this point, if the Pre-trained models have the focus you want (e.g. sentiment analysis or recognition of persons, places, dates, time, money, percentages or miscellaneous nouns) you can skip to the next document, which is all about how to use NLP in your chatbot's conversation.

2. Creating Custom Models
If you want NLP models that focus on Intents or Entities that are not in the pre-trained models, then you'll want to create your own. This is a bit more involved than clicking five buttons, but really, it's not much more difficult. We've done as much as we can for you behind the scenes to allow you to build easily a great NLP model.
Open the Custom models tab and click Create New Model:

The window with model settings will appear:
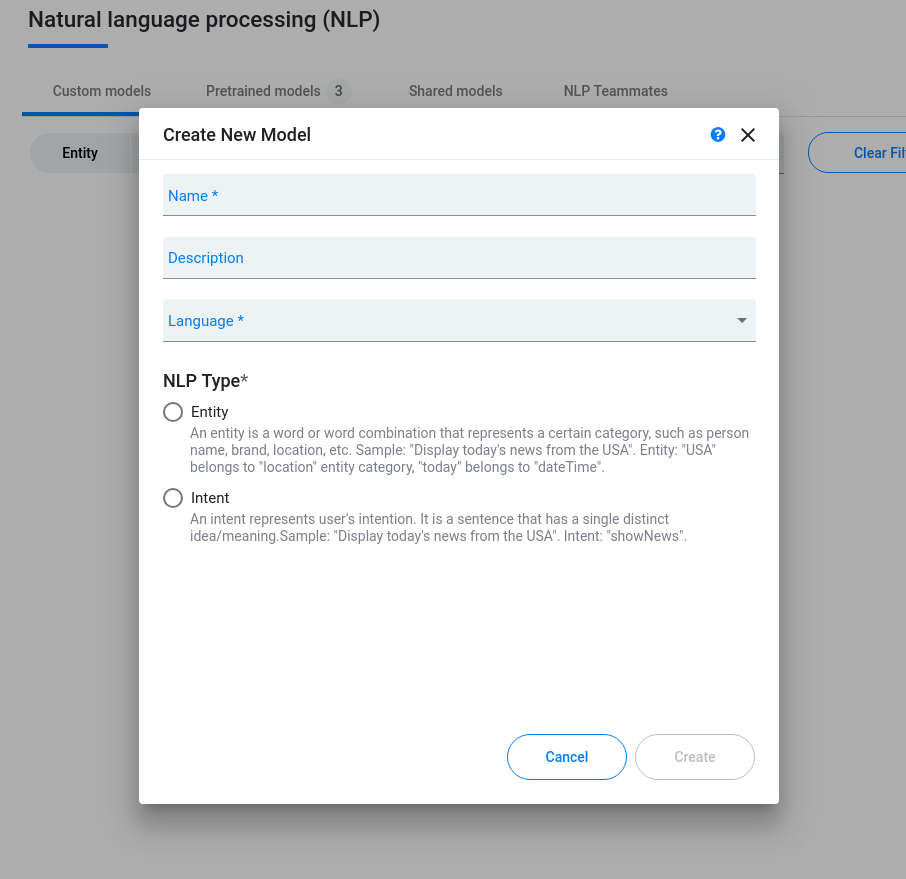
Model settings:
-
Give your model a name. As this is the name that you will see when you are building your bot's conversation and intend to add NLP options, you'll want the name to identify the model's purpose. So for example, you might call it
Intent booking, orIntent travel, orEntity car parts, etc. -
Add a description of the purpose of the model.
-
Pick a language for the model from our drop-down menu of over 130 languages.
-
NLP Type. Decide whether you want the model to identify Entities or Intent. You can create as many models as you need, so you can build both types in due course.
-
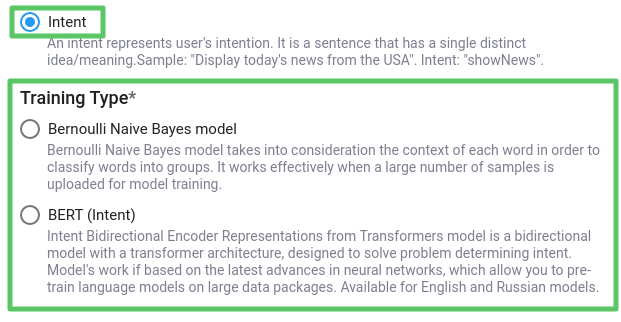
Choose a Training type.
There are two options for the Intent models: Bernoulli Naive Bayes model and BERT (Bidirectional Encoder Representations from Transformers). This is our choice of algorithm to allow the model to analyze sentences in the light of the samples you have provided.
Intent type requires a great number of samples to work correctly compared to the Entity type and must contain both false and true samples to be able to learn properly from the context. The false/true ratio must be at least 1:3. We advise adding as many false samples as possible.
In some cases, we advise you to go with Entity type - List and highlight matching words:
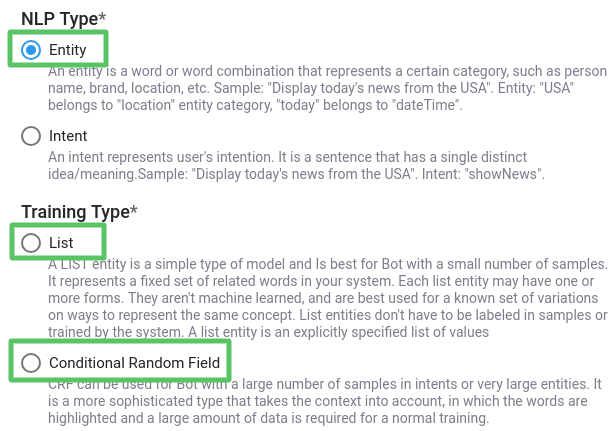
If your model is of the Entity type you can choose between two types of training, List or Conditional Random Field (CRF).
List is the simpler type of training as the model identifies Entities based on the known lists of terms for the same concept.
The CRF type of training is more sophisticated, with the model making an assessment of the likelihood of certain words being linked. The only reason not to choose CRF as your training model is that it requires a lot - hundreds minimum - of samples to become accurate. If you don't have the time or dataset to invest in establishing effective CRF training it might be best to use List:
Click Create to proceed.
At this point, your model is completely in the dark about how to look for the meaning you want, so you need to train it.
3. Adding Samples
Intent model
Whether it is an Intent model or an Entity model, you need to add Samples.
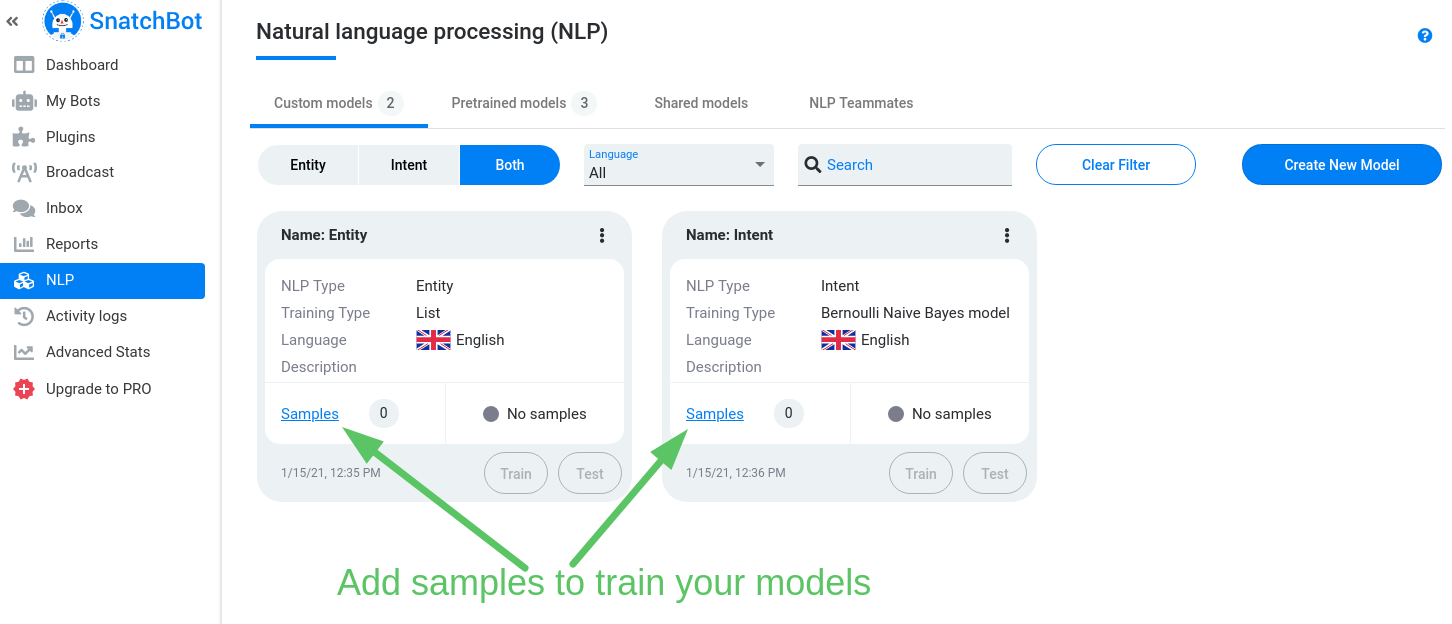
On the Samples page you can see your existing samples and add new ones.
In order to add a sample, enter the sample text, add a description (optionally), then use the Match toggle to set the status of the sample (true or false) and click “Add sample”.
For the best results, you have to add as many samples as you can (but no more than 1,000,000). Also, you should give negative samples using similar words, that will boost the effectiveness of the model.
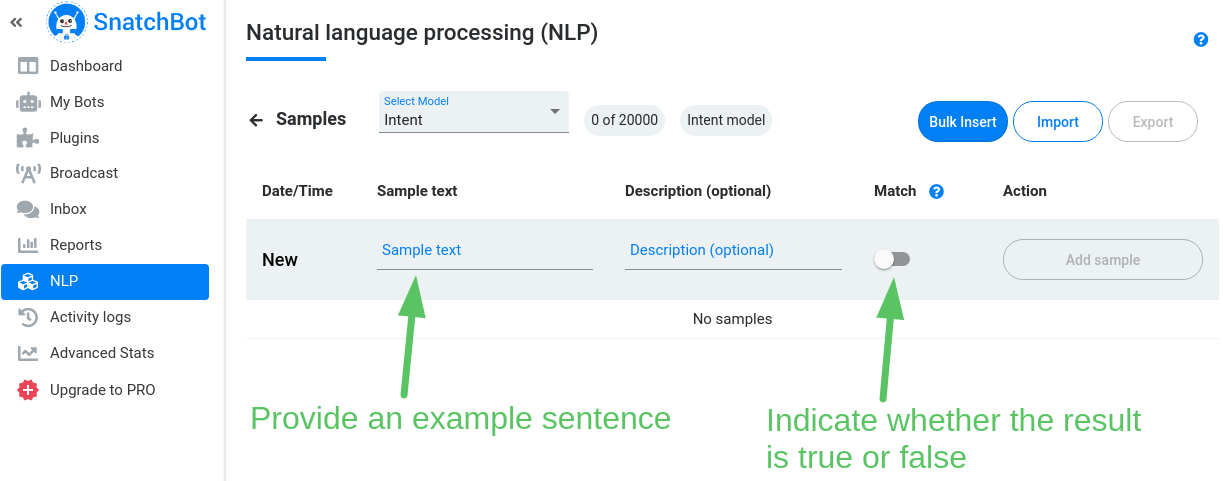
If, for example, you are making an NLP model that detects enthusiasm, you will want to provide text such as: this chatbot is awesome and flag the sentence true (i.e. slide the Intent match slider to the right).
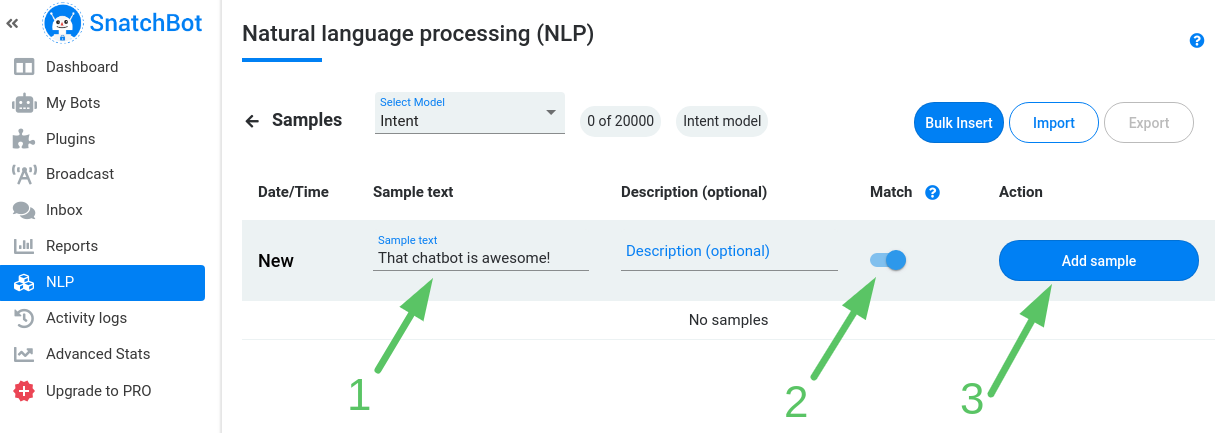
For the same model, you would also mark sentences like, meh and I'm getting fed up with False (i.e. the Intent match slider is to the left).
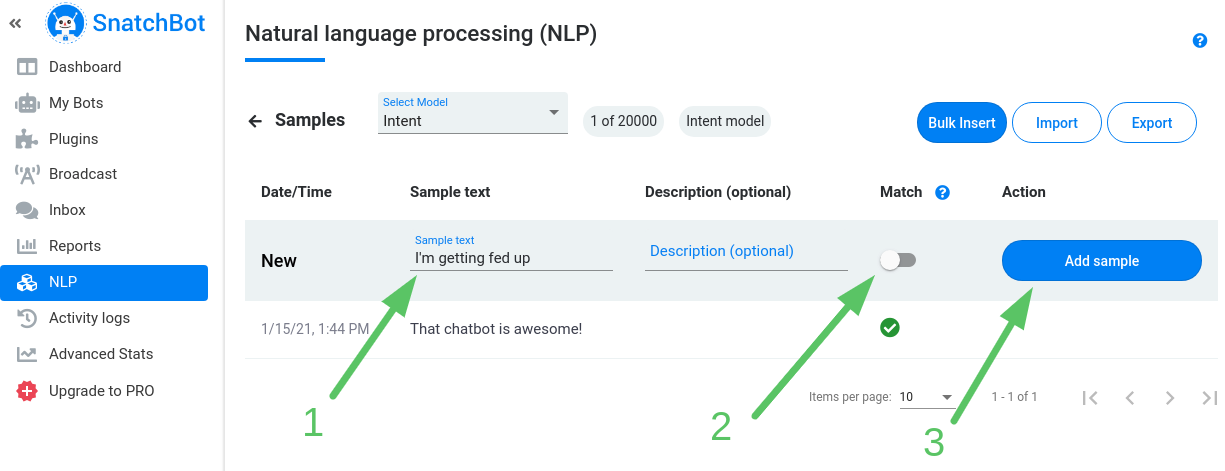
You can add samples manually one by one or insert large numbers of samples at a time using the “Bulk insert” feature. Each sample must start from a new line.
Make sure to have a high proportion of false sentences and not just enter true ones. In order to train an intent model, you must add at least one false and true sample. Otherwise, you could not train your model and, as a result, it will be unavailable for further use.
Entity model
For Entity models, adding Samples is just as simple:
- Enter sentences with words that correspond to the Entity you want the model to detect. Your sentence will appear in the box below the Entity Text field.
- Highlight the keyword in the sentence in the second box. The keyword will pop up in the third box.
- Click the '+Add' button to add the keyword into the sample. You will then see them as removable white buttons. You can add as many keywords as appropriate.
- Click Add sample when you are done.
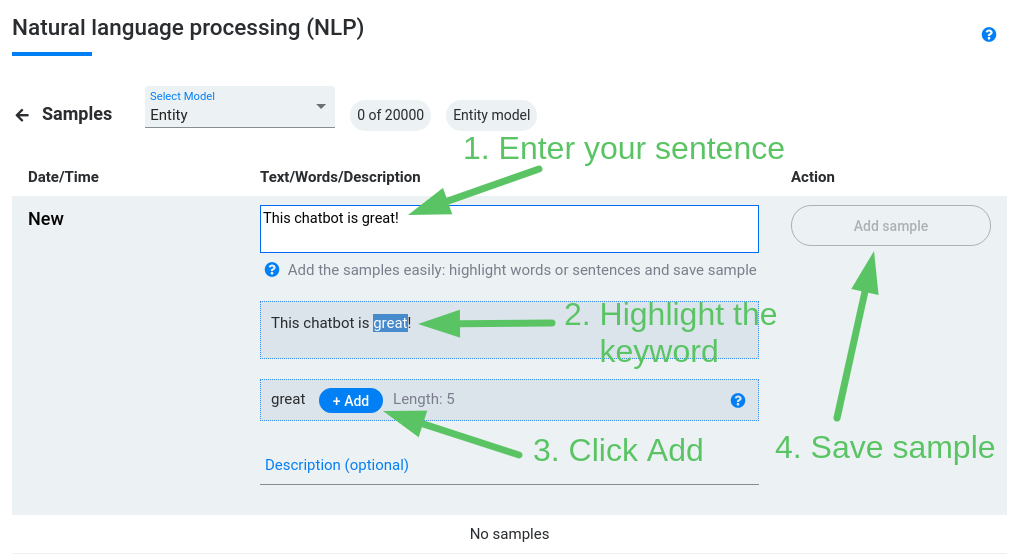
That's it! Except it is time to add another. And another. The more the better! The pre-trained models, for example, utilise tens of thousands of names and locations.
4. Train model
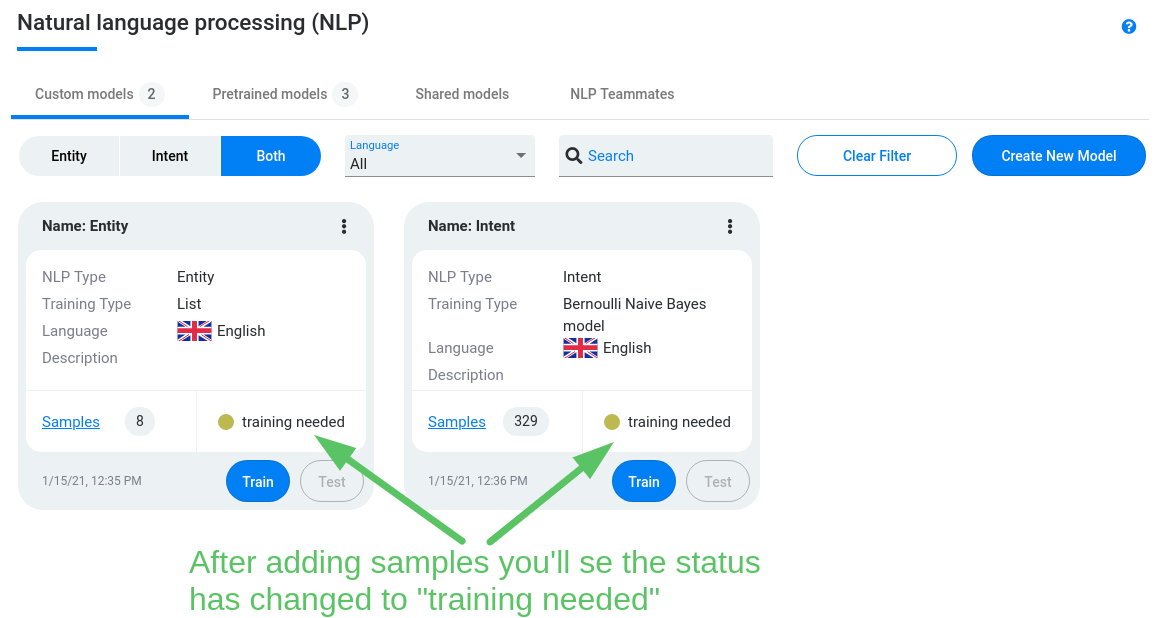
Let's assume you've created a large amount of samples. Now they have to be added to the model. Open the Custom models tab (top left). You'll see that the Status of the model has changed to training needed:
To train the model click Train:
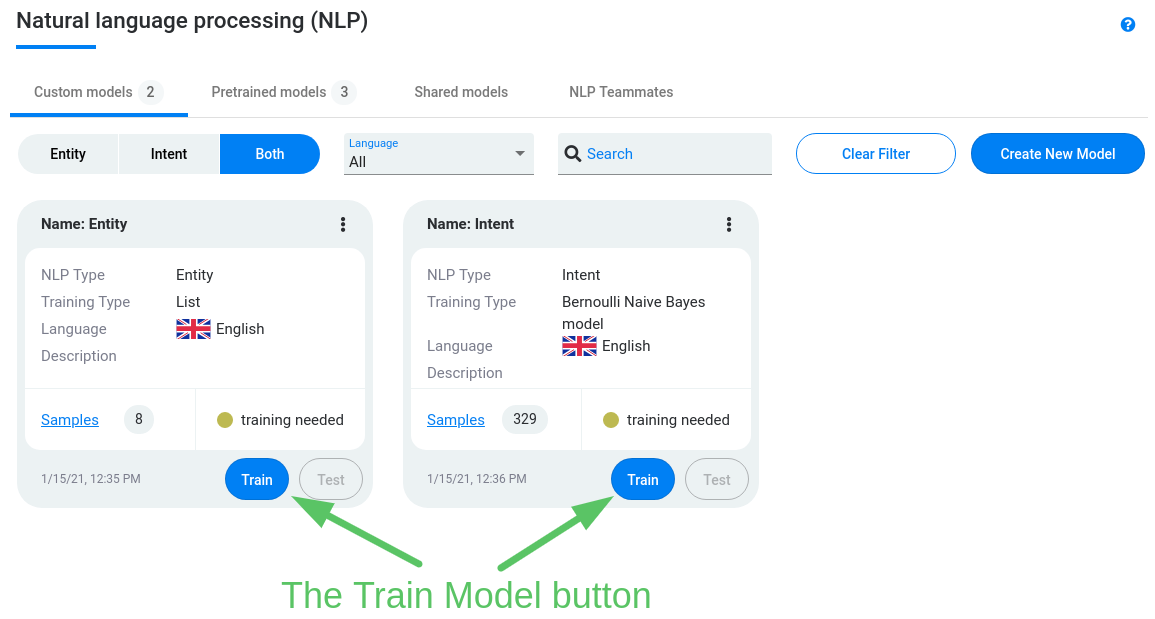
Training settings are different for each type of model and each type of training. There are 3 options:
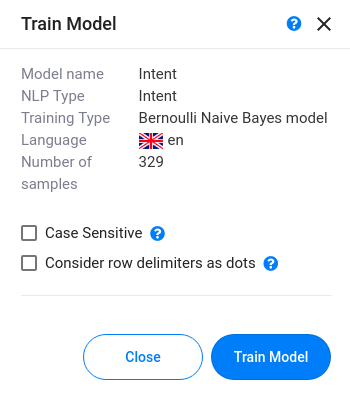
Intent - Bernoulli Naive Bayes
For Intent models, the algorithm has been pre-populated (Bernoulli Naive Bayes mode). You need to decide whether you want the text in your samples to be Case sensitive true or false. The same is for Consider row delimiters as dots
Training settings for Intent - Bernoulli Naive Bayes model:
Entity - List
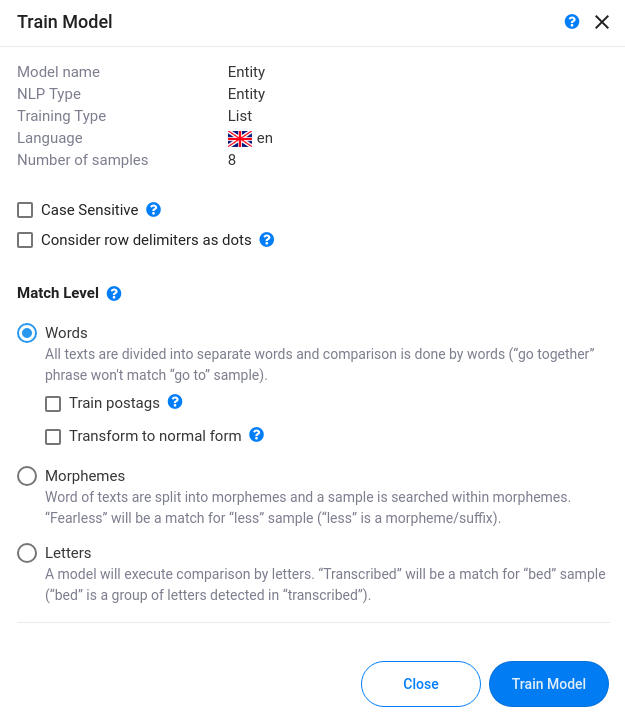
List settings:
- Case sensitivity
- Consider row delimiters as dots
Match level
Match level is responsible for morphological analysis of text.
- Words: text is divided by words, the match will be found if words are matching completely. For example, "go together" will not be counted as a match for "go to".
- Train POS tags, iftrue, the model will be trained taking into account the exact part of speech in context. Not supported by some languages.
- Transform to normal form: iftrue, the algorithm will convert the words into normal form before matching. Not supported by some languages. - Morphemes: text is divided into morphemes (roots, affixes etc.)
- Letters: texts are compared by symbols, the combination may be found inside any word.
Entity - Conditional Random Field (CRF)
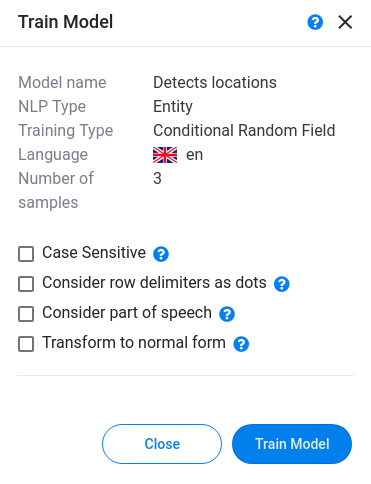
CRF settings:
- Case sensitivity
- Consider row delimiters as dots
Consider part of speech: iftrue, the model will be trained taking into account the exact part of speech in context. Not supported by some languages.
Transform to normal form: iftrue, the algorithm will convert the words into normal form before matching. Not supported by some languages.
Intent - BERT (Bidirectional Encoder Representations from Transformers)
Intent Bidirectional Encoder Representations from Transformers model is a bidirectional model with a transformer architecture, designed to solve problem determining intent. Model's work is based on the latest advances in neural networks, which allow you to pre-train language models on large data packages. Available for English and Russian models.
Click Train Model and the model status will be changed to Training. The training process might take some time.
5. Testing
Once training is over the model status will be Trained and you will be able to test and use your model.
Click Test to open testing window:
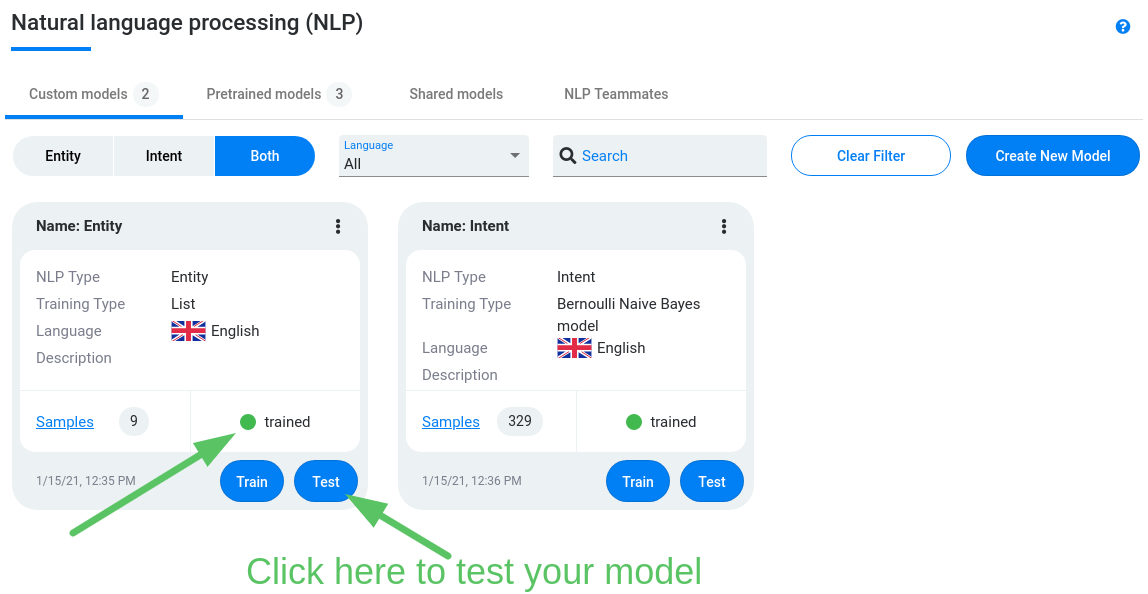
You need to enter some text in the Test Text field and click Test.
In the Response box you will see the result of the model's analysis:
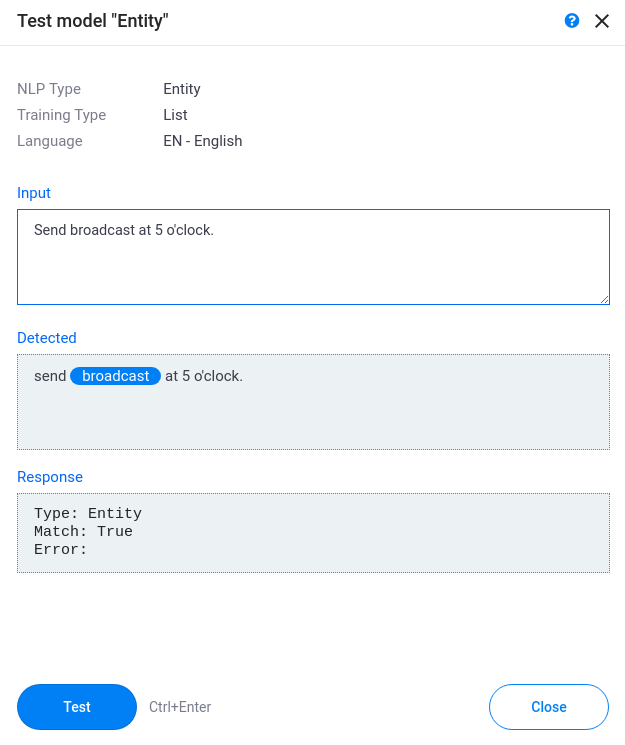
There are two results you can obtain from testing a model: true or false. The subsequent direction of the conversation depends on this result.
If the tested text (or any part) matches the settings of a model, then the result will be true; otherwise, false.
The identified samples will be highlighted in the “Detected” box.
If there are no matches, then the system will display your text without any highlighting.
Response box:
- Type - the type of the tested model (Entity/Intent).
- Match - status of testing (True/False). If the model matches, then the status is true; otherwise, false.
- Error - in case of an error, you will see it flagged here.
If you are not happy with your test results, you will want to create more samples and retrain the model. Once you are satisfied, you are ready to place your NLP model in your chatbot.
In this tutorial we will learn How to create your own NLP models for your chatbot with SnatchBot
The following tutorial demonstrates How you can train your INTENT NLP model with SnatchBot
Updated over 2 years ago
Once you've created your NLP models, it's really straightforward to apply them to your chatbot's conversations.
