Skype Messenger (old version)
Creating a Skype Messenger bot is easy.
Skype closes registration of new bots since October 31st, 2019. Skype for Business channel is being deprecated since June 30th, 2019.
Thus, since October 31st you can connect only previously existing bots.
A bot connected to the Skype channel can be added to a contact list and people can interact with it in Skype.
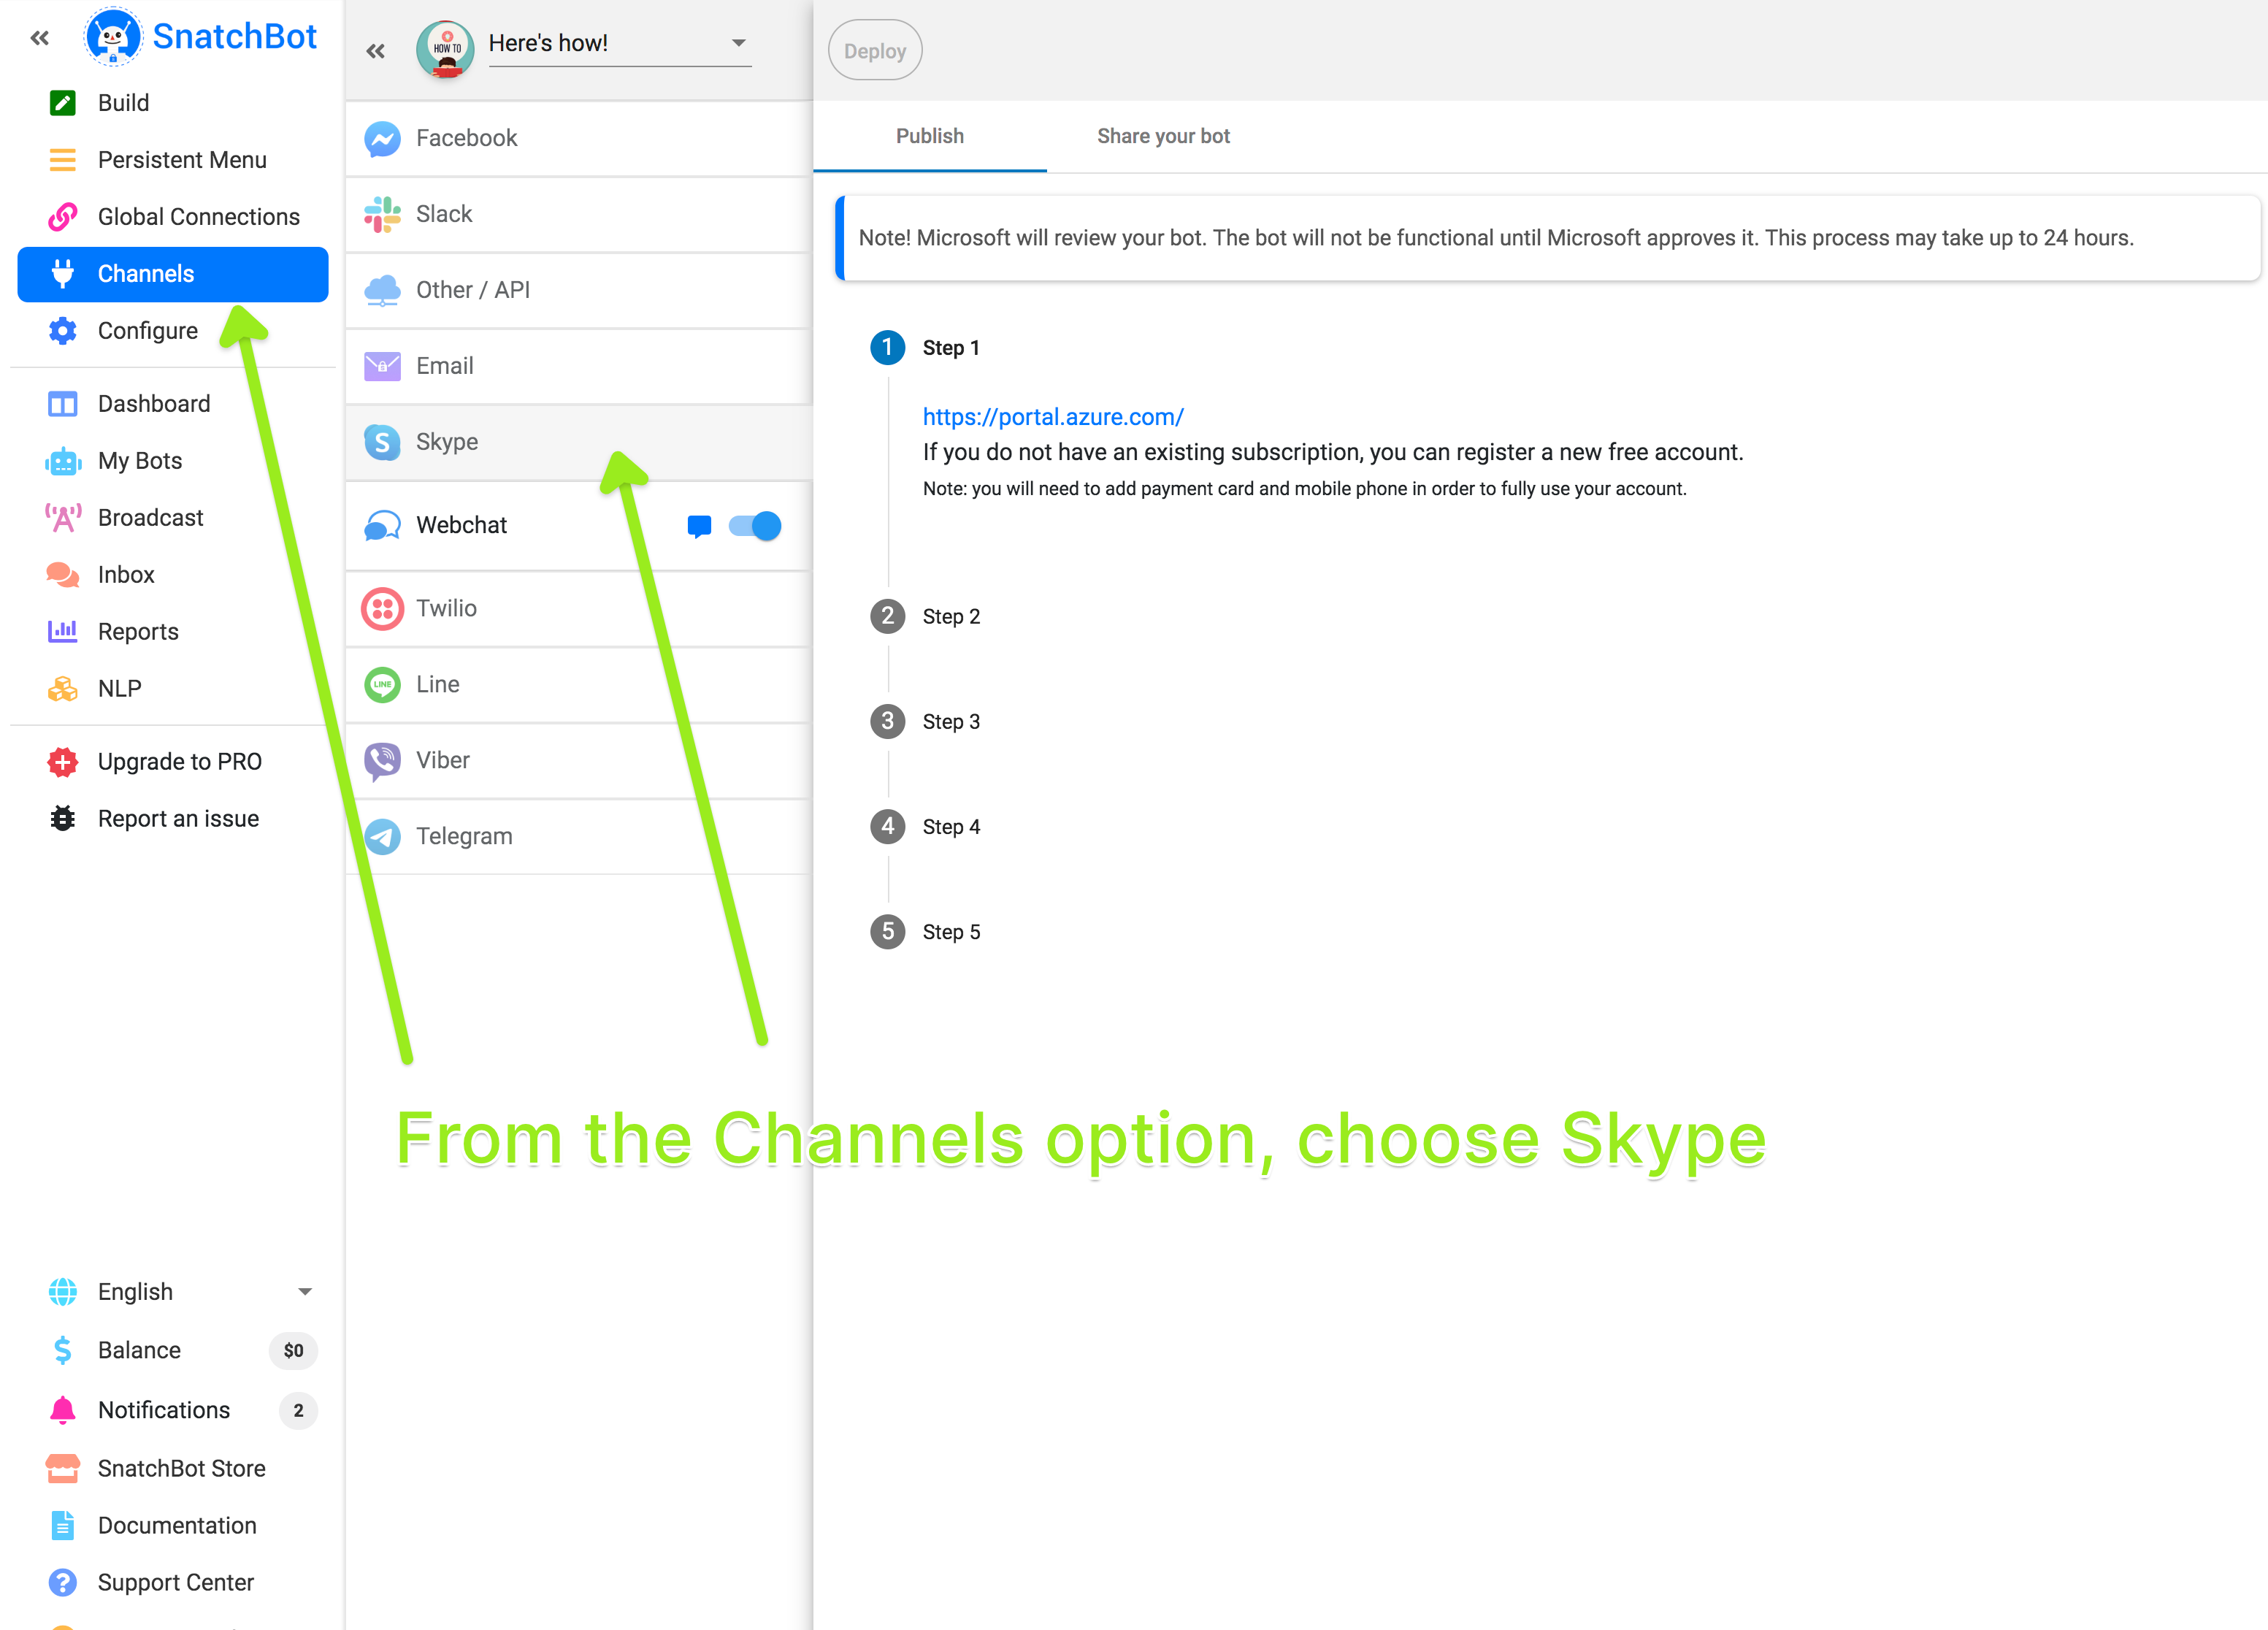
To publish your bot on Skype you need to go to the bot’s settings and open the Channels section. In the next panel, you will see the ‘Skype’ channel:
Next, you will need to login to Microsoft Azure Portal (with an existing account or a newly created one). When logged in, please follow the steps below:
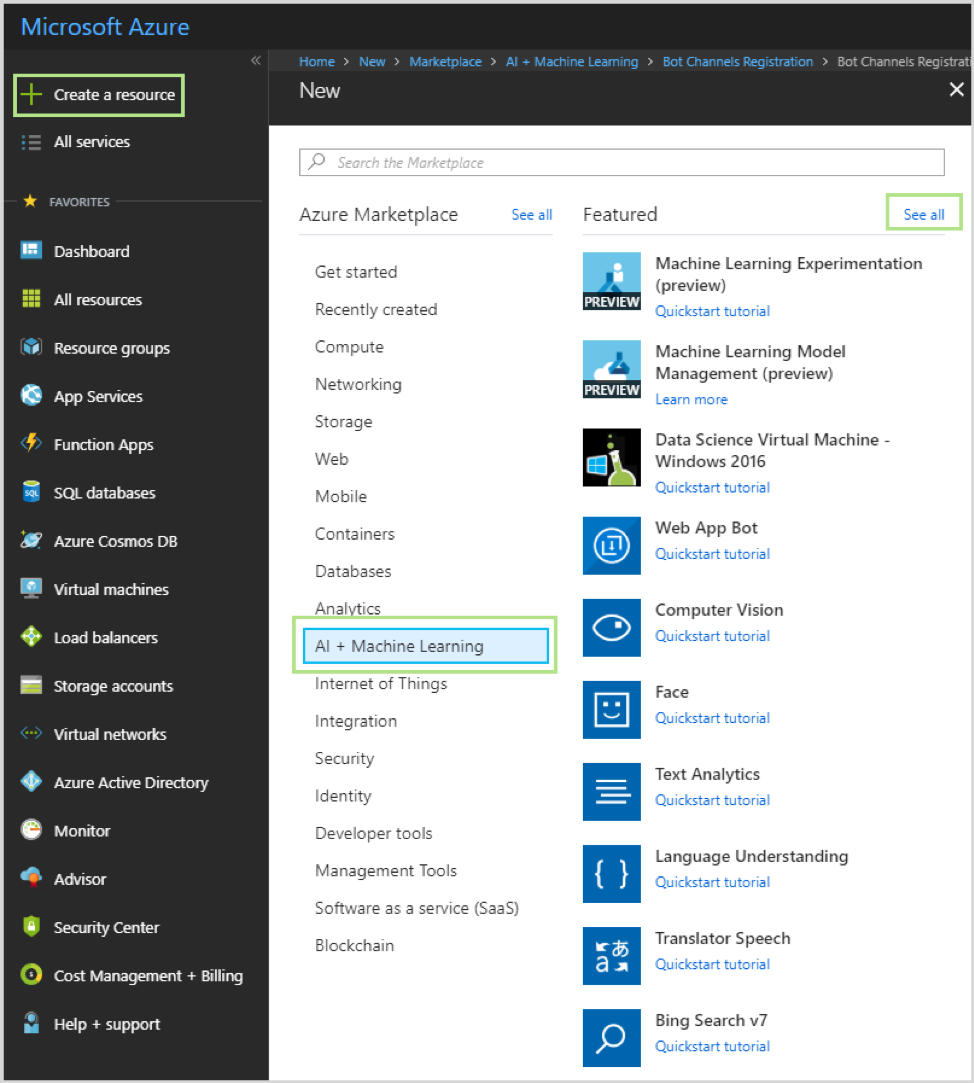
- Click + Create a resource button, followed by Al + Machine Learning, and then select Bot Channels Registration section (if you do not see it in the list, click the ‘See All’ button):
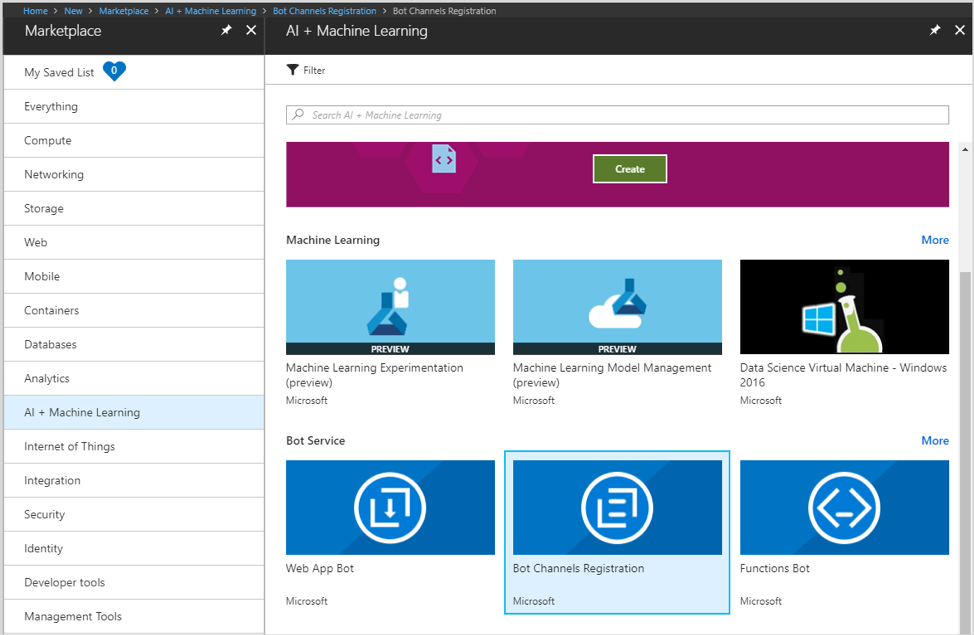
- In the form that opens, click the ‘Create’ button to start the creation process. After that, fill in the required fields as specified on the screenshot below:
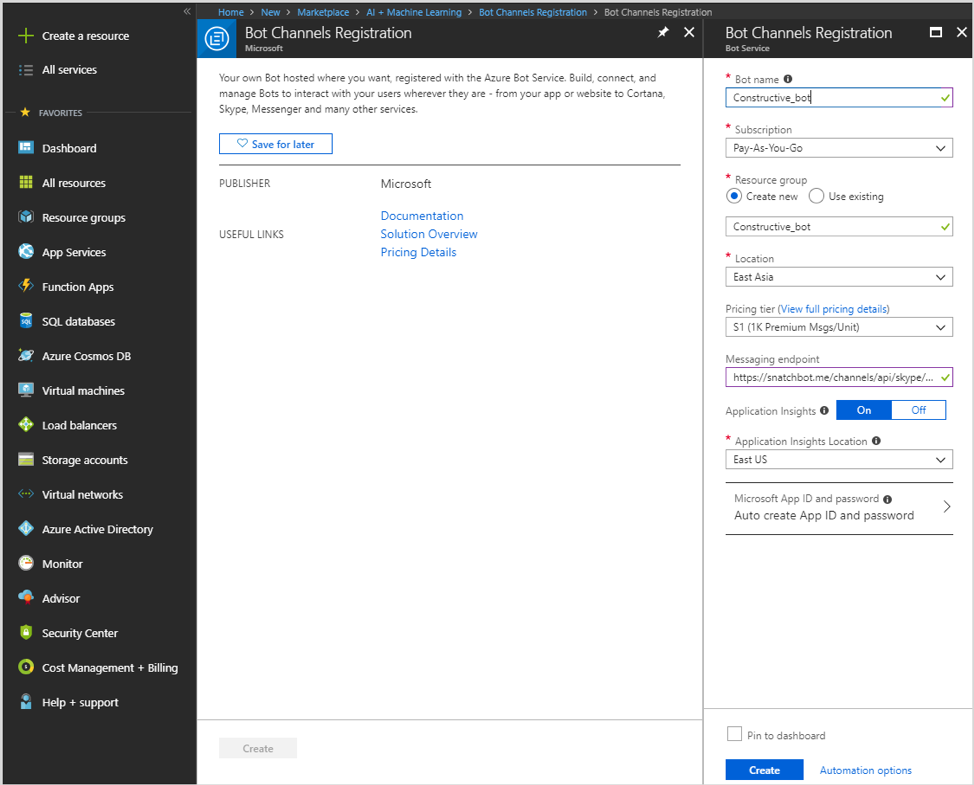
In the messaging field use this URL but change the number at the end to the ID of your bot.:
https://snatchbot.me/channels/api/skype/id15457
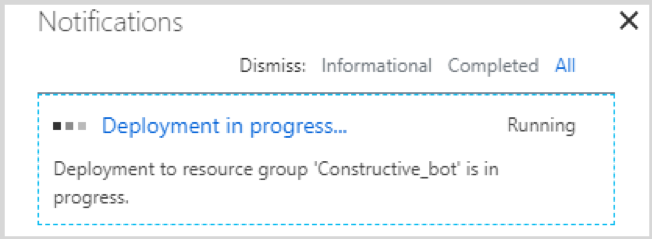
- Click the Create button to confirm you are ready to go. In the Notifications section you can view how the deployment process is progressing:
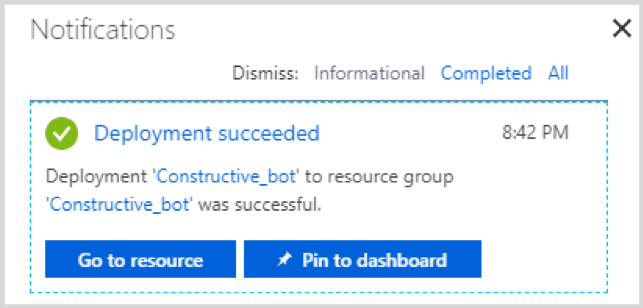
Click the ‘Go to resource’ button to open the bot's resources menu.
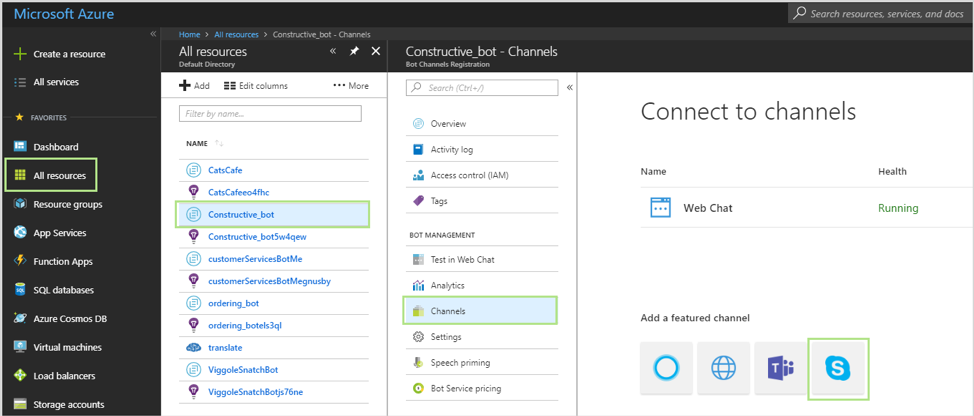
- Now you need to add the Skype channel. To do this, go to the ‘All resources’ tab, in the opened window select your bot’s name and then click ‘Channels’ under the Bot Management. To add a channel, click the Skype logo icon:
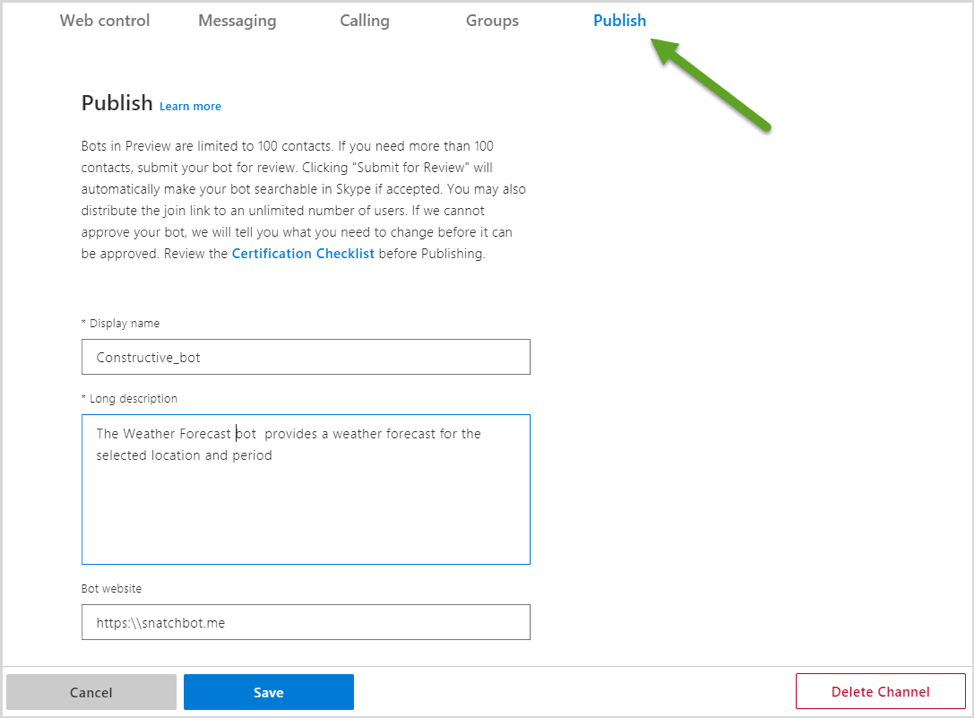
- In the opened window, go to the ‘Publish’ tab and fill in the needed information. This section configures the publish settings of your bot. All fields marked with an asterisk are required:
- Accept the Terms of Service and the Skype channel will be added to your bot:
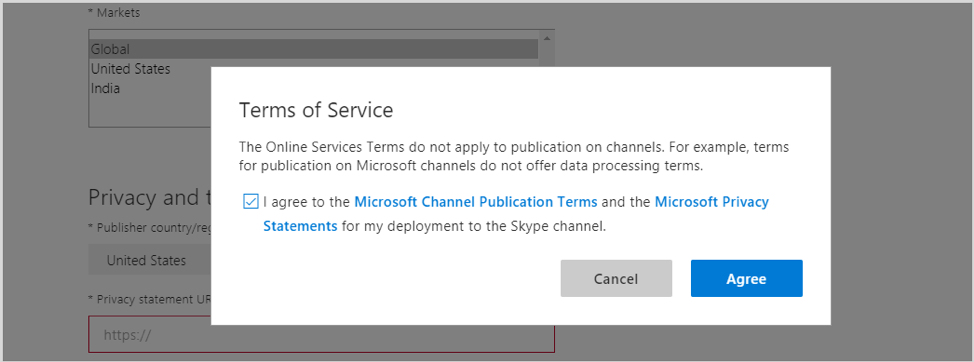
Publishing a bot submits it for review. Before review, the bot is limited to 100 contacts. Approved bots do not have limited contacts and you may opt to have the bot included in the Skype bot directory.
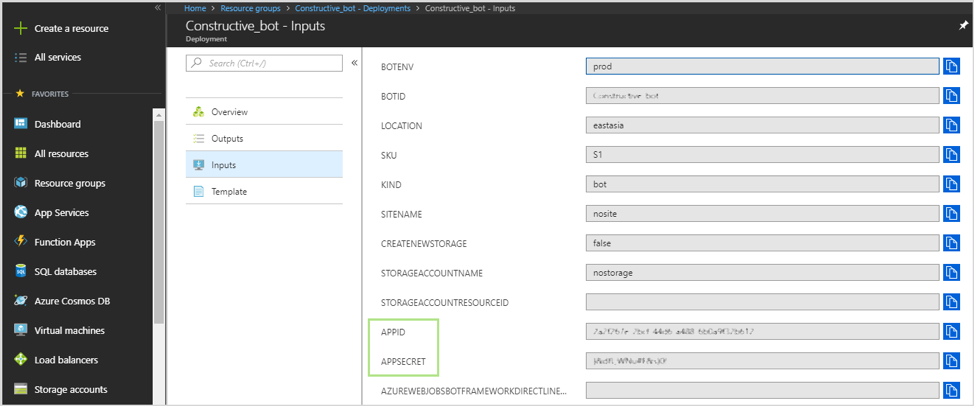
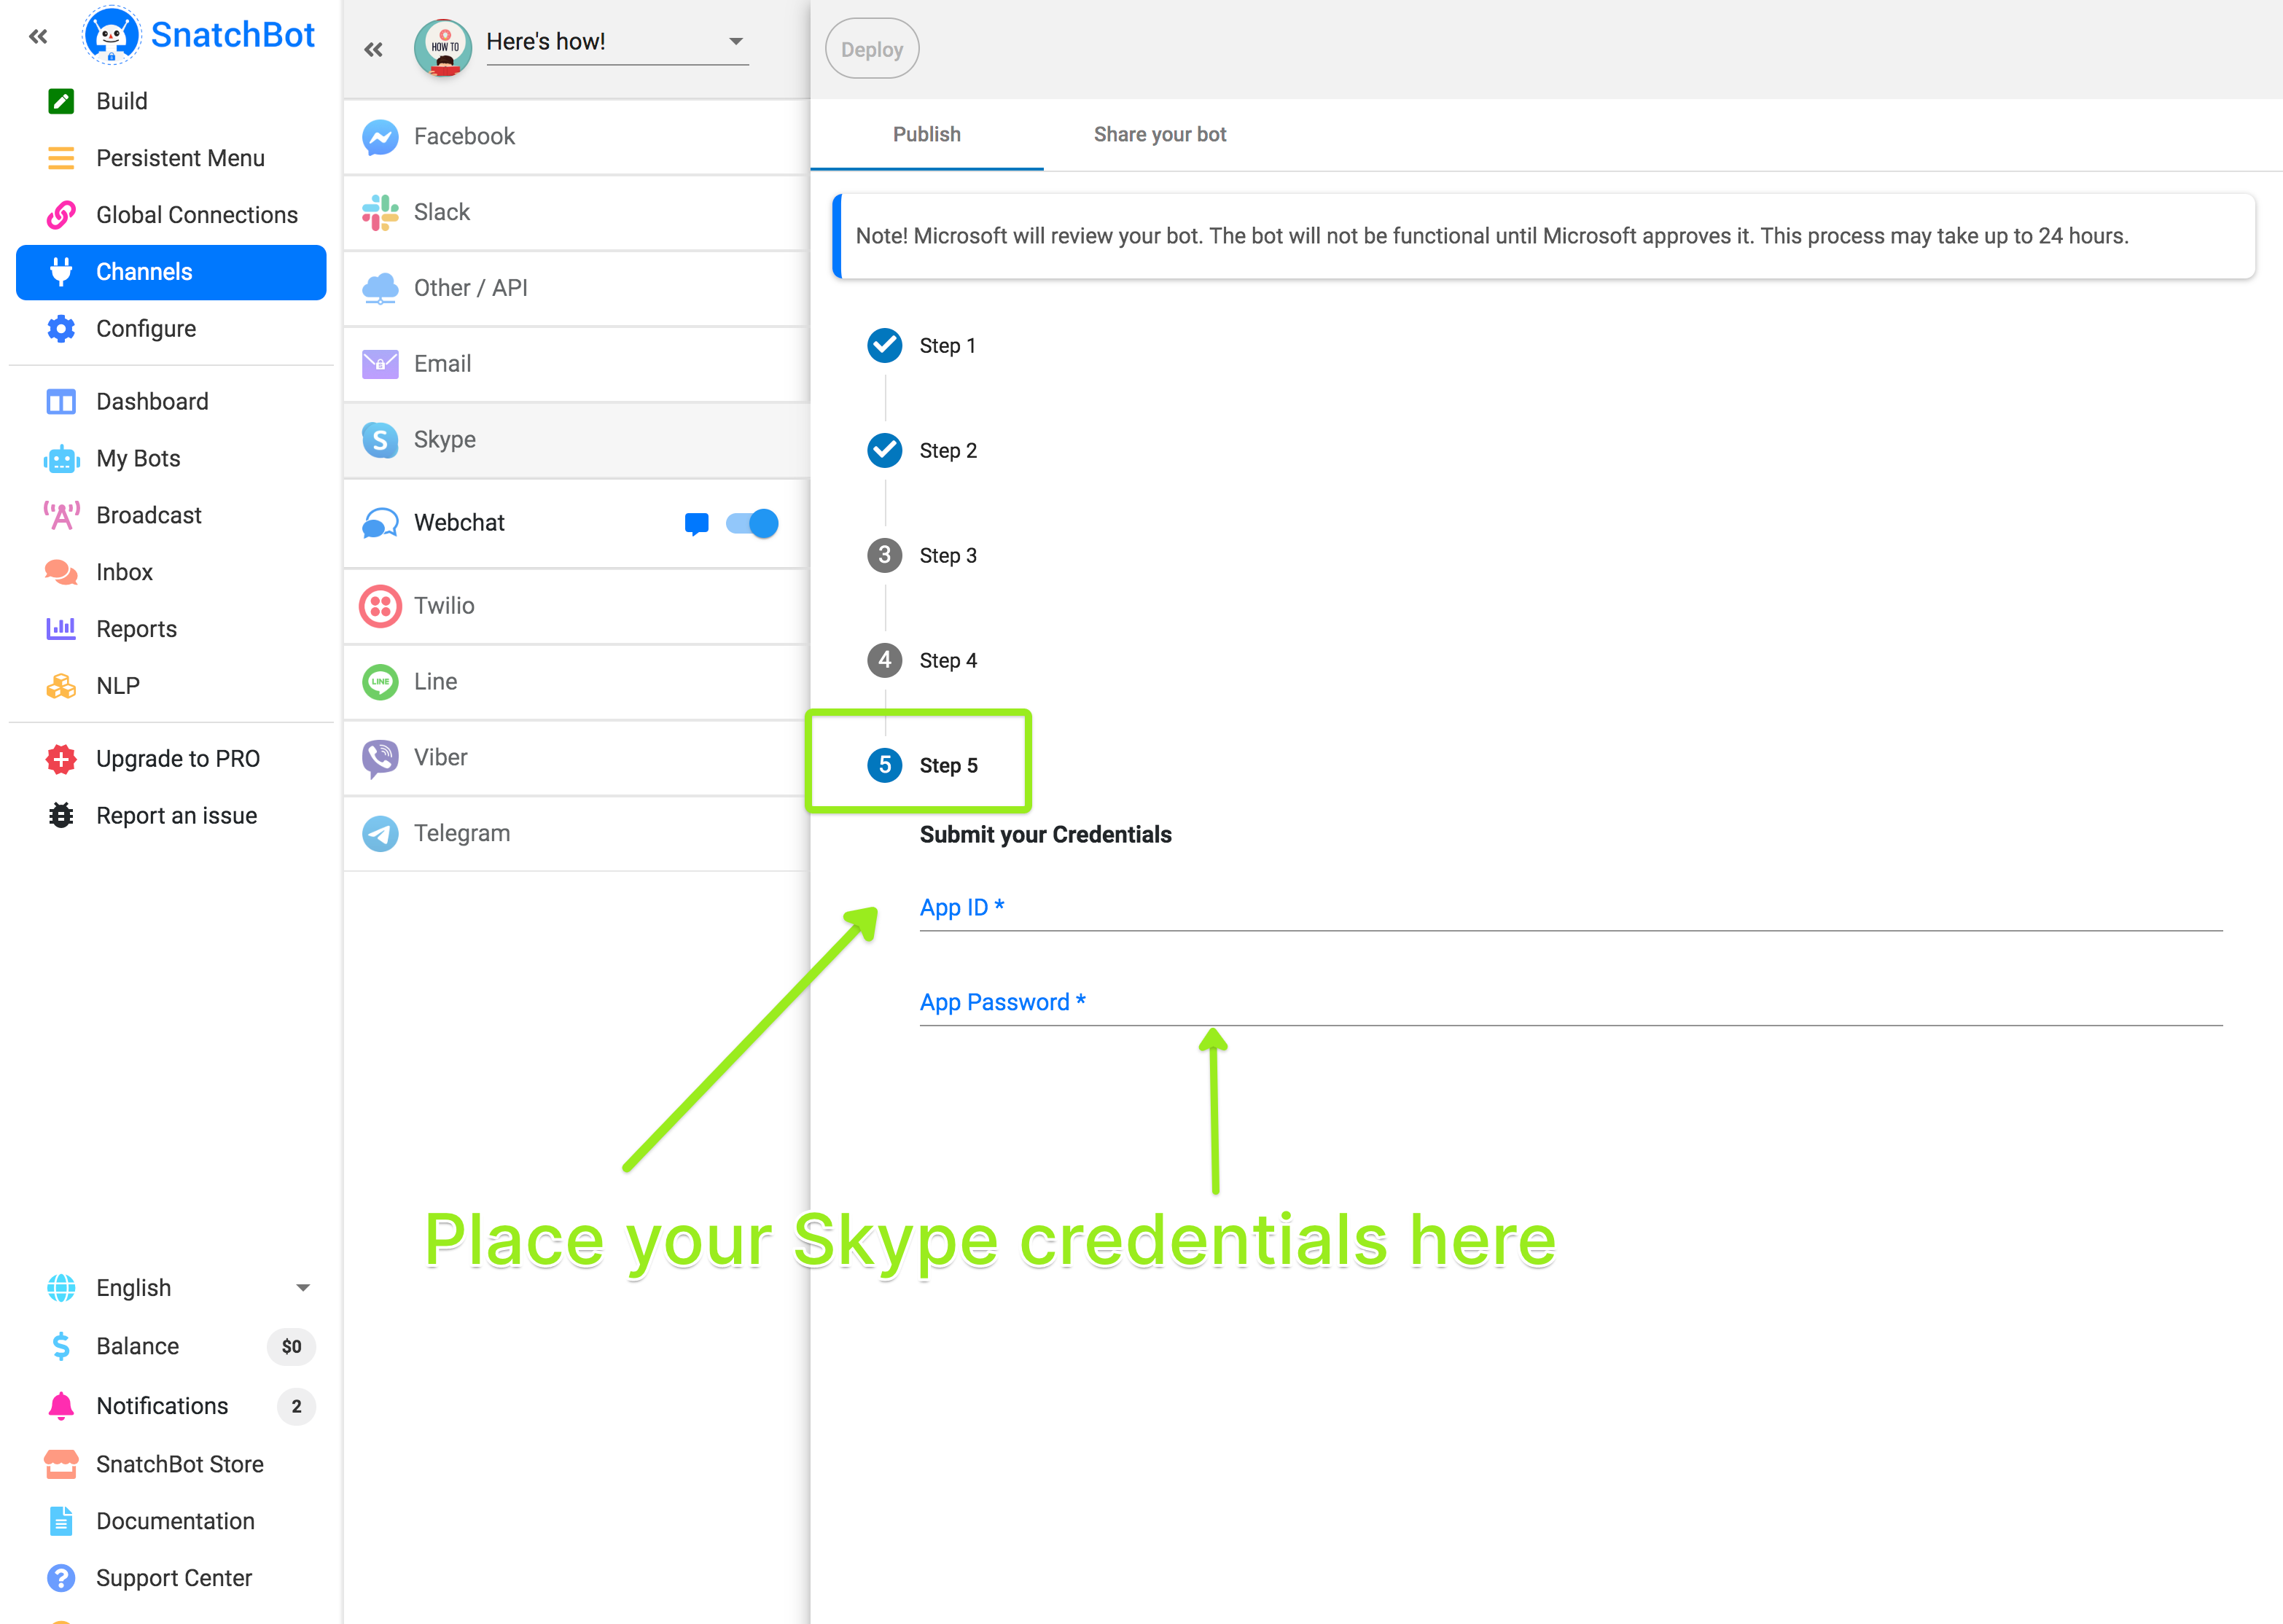
- In Step 5 of adding this channel to the bot, you will be requested to specify an App ID and App Password. To get them, go to Resource groups -> your bot’s name -> Deployments (in the Settings menu) -> your bot’s name -> Inputs -> copy values from “APPID” and “APPSECRET” fields:
- Go back to the Snatchbot’s adding channel form, and in Step 5 paste the copied values in the appropriate fields:
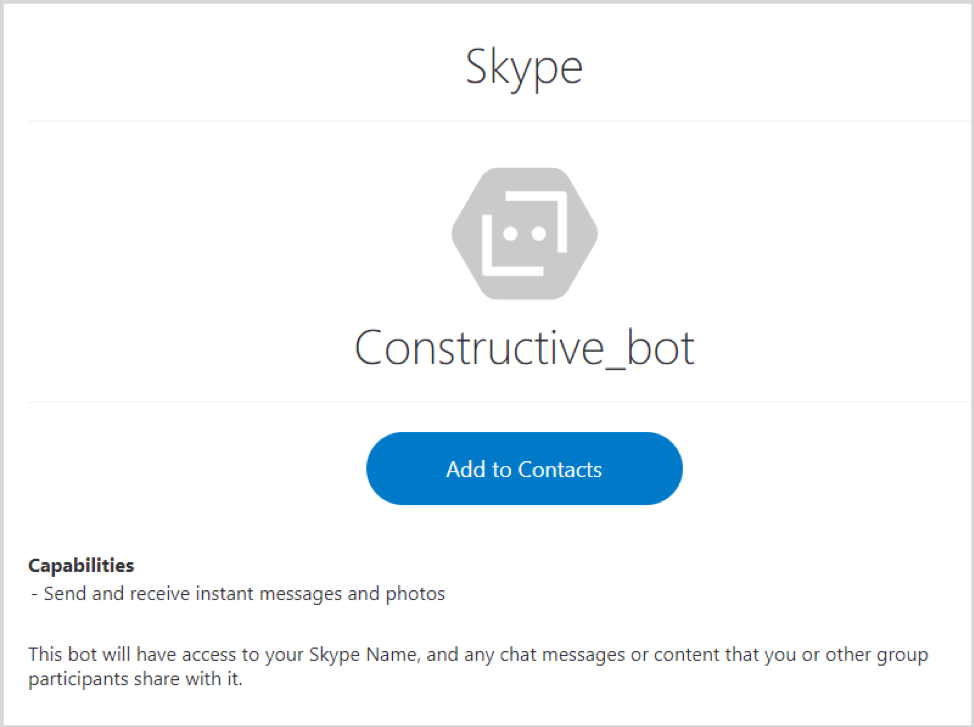
- To add a bot’s Skype contact, click the Add to Skype button next to the channel’s name. On the opened page, click Add to Contacts button and select the Skype you want to add it to:
Note
Microsoft will review your bot. The bot will not be functional until Microsoft approves it. This process may take up to 24 hours.
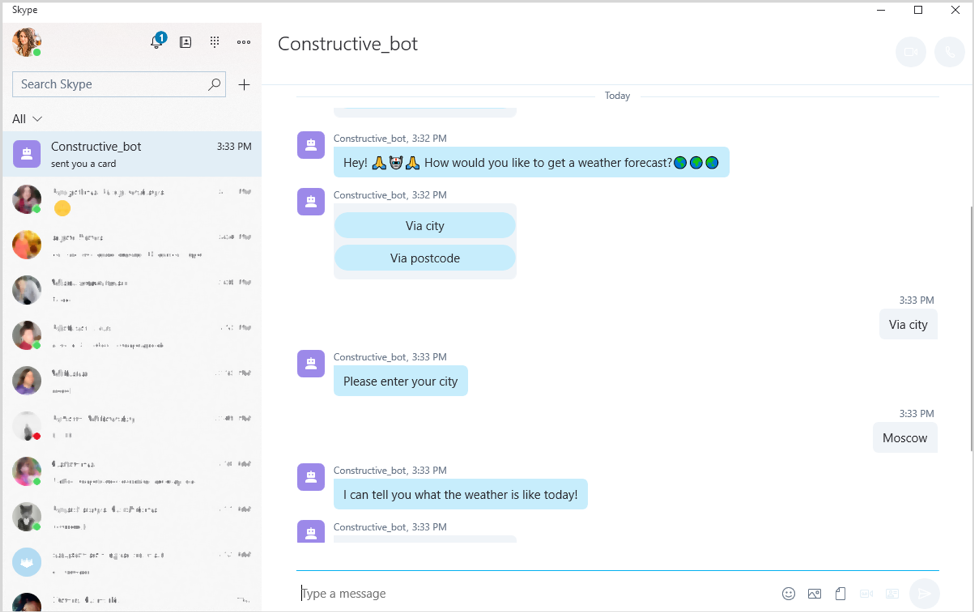
You can now start the conversation with the bot:
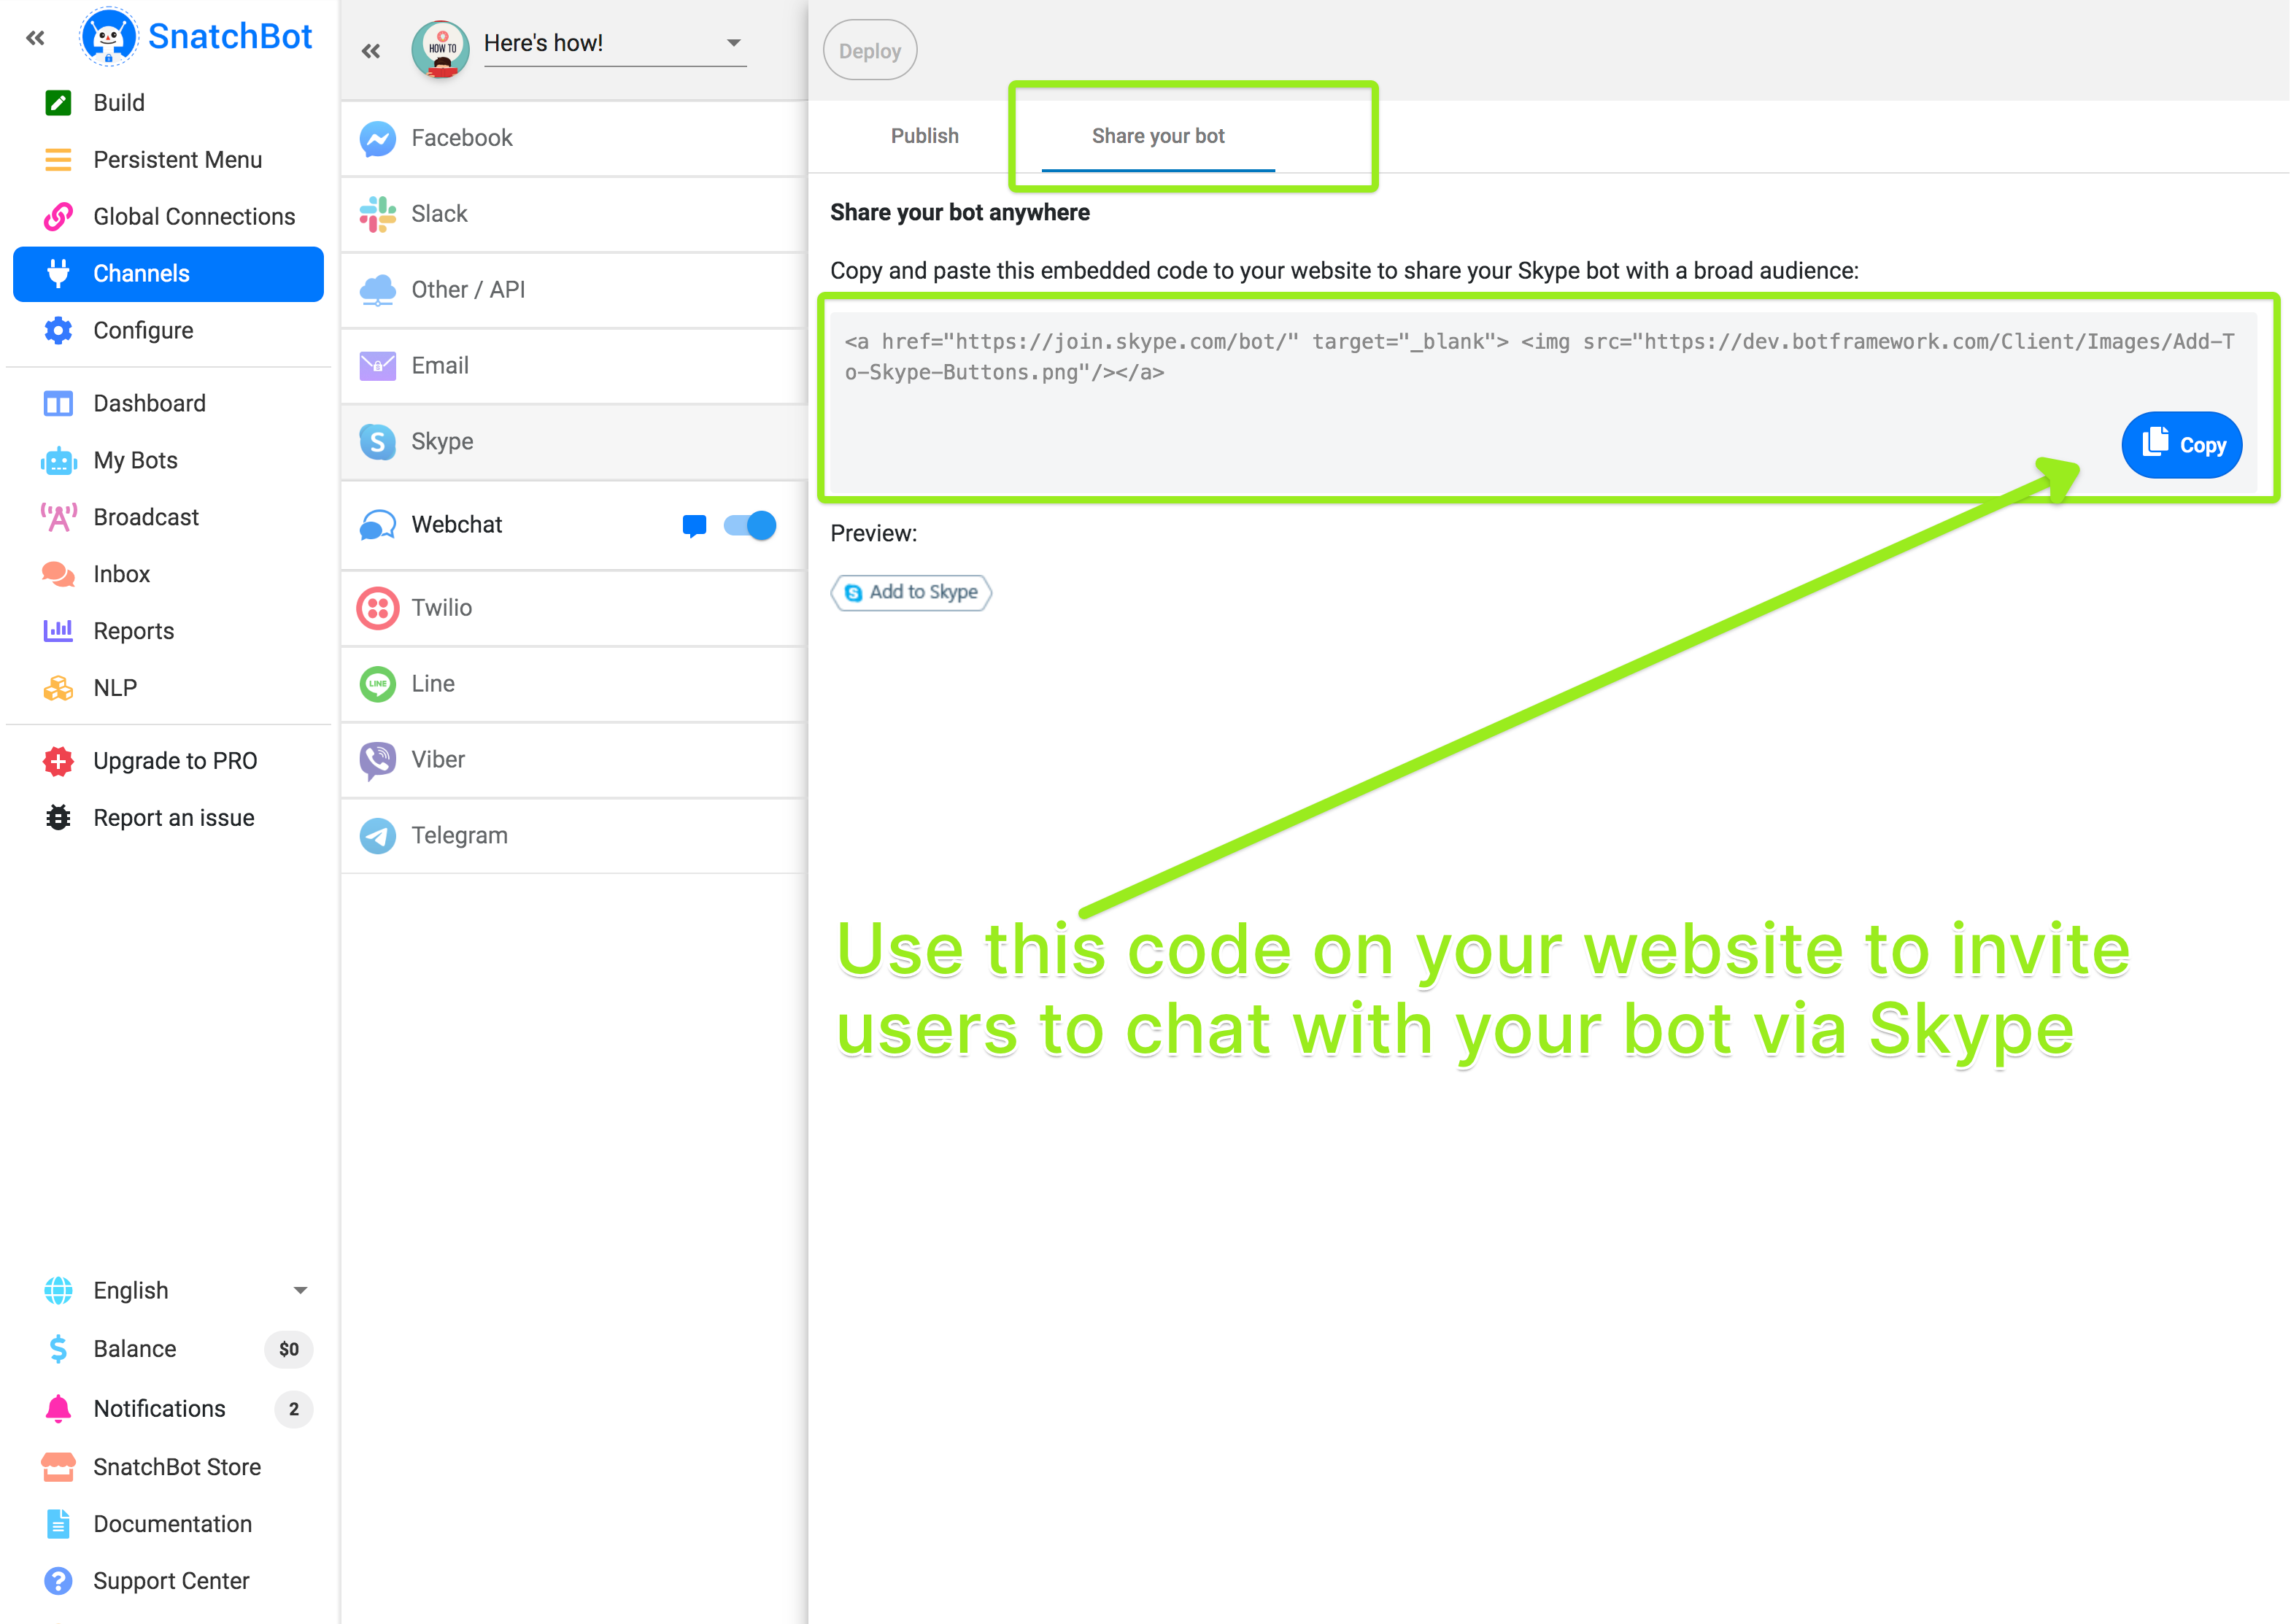
To share an invitation to your Skype bot via your webpage, copy and paste the embedded code in Step 5.
Some restrictions
- Facebook attributes are not available for Skype
- The STT feature is not available for Skype.
- Persistent Menu (ProPlan): the “Disable text input” and “Submenu” features are not available for Skype. The maximum number of Persistent Menu items is six.
The "Powered by Snatchbot" attribution as well as the Message Count feature do not apply to Skype- The following plugins are not available for Skype: Calendar, eBay, Jira, Giphy
- Cards: The “Phone” button is restricted in form: the phone number must not contain spaces.
- Text card: The maximum length of the “Description” field is 180 chars.
- The “Enable "Share" button for each story” feature is not available for Skype.
- Gallery: The display mode (Grouped, In a line) is not supported by Skype. All images will be sent as a separate message. URLs are also not supported.
Skype displays only png, jpg, gif images which are no larger than 1 Mb, 1024x1024 px.
Updated over 3 years ago
